
Ver3.5 웹 블루투스 API브라우저에서 블루투스 기기를 직접 제어한다고?! 🎮
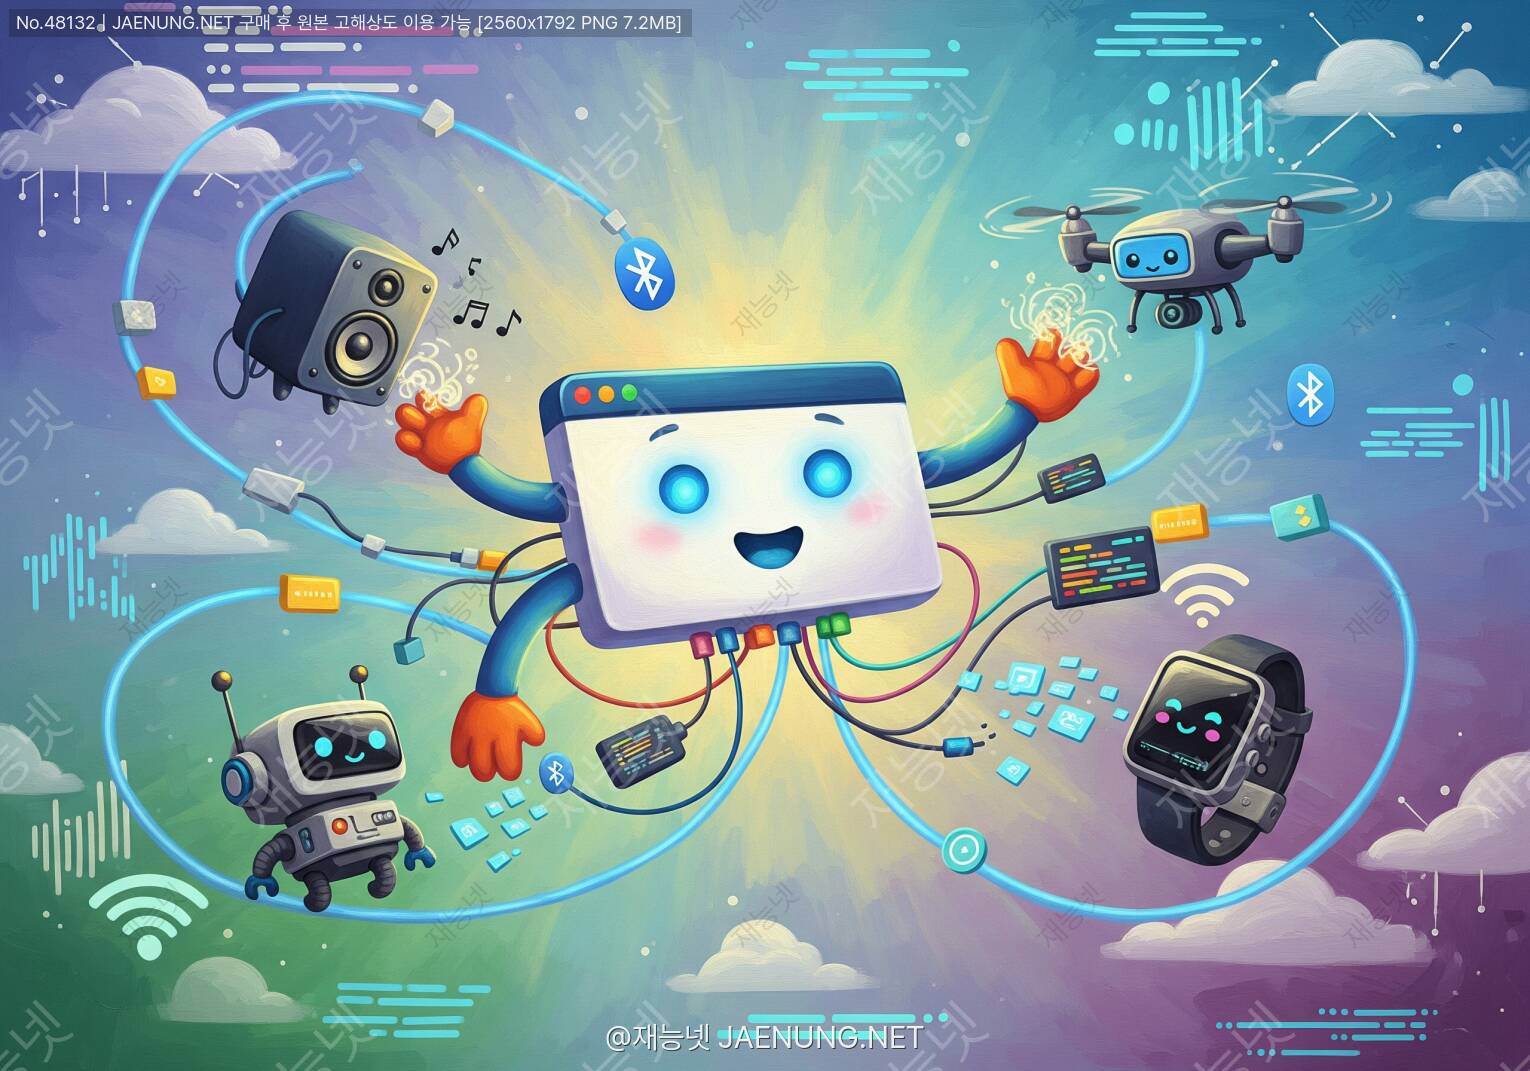
웹 블루투스 API
브라우저에서 블루투스 기기를 직접 제어한다고?! 🎮
케이블도 앱도 필요 없어! 브라우저 하나로 블루투스 세상을 열어보자 🔵✨
야, 솔직히 말해봐. 블루투스 기기 제어하려면 무조건 앱 깔아야 한다고 생각했지? 😏
근데 이제 그 고정관념 완전히 부숴버릴 시간이야.
웹 블루투스 API(Web Bluetooth API)를 사용하면 크롬 브라우저 하나만으로 블루투스 기기를 직접 연결하고 제어할 수 있거든!
스마트 전구 켜고 끄기, 심박수 센서 데이터 읽기, 드론 조종까지... 이 모든 걸 웹페이지에서 할 수 있다는 게 진짜야.
오늘은 이 신기하고 강력한 API를 처음부터 끝까지 파헤쳐볼 거야. 준비됐지? 🚀
🔵 웹 블루투스 API가 뭔데? 기초부터 잡자!
Web Bluetooth API는 W3C에서 표준화 작업 중인 웹 API야.
쉽게 말하면, 자바스크립트 코드로 블루투스 LE(Low Energy) 기기에 직접 연결하고 데이터를 주고받을 수 있게 해주는 브라우저 내장 기능이야.
기존에는 블루투스 기기를 제어하려면 반드시 네이티브 앱(iOS 앱, 안드로이드 앱)을 만들어야 했어.
근데 Web Bluetooth API가 등장하면서 이 패러다임이 완전히 바뀌었지!
클래식 블루투스(Bluetooth Classic)는 지원하지 않아. 이 점 꼭 기억해!
BLE는 IoT 기기, 웨어러블, 센서류에 주로 사용되는 저전력 블루투스 규격이야.
🤔 BLE가 뭔지 잠깐 짚고 가자
BLE(Bluetooth Low Energy)는 블루투스 4.0부터 도입된 저전력 통신 규격이야.
배터리 소모가 극히 적어서 작은 코인 배터리 하나로 수개월~수년을 버티는 기기들이 많아.
스마트워치, 피트니스 트래커, 심박수 센서, 스마트 자물쇠, 비콘(Beacon) 등이 모두 BLE를 사용해.
고속 데이터 전송
오디오 스트리밍
파일 전송
❌ Web Bluetooth 미지원
저전력 소모
센서 데이터 전송
IoT/웨어러블
✅ Web Bluetooth 지원!
🏗️ GATT 프로토콜: 블루투스 통신의 뼈대
Web Bluetooth API를 제대로 이해하려면 GATT(Generic Attribute Profile)를 알아야 해.
GATT는 BLE 기기들이 데이터를 주고받는 방식을 정의한 프로토콜이야.
마치 웹에서 HTTP가 있듯이, BLE에는 GATT가 있는 거지!
GATT 구조를 이해했으면 이제 실제로 어떻게 동작하는지 알아보자.
핵심 개념 세 가지만 기억해!
관련된 기능들의 묶음이야. 예를 들어 "심박수 서비스"는 심박수와 관련된 모든 데이터를 담고 있어.
각 서비스는 고유한 UUID(Universally Unique Identifier)로 식별돼.
서비스 안에 있는 실제 데이터 단위야. 심박수 서비스 안에 "심박수 측정값" 특성이 있는 식이지.
읽기(Read), 쓰기(Write), 알림(Notify) 등의 속성을 가질 수 있어.
특성에 대한 추가 메타데이터야. 보통 특성의 단위나 형식을 설명해줘.
일반적인 웹 블루투스 개발에서는 자주 다루지 않아도 돼.
🌍 브라우저 지원 현황: 어디서 쓸 수 있어?
솔직히 말하면, Web Bluetooth API는 아직 모든 브라우저에서 지원되지 않아.
이게 현재 가장 큰 한계점이기도 해. 하지만 크롬 기반 브라우저에서는 잘 돌아가!
❌ 미지원 브라우저
Firefox Safari (iOS/macOS) IE
localhost는 예외적으로 HTTP에서도 테스트 가능하지만, 실제 배포 시에는 무조건 HTTPS가 필요해.
또한 사용자의 명시적인 제스처(버튼 클릭 등)가 있어야만 기기 검색 다이얼로그가 열려. 자동으로 연결하는 건 불가능해!
Chrome에서
chrome://flags/#enable-experimental-web-platform-features아직 실험적인 기능들도 테스트해볼 수 있어. 개발 중에 유용하게 써봐!
💻 실전 코드: 단계별로 블루투스 기기 연결하기
이제 진짜 재미있는 부분이야! 🎉
실제로 코드를 작성해서 블루투스 기기를 연결하는 과정을 단계별로 살펴보자.
예제로는 가장 흔하게 쓰이는 심박수 센서 연결을 해볼 거야.
📍 Step 1: 기기 검색 및 연결 요청
가장 먼저 해야 할 일은 navigator.bluetooth.requestDevice()를 호출하는 거야.
이 메서드를 호출하면 브라우저가 블루투스 기기 선택 다이얼로그를 띄워줘.
// 블루투스 지원 여부 먼저 확인!
if (!navigator.bluetooth) {
  console.log('이 브라우저는 Web Bluetooth를 지원하지 않아요 😢');
  return;
}

// 기기 검색 요청
async function connectToDevice() {
  try {
    const device = await navigator.bluetooth.requestDevice({
      // 필터 옵션: 어떤 기기를 검색할지 지정
      filters: [
        { services: ['heart_rate'] }  // 심박수 서비스를 가진 기기만 표시
      ],
      // 또는 이름으로 필터링
      // filters: [{ name: '내 기기 이름' }],
      // 또는 이름 접두사로 필터링
      // filters: [{ namePrefix: 'BLE-' }],

      // 추가로 접근할 서비스 목록 (선택사항)
      optionalServices: ['battery_service']
    });

    console.log('선택된 기기:', device.name);
    console.log('기기 ID:', device.id);

    return device;
  } catch (error) {
    console.error('기기 선택 취소 또는 오류:', error);
  }
}filters 없이 acceptAllDevices: true를 사용하면 모든 BLE 기기를 표시할 수 있어.하지만 보안상 이유로
optionalServices에 접근할 서비스를 명시해야 해!{ acceptAllDevices: true, optionalServices: ['heart_rate', 'battery_service'] }📍 Step 2: GATT 서버 연결
기기를 선택했으면 이제 GATT 서버에 연결해야 해.
device.gatt.connect()를 호출하면 돼.
async function connectGATT(device) {
  try {
    // GATT 서버 연결
    const server = await device.gatt.connect();
    console.log('GATT 서버 연결 성공! 🎉');

    // 연결 상태 확인
    console.log('연결됨:', device.gatt.connected); // true

    return server;
  } catch (error) {
    console.error('GATT 연결 실패:', error);
  }
}

// 연결 해제 이벤트 리스너
device.addEventListener('gattserverdisconnected', (event) => {
  console.log('기기 연결이 끊어졌어요:', event.target.name);
  // 여기서 재연결 로직을 구현할 수 있어
});
📍 Step 3: 서비스 및 특성 가져오기
async function getHeartRateCharacteristic(server) {
  try {
    // 심박수 서비스 가져오기
    const service = await server.getPrimaryService('heart_rate');
    console.log('심박수 서비스 획득!');

    // 심박수 측정 특성 가져오기
    const characteristic = await service.getCharacteristic(
      'heart_rate_measurement'
    );
    console.log('심박수 특성 획득!');

    // 특성의 속성 확인
    console.log('읽기 가능:', characteristic.properties.read);
    console.log('알림 가능:', characteristic.properties.notify);
    console.log('쓰기 가능:', characteristic.properties.write);

    return characteristic;
  } catch (error) {
    console.error('서비스/특성 획득 실패:', error);
  }
}
📍 Step 4: 데이터 읽기
async function readHeartRate(characteristic) {
  try {
    // 현재 값 한 번 읽기
    const value = await characteristic.readValue();

    // DataView로 반환됨 - 파싱이 필요해!
    // 심박수 데이터 파싱 (GATT 스펙에 따라)
    const flags = value.getUint8(0);
    const rate16Bits = flags & 0x1;

    let heartRate;
    if (rate16Bits) {
      heartRate = value.getUint16(1, /*littleEndian=*/true);
    } else {
      heartRate = value.getUint8(1);
    }

    console.log('현재 심박수:', heartRate, 'bpm');
    return heartRate;
  } catch (error) {
    console.error('데이터 읽기 실패:', error);
  }
}
📍 Step 5: 실시간 알림 구독 (가장 많이 쓰는 방식!)
심박수처럼 계속 변하는 데이터는 매번 읽는 것보다 알림(Notification)을 구독하는 게 훨씬 효율적이야!
async function subscribeToHeartRate(characteristic) {
  try {
    // 알림 시작
    await characteristic.startNotifications();
    console.log('심박수 알림 구독 시작! 💓');

    // 값이 변경될 때마다 이벤트 발생
    characteristic.addEventListener(
      'characteristicvaluechanged',
      handleHeartRateChange
    );
  } catch (error) {
    console.error('알림 구독 실패:', error);
  }
}

function handleHeartRateChange(event) {
  const value = event.target.value;
  const flags = value.getUint8(0);
  const rate16Bits = flags & 0x1;

  let heartRate;
  if (rate16Bits) {
    heartRate = value.getUint16(1, true);
  } else {
    heartRate = value.getUint8(1);
  }

  console.log('실시간 심박수:', heartRate, 'bpm');
  // UI 업데이트
  document.getElementById('heart-rate').textContent = heartRate;
}

// 알림 구독 해제
async function unsubscribe(characteristic) {
  await characteristic.stopNotifications();
  characteristic.removeEventListener(
    'characteristicvaluechanged',
    handleHeartRateChange
  );
  console.log('알림 구독 해제됨');
}
📍 Step 6: 데이터 쓰기 (기기 제어)
읽기만 하는 게 아니라 기기에 명령을 보낼 수도 있어!
예를 들어 스마트 전구의 색상을 바꾸거나 LED를 켜고 끄는 거지.
async function writeLEDColor(characteristic, r, g, b) {
  try {
    // RGB 값을 ArrayBuffer로 변환
    const data = new Uint8Array([r, g, b]);

    // writeValue: 응답을 기다림 (Write with Response)
    await characteristic.writeValue(data);
    console.log(`LED 색상 변경: RGB(${r}, ${g}, ${b})`);

    // writeValueWithoutResponse: 응답 없이 빠르게 전송
    // await characteristic.writeValueWithoutResponse(data);

    // writeValueWithResponse: 명시적으로 응답 요청
    // await characteristic.writeValueWithResponse(data);
  } catch (error) {
    console.error('쓰기 실패:', error);
  }
}

// 사용 예시
// LED를 빨간색으로 변경
writeLEDColor(ledCharacteristic, 255, 0, 0);

// LED를 파란색으로 변경
writeLEDColor(ledCharacteristic, 0, 0, 255);
🎯 완성된 예제: 심박수 모니터 웹앱
앞에서 배운 내용을 모두 합쳐서 실제로 동작하는 심박수 모니터 웹앱을 만들어보자!
이 코드를 HTTPS 서버에 올리면 바로 사용할 수 있어. 😎
<!DOCTYPE html>
<html lang="ko">
<head>
  <meta charset="UTF-8">
  <title>심박수 모니터</title>
  <style>
    body { font-family: sans-serif; text-align: center; padding: 20px; }
    #heart-rate { font-size: 72px; color: #e74c3c; }
    button { padding: 12px 24px; font-size: 16px; cursor: pointer; }
  </style>
</head>
<body>
  <h1>💓 심박수 모니터</h1>
  <div id="heart-rate">--</div>
  <p>bpm</p>
  <button id="connect-btn">블루투스 기기 연결</button>
  <button id="disconnect-btn" disabled>연결 해제</button>
  <p id="status">연결 대기 중...</p>

  <script>
    let device = null;
    let characteristic = null;

    document.getElementById('connect-btn')
      .addEventListener('click', connect);
    document.getElementById('disconnect-btn')
      .addEventListener('click', disconnect);

    async function connect() {
      try {
        // 1. 기기 선택
        device = await navigator.bluetooth.requestDevice({
          filters: [{ services: ['heart_rate'] }]
        });

        updateStatus('기기 연결 중...');

        // 연결 해제 이벤트
        device.addEventListener('gattserverdisconnected', onDisconnected);

        // 2. GATT 연결
        const server = await device.gatt.connect();

        // 3. 서비스 획득
        const service = await server.getPrimaryService('heart_rate');

        // 4. 특성 획득
        characteristic = await service.getCharacteristic(
          'heart_rate_measurement'
        );

        // 5. 알림 구독
        await characteristic.startNotifications();
        characteristic.addEventListener(
          'characteristicvaluechanged',
          onHeartRateChanged
        );

        updateStatus(`연결됨: ${device.name}`);
        document.getElementById('connect-btn').disabled = true;
        document.getElementById('disconnect-btn').disabled = false;

      } catch (error) {
        updateStatus('오류: ' + error.message);
        console.error(error);
      }
    }

    async function disconnect() {
      if (characteristic) {
        await characteristic.stopNotifications();
        characteristic.removeEventListener(
          'characteristicvaluechanged',
          onHeartRateChanged
        );
      }
      if (device && device.gatt.connected) {
        device.gatt.disconnect();
      }
    }

    function onDisconnected() {
      updateStatus('연결 해제됨');
      document.getElementById('heart-rate').textContent = '--';
      document.getElementById('connect-btn').disabled = false;
      document.getElementById('disconnect-btn').disabled = true;
    }

    function onHeartRateChanged(event) {
      const value = event.target.value;
      const flags = value.getUint8(0);
      const rate16Bits = flags & 0x1;

      let heartRate;
      if (rate16Bits) {
        heartRate = value.getUint16(1, true);
      } else {
        heartRate = value.getUint8(1);
      }

      document.getElementById('heart-rate').textContent = heartRate;
    }

    function updateStatus(msg) {
      document.getElementById('status').textContent = msg;
    }
  </script>
</body>
</html>- 실시간으로 심박수 데이터 수신
- 연결/해제 상태 관리
- 연결 끊김 자동 감지
네이티브 앱 없이 웹페이지 하나로 이 모든 걸 할 수 있다는 게 진짜 신기하지 않아? 😲
🔧 고급 기능: 더 깊이 파고들기
🔄 자동 재연결 구현하기
블루투스 연결은 신호 범위를 벗어나거나 배터리가 부족하면 끊길 수 있어.
실제 서비스에서는 자동 재연결 로직이 필수야!
let reconnectAttempts = 0;
const MAX_RECONNECT_ATTEMPTS = 5;

async function reconnect(device) {
  if (reconnectAttempts >= MAX_RECONNECT_ATTEMPTS) {
    console.log('최대 재연결 시도 횟수 초과');
    return;
  }

  reconnectAttempts++;
  console.log(`재연결 시도 ${reconnectAttempts}/${MAX_RECONNECT_ATTEMPTS}...`);

  // 지수 백오프: 1초, 2초, 4초, 8초, 16초
  const delay = Math.pow(2, reconnectAttempts - 1) * 1000;

  await new Promise(resolve => setTimeout(resolve, delay));

  try {
    const server = await device.gatt.connect();
    reconnectAttempts = 0; // 성공 시 초기화
    console.log('재연결 성공! 🎉');

    // 서비스와 특성 다시 설정
    await setupCharacteristics(server);
  } catch (error) {
    console.error('재연결 실패:', error);
    reconnect(device); // 재귀 호출로 다시 시도
  }
}

// 연결 해제 이벤트에서 재연결 시도
device.addEventListener('gattserverdisconnected', () => {
  console.log('연결 끊김 감지, 재연결 시도...');
  reconnect(device);
});
📦 여러 특성 동시에 다루기
async function getAllCharacteristics(server) {
  // 모든 서비스 가져오기
  const services = await server.getPrimaryServices();

  for (const service of services) {
    console.log('서비스:', service.uuid);

    // 서비스의 모든 특성 가져오기
    const characteristics = await service.getCharacteristics();

    for (const char of characteristics) {
      console.log('  특성:', char.uuid);
      console.log('  속성:', {
        read: char.properties.read,
        write: char.properties.write,
        notify: char.properties.notify,
        indicate: char.properties.indicate,
        writeWithoutResponse: char.properties.writeWithoutResponse
      });
    }
  }
}

// Promise.all로 병렬 처리 (성능 향상!)
async function readMultipleValues(server) {
  const [heartRateService, batteryService] = await Promise.all([
    server.getPrimaryService('heart_rate'),
    server.getPrimaryService('battery_service')
  ]);

  const [heartRateChar, batteryChar] = await Promise.all([
    heartRateService.getCharacteristic('heart_rate_measurement'),
    batteryService.getCharacteristic('battery_level')
  ]);

  const batteryValue = await batteryChar.readValue();
  const batteryLevel = batteryValue.getUint8(0);
  console.log('배터리 잔량:', batteryLevel, '%');
}
🎛️ 커스텀 UUID 사용하기
표준 GATT 서비스가 아닌 제조사 커스텀 기기를 다룰 때는 128비트 UUID를 사용해야 해.
// 커스텀 서비스/특성 UUID (제조사 문서에서 확인)
const CUSTOM_SERVICE_UUID = '12345678-1234-1234-1234-123456789abc';
const CUSTOM_CHAR_UUID = 'abcdef01-1234-1234-1234-123456789abc';

const device = await navigator.bluetooth.requestDevice({
  filters: [{ name: '내 커스텀 기기' }],
  optionalServices: [CUSTOM_SERVICE_UUID]  // 반드시 명시해야 해!
});

const server = await device.gatt.connect();
const service = await server.getPrimaryService(CUSTOM_SERVICE_UUID);
const characteristic = await service.getCharacteristic(CUSTOM_CHAR_UUID);

// 커스텀 명령 전송 (기기 프로토콜에 따라)
const command = new Uint8Array([0x01, 0x02, 0x03]);
await characteristic.writeValue(command);
🔍 기기 캐싱: 이전에 연결한 기기 재사용
매번 기기 선택 다이얼로그를 띄우는 게 불편하다면?
navigator.bluetooth.getDevices()로 이전에 허용한 기기 목록을 가져올 수 있어!
// 이전에 연결 허용한 기기 목록 가져오기
async function getPairedDevices() {
  const devices = await navigator.bluetooth.getDevices();
  console.log('허용된 기기 목록:', devices.map(d => d.name));
  return devices;
}

// 특정 기기에 자동 연결 시도
async function autoConnect() {
  const devices = await navigator.bluetooth.getDevices();

  for (const device of devices) {
    try {
      // watchAdvertisements로 기기 광고 신호 감지
      await device.watchAdvertisements();

      device.addEventListener('advertisementreceived', async (event) => {
        console.log('기기 발견:', event.device.name);
        await event.device.gatt.connect();
        device.unwatchAdvertisements();
      });
    } catch (error) {
      console.error('광고 감시 실패:', error);
    }
  }
}getDevices()와 watchAdvertisements()는 아직 실험적인 기능이야.Chrome 85+ 이상에서 지원하지만, 플래그 활성화가 필요할 수 있어.
프로덕션 사용 전에 브라우저 지원 현황을 꼭 확인해봐!
🛡️ 보안과 권한 관리
Web Bluetooth API는 보안을 정말 중요하게 생각해.
왜냐하면 블루투스 기기에 잘못 접근하면 개인 의료 데이터가 노출되거나 기기가 오작동할 수 있거든.
그래서 여러 겹의 보안 장치가 있어.
필요한 서비스만
filters나 optionalServices에 명시해.모든 서비스에 접근하려고 하면 사용자가 거부할 가능성이 높아.
2. 에러 처리 철저히
사용자가 기기 선택을 취소하거나 권한을 거부할 수 있어.
항상 try-catch로 감싸고 적절한 UI 피드백을 제공해.
3. 연결 상태 명확히 표시
사용자가 현재 어떤 기기에 연결되어 있는지 항상 알 수 있게 해줘.
// 권한 상태 확인 (Permissions API 활용)
async function checkBluetoothPermission() {
  try {
    // 현재 블루투스 권한 상태 확인
    const result = await navigator.permissions.query({
      name: 'bluetooth'
    });

    console.log('블루투스 권한 상태:', result.state);
    // 'granted', 'denied', 'prompt' 중 하나

    result.addEventListener('change', () => {
      console.log('권한 상태 변경:', result.state);
    });

    return result.state;
  } catch (error) {
    // 일부 브라우저에서 미지원
    console.log('권한 API 미지원');
  }
}
🚀 실제 활용 사례들
Web Bluetooth API가 실제로 어떻게 활용되고 있는지 살펴보자.
생각보다 훨씬 다양한 분야에서 쓰이고 있어! 😮
💡 실제 프로젝트 아이디어
웹페이지에서 아두이노를 직접 제어할 수 있어!
LED 켜고 끄기, 서보 모터 제어, 센서 데이터 읽기 등 무궁무진한 프로젝트가 가능해.
웹 기반 DAW(Digital Audio Workstation)와 연결하는 프로젝트도 가능해.
Web MIDI API와 함께 사용하면 더욱 강력한 음악 제작 도구를 만들 수 있어!
하나의 웹 대시보드에서 통합 관리하는 서비스를 만들 수 있어.
재능넷 같은 플랫폼에서 이런 웹 개발 재능을 공유하고 거래하는 것도 좋은 아이디어야! 💪
⚡ 성능 최적화 팁
Web Bluetooth API를 사용할 때 성능을 최적화하는 방법들을 알아보자.
특히 실시간 데이터를 다룰 때 이 팁들이 정말 유용해!
GATT 연결은 비용이 비싸. 한 번 연결하면 가능한 한 유지하고,
페이지를 떠날 때만 명시적으로 해제해.
같은 특성을 반복해서
getCharacteristic()으로 가져오지 말고,처음 가져온 특성 객체를 변수에 저장해서 재사용해.
주기적으로
readValue()를 호출하는 것보다startNotifications()로 알림을 구독하는 게 훨씬 효율적이야.배터리 소모도 줄고 데이터도 더 빠르게 받을 수 있어.
알림 이벤트 핸들러에서 무거운 연산을 하지 마.
requestAnimationFrame()이나 setTimeout()으로 UI 업데이트를 분리해.
// 최적화된 실시간 데이터 처리 예시
let latestHeartRate = null;
let isAnimating = false;

function handleHeartRateChange(event) {
  // 데이터 파싱만 빠르게
  const value = event.target.value;
  latestHeartRate = parseHeartRate(value);

  // UI 업데이트는 requestAnimationFrame으로 분리
  if (!isAnimating) {
    isAnimating = true;
    requestAnimationFrame(updateUI);
  }
}

function updateUI() {
  if (latestHeartRate !== null) {
    document.getElementById('heart-rate').textContent = latestHeartRate;
    latestHeartRate = null;
  }
  isAnimating = false;
}

// 특성 캐싱 패턴
class BluetoothDevice {
  constructor() {
    this.device = null;
    this.server = null;
    this.characteristics = new Map(); // 캐시
  }

  async getCharacteristic(serviceUUID, charUUID) {
    const key = `${serviceUUID}:${charUUID}`;

    // 캐시에 있으면 바로 반환
    if (this.characteristics.has(key)) {
      return this.characteristics.get(key);
    }

    // 없으면 가져와서 캐시에 저장
    const service = await this.server.getPrimaryService(serviceUUID);
    const char = await service.getCharacteristic(charUUID);
    this.characteristics.set(key, char);

    return char;
  }
}
🐛 디버깅 & 트러블슈팅
Web Bluetooth 개발하다 보면 이런저런 오류를 만나게 돼.
자주 만나는 오류들과 해결 방법을 정리해봤어!
→ 블루투스를 켜거나, 블루투스가 있는 기기에서 테스트해봐.
requestDevice()를 호출한 경우야.→ 반드시 버튼 클릭 이벤트 핸들러 안에서 호출해야 해!
→ 기기 문서를 확인하고 올바른 UUID를 사용하고 있는지 체크해봐.
→ 재연결 로직을 구현하고 기기를 가까이 가져가봐.
navigator.bluetooth를 입력하면Web Bluetooth API 객체를 직접 확인할 수 있어.
또한
chrome://bluetooth-internals 페이지에서블루투스 어댑터 상태와 연결된 기기 정보를 자세히 볼 수 있어!
// 디버깅을 위한 유틸리티 함수
async function debugDevice(server) {
  console.group('🔵 블루투스 기기 디버그 정보');

  try {
    const services = await server.getPrimaryServices();
    console.log(`발견된 서비스 수: ${services.length}`);

    for (const service of services) {
      console.group(`📦 서비스: ${service.uuid}`);

      const characteristics = await service.getCharacteristics();
      for (const char of characteristics) {
        const props = char.properties;
        const propList = Object.keys(props)
          .filter(key => props[key])
          .join(', ');
        console.log(`  📊 특성: ${char.uuid} [${propList}]`);

        // 읽기 가능한 특성은 값도 출력
        if (props.read) {
          try {
            const value = await char.readValue();
            const bytes = new Uint8Array(value.buffer);
            console.log(`     값: [${Array.from(bytes).join(', ')}]`);
          } catch (e) {
            console.log(`     값 읽기 실패: ${e.message}`);
          }
        }
      }

      console.groupEnd();
    }
  } catch (error) {
    console.error('디버그 실패:', error);
  }

  console.groupEnd();
}

// 사용법
// debugDevice(server);
📱 모바일에서의 Web Bluetooth
Web Bluetooth API는 데스크톱뿐만 아니라 모바일에서도 동작해!
특히 안드로이드 크롬에서는 꽤 잘 지원돼.
✅ 완전 지원
Chrome 56+ 이상
안드로이드 6.0+ 권장
위치 권한 필요할 수 있음
❌ 미지원
Apple의 정책으로 차단
WKWebView도 미지원
대안: 네이티브 앱 필요
이건 구글의 정책인데, BLE 비콘으로 위치를 추적할 수 있기 때문이야.
사용자에게 위치 권한을 요청하는 UI를 미리 준비해둬!
// 모바일 환경 감지 및 대응
function checkMobileCompatibility() {
  const isAndroid = /Android/i.test(navigator.userAgent);
  const isIOS = /iPhone|iPad|iPod/i.test(navigator.userAgent);
  const isChrome = /Chrome/i.test(navigator.userAgent);

  if (isIOS) {
    showMessage('iOS에서는 Web Bluetooth를 지원하지 않아요 😢\n앱을 사용해주세요.');
    return false;
  }

  if (isAndroid && !isChrome) {
    showMessage('안드로이드에서는 Chrome 브라우저를 사용해주세요!');
    return false;
  }

  if (!navigator.bluetooth) {
    showMessage('이 브라우저는 Web Bluetooth를 지원하지 않아요.');
    return false;
  }

  return true;
}

// 블루투스 가용성 확인 (비동기)
async function checkBluetoothAvailability() {
  const available = await navigator.bluetooth.getAvailability();

  if (!available) {
    showMessage('블루투스를 켜주세요!');
    return false;
  }

  // 블루투스 상태 변화 감지
  navigator.bluetooth.addEventListener('availabilitychanged', (event) => {
    if (event.value) {
      console.log('블루투스 켜짐');
    } else {
      console.log('블루투스 꺼짐');
    }
  });

  return true;
}
🔮 Web Bluetooth의 미래
Web Bluetooth API는 아직 발전 중이야.
현재 W3C에서 표준화 작업이 진행 중이고, 앞으로 더 많은 기능이 추가될 예정이야.
연결 없이도 주변 BLE 기기의 광고 패킷을 스캔할 수 있게 돼.
비콘 기반 위치 서비스나 근접 감지 앱에 유용해.
• getDevices() 안정화
이전에 연결 허용한 기기 목록을 가져오는 기능이 더 안정적으로 지원될 예정이야.
• 더 많은 브라우저 지원
Firefox와 Safari도 언젠가는 지원할 가능성이 있어.
특히 Safari는 WebKit 팀에서 논의 중이라고 해.
• Web Serial API: USB 시리얼 기기 제어
• Web USB API: USB 기기 직접 제어
• Web HID API: 게임패드, 키보드 등 HID 기기
• Web NFC API: NFC 태그 읽기/쓰기
이 API들을 조합하면 진정한 의미의 하드웨어 제어 웹 앱을 만들 수 있어!
재능넷에서도 이런 최신 웹 기술을 활용한 프로젝트 개발 재능을 거래하는 사람들이 늘고 있어.
Web Bluetooth API를 마스터하면 IoT 웹 개발이라는 틈새 시장에서 정말 귀한 재능을 가진 개발자가 될 수 있어! 🌟
📚 전체 API 레퍼런스 요약
마지막으로 Web Bluetooth API의 주요 메서드와 속성을 한눈에 정리해볼게!
device.gatt.connect() GATT 서버 연결
server.getPrimaryService(uuid) 서비스 가져오기
service.getCharacteristic(uuid) 특성 가져오기
char.readValue() 값 읽기 → DataView
char.writeValue(data) 값 쓰기 (ArrayBuffer)
char.startNotifications() 알림 구독 시작
char.stopNotifications() 알림 구독 중지
device.gatt.disconnect() 연결 해제
🎓 마무리: Web Bluetooth로 뭘 만들어볼까?
자, 오늘 Web Bluetooth API에 대해 정말 많은 걸 배웠어! 🎉
처음에는 복잡해 보였지만, 사실 핵심 흐름은 단순해.
기기 선택 → GATT 연결 → 서비스 탐색 → 특성 접근 → 데이터 읽기/쓰기
이 다섯 단계만 기억하면 어떤 BLE 기기든 웹에서 제어할 수 있어!
🏗️ GATT 프로토콜: 서비스 → 특성 → 디스크립터 구조
🌍 Chrome/Edge/Opera에서 지원, HTTPS 필수
💻 requestDevice → gatt.connect → getPrimaryService → getCharacteristic → readValue/writeValue/startNotifications
🛡️ 사용자 제스처 필요, 서비스 필터링으로 보안 강화
⚡ 특성 캐싱, Notification 활용으로 성능 최적화
📱 안드로이드 Chrome 지원, iOS Safari 미지원
2️⃣ 중급: 아두이노 + BLE 모듈로 LED 제어 웹앱
3️⃣ 고급: 여러 BLE 기기를 통합 관리하는 IoT 대시보드
GitHub에
web-bluetooth로 검색하면 다양한 오픈소스 예제들을 찾을 수 있어!
Web Bluetooth API는 웹 개발의 경계를 물리적 세계로 확장시켜주는 정말 흥미로운 기술이야.
IoT, 헬스케어, 스마트홈, 교육 등 다양한 분야에서 활용 가능성이 무궁무진하지.
아직 브라우저 지원이 완전하지 않다는 한계가 있지만,
크롬 기반 브라우저의 점유율을 생각하면 충분히 실용적인 기술이야.
자, 이제 직접 만들어봐! 코드는 짜봐야 실력이 늘거든. 화이팅! 🚀💪

댓글 작성
이 글에 대한 여러분의 생각을 들려주세요
로그인이 필요합니다
댓글을 작성하려면 먼저 로그인해주세요.
댓글 0
지식인의 숲 - 지적 재산권 보호 고지
지적 재산권 보호 고지
- 저작권 및 소유권: 본 컨텐츠는 재능넷의 독점 AI 기술로 생성되었으며, 대한민국 저작권법 및 국제 저작권 협약에 의해 보호됩니다.
- AI 생성 컨텐츠의 법적 지위: 본 AI 생성 컨텐츠는 재능넷의 지적 창작물로 인정되며, 관련 법규에 따라 저작권 보호를 받습니다.
- 사용 제한: 재능넷의 명시적 서면 동의 없이 본 컨텐츠를 복제, 수정, 배포, 또는 상업적으로 활용하는 행위는 엄격히 금지됩니다.
- 데이터 수집 금지: 본 컨텐츠에 대한 무단 스크래핑, 크롤링, 및 자동화된 데이터 수집은 법적 제재의 대상이 됩니다.
- AI 학습 제한: 재능넷의 AI 생성 컨텐츠를 타 AI 모델 학습에 무단 사용하는 행위는 금지되며, 이는 지적 재산권 침해로 간주됩니다.






아직 댓글이 없습니다.