
Ver3.5 자바 GUI와 JavaFX로 만드는 데스크톱 애플리케이션 완전 정복 가이드
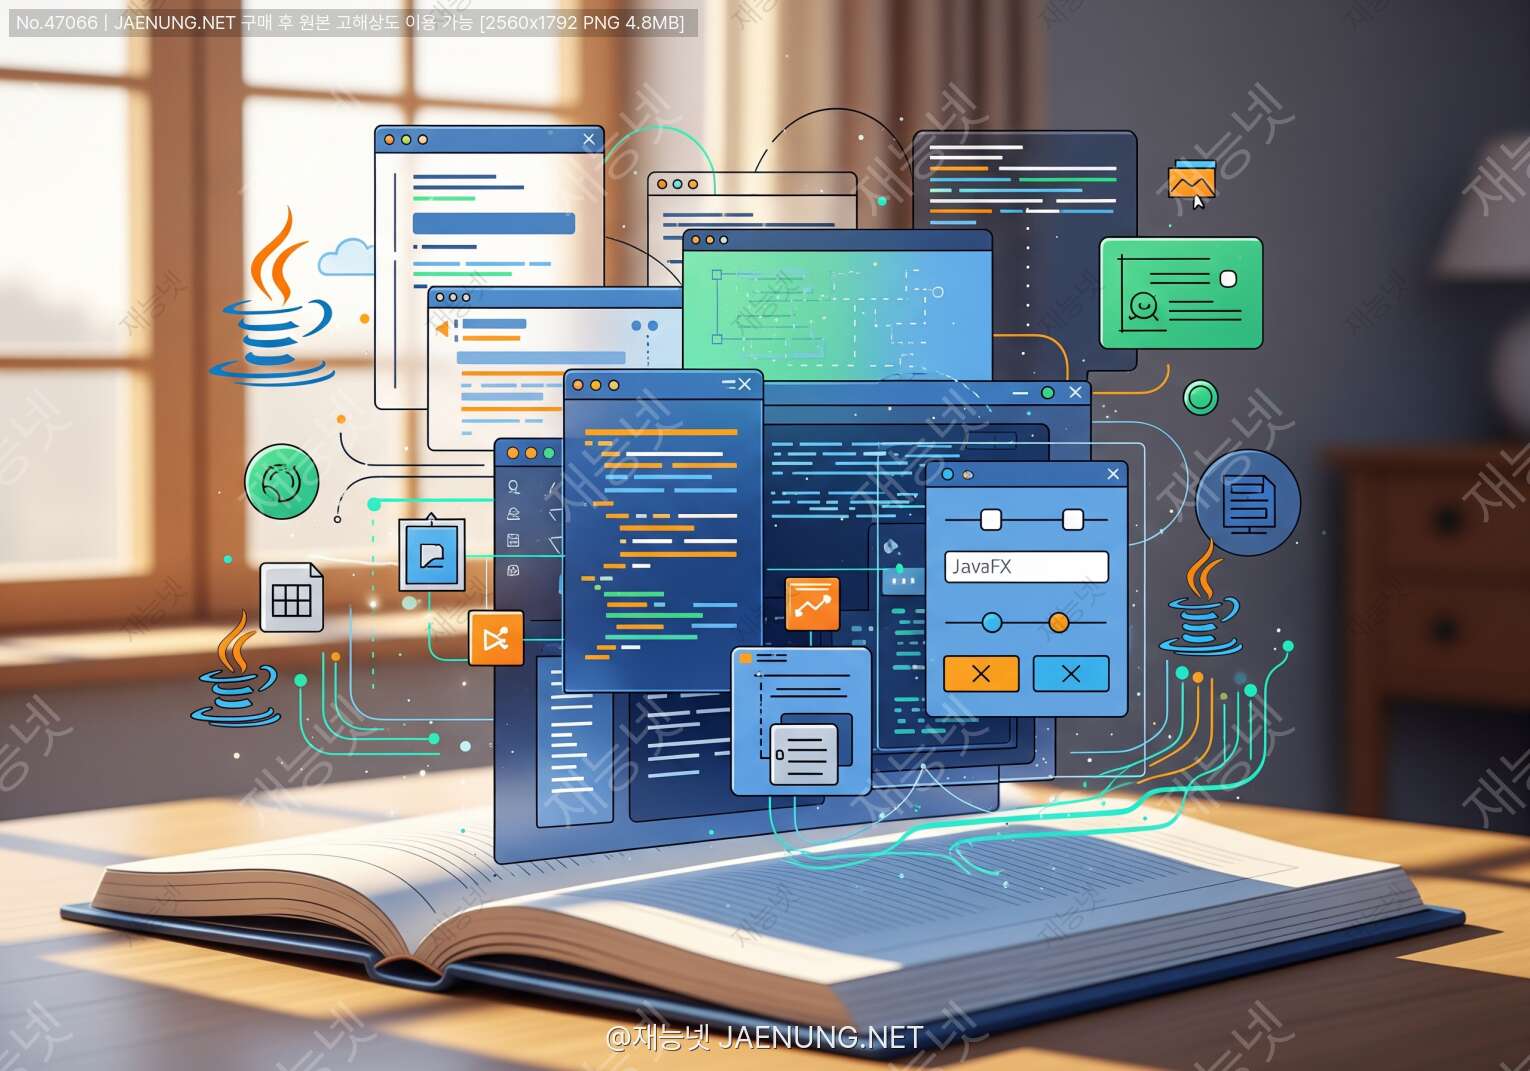
자바 GUI와 JavaFX로 만드는 데스크톱 애플리케이션 완전 정복 가이드
"자바로 데스크톱 앱 만들 수 있어?" 라고 물어보면 대부분 "그거 옛날 기술 아니야?" 하는 반응이 나오는데ㅋㅋㅋ
사실 자바 GUI는 지금도 현역이고, JavaFX는 오히려 요즘 더 핫해지고 있음 🔥
이 글에서 Swing부터 JavaFX까지, 데스크톱 앱 개발의 모든 것을 낱낱이 파헤쳐볼게요!
📜 자바 GUI의 역사 — "이게 다 어디서 왔냐고?"
자바가 처음 세상에 나온 건 1995년인데, 그때부터 이미 GUI 개발 기능을 품고 있었음ㅋㅋ
처음엔 AWT(Abstract Window Toolkit)라는 녀석이 등장했고,
이후 더 강력한 Swing이 나왔고, 그 다음엔 JavaFX가 등장하면서 지금에 이름.
각각의 기술이 왜 나왔는지, 어떤 차이가 있는지 알면 어떤 걸 써야 할지 감이 잡힘! 🎯
AWT — 자바 GUI의 시조새 🦕
AWT는 Java 1.0 시절부터 있던 가장 오래된 GUI 라이브러리야.
특징은 운영체제의 네이티브 컴포넌트를 직접 사용한다는 것.
즉, 윈도우에서 버튼을 만들면 진짜 윈도우 버튼이 나오고, 맥에서 만들면 맥 버튼이 나오는 방식임.
"Write Once, Run Anywhere"라는 자바 철학과 어울리는 것 같지만...
윈도우에서 잘 되던 게 맥에서 안 되는 상황이 자주 발생했고,
컴포넌트 종류도 적어서 복잡한 UI 만들기가 너무 힘들었음.
Swing — 진짜 자바 GUI의 시작 🎨
1997년 Java 1.2와 함께 등장한 Swing은 AWT의 문제를 해결하기 위해 만들어졌어.
가장 큰 차이점은 순수 자바로 컴포넌트를 직접 그린다는 것!
OS 네이티브 컴포넌트에 의존하지 않고, 자바가 직접 픽셀 단위로 그려내기 때문에
어느 플랫폼에서든 동일한 모양을 보장할 수 있게 됐음.
Swing은 Look and Feel(L&F) 개념을 도입해서
Metal, Nimbus, Windows, GTK 등 다양한 테마를 적용할 수 있게 됐고,
지금도 수많은 기업용 애플리케이션에서 현역으로 활약 중임 💪
JavaFX — 현대적 UI의 등장 ✨
JavaFX는 2008년 처음 등장했고, Java 8부터 JDK에 번들로 포함됐어.
(Java 11부터는 다시 분리됐지만 OpenJFX로 계속 발전 중!)
CSS 스타일링, FXML 마크업 언어, 하드웨어 가속 렌더링, 애니메이션 API 등
현대적인 UI 개발에 필요한 모든 것을 갖추고 있음.
웹 개발자들이 자바 데스크톱 개발로 넘어올 때 진입장벽이 낮다는 것도 큰 장점! 🚀
🔧 AWT 기초 — "옛날 기술이지만 알아두면 쓸모 있음"
AWT를 직접 쓸 일은 많지 않지만, Swing이 AWT를 기반으로 만들어졌기 때문에
AWT의 기본 개념을 이해하는 건 중요해. 특히 이벤트 처리 모델은 지금도 그대로 쓰임!
AWT 핵심 클래스 구조
AWT의 모든 컴포넌트는 java.awt.Component 클래스를 상속받아.
컴포넌트들을 담는 컨테이너는 java.awt.Container를 상속받고,
최상위 윈도우는 java.awt.Frame을 사용함.
import java.awt.*;
import java.awt.event.*;

public class BasicAWTExample {
    public static void main(String[] args) {
        // Frame 생성 (최상위 윈도우)
        Frame frame = new Frame("AWT 기본 예제");
        frame.setSize(400, 300);
        frame.setLayout(new FlowLayout());

        // 컴포넌트 추가
        Label label = new Label("안녕하세요!");
        Button button = new Button("클릭하세요");
        TextField textField = new TextField(20);

        // 버튼 이벤트 처리
        button.addActionListener(new ActionListener() {
            @Override
            public void actionPerformed(ActionEvent e) {
                label.setText("버튼이 클릭됐어요! 👋");
            }
        });

        frame.add(label);
        frame.add(textField);
        frame.add(button);

        // 윈도우 닫기 처리
        frame.addWindowListener(new WindowAdapter() {
            @Override
            public void windowClosing(WindowEvent e) {
                System.exit(0);
            }
        });

        frame.setVisible(true);
    }
}
AWT 레이아웃 매니저
AWT에서 컴포넌트 배치는 레이아웃 매니저가 담당해.
절대 좌표로 배치하는 것보다 레이아웃 매니저를 쓰면 화면 크기가 바뀌어도 자동으로 조정됨!
BorderLayout 화면을 North/South/East/West/Center 5구역으로 분할
GridLayout 격자 형태로 동일한 크기의 셀에 배치
GridBagLayout 가장 유연하지만 복잡한 레이아웃. 셀 병합, 크기 조절 가능
CardLayout 여러 패널을 카드처럼 겹쳐서 하나씩 보여주는 방식
🎯 Swing 완전 정복 — "아직도 현역인 이유가 있음"
Swing은 자바 GUI 개발의 핵심이야. 지금도 IntelliJ IDEA, Eclipse 같은 대형 IDE들이
Swing 기반으로 만들어져 있다는 사실 알고 있었음?ㅋㅋ
그만큼 성숙하고 안정적인 기술이라는 증거지! 💼
Swing의 핵심 — JFrame과 컴포넌트 계층구조
Swing 컴포넌트는 모두 J로 시작해. JFrame, JPanel, JButton, JLabel...
AWT 컴포넌트에 J를 붙인 버전이라고 생각하면 쉬움!
모든 Swing 컴포넌트는 javax.swing.JComponent를 상속받아.
import javax.swing.*;
import java.awt.*;
import java.awt.event.*;

public class SwingBasicExample extends JFrame {

    private JLabel statusLabel;
    private JTextField inputField;
    private JButton submitButton;

    public SwingBasicExample() {
        setTitle("Swing 기본 예제");
        setDefaultCloseOperation(JFrame.EXIT_ON_CLOSE);
        setSize(450, 300);
        setLocationRelativeTo(null); // 화면 중앙에 배치

        initComponents();
        setVisible(true);
    }

    private void initComponents() {
        // 메인 패널 설정
        JPanel mainPanel = new JPanel(new BorderLayout(10, 10));
        mainPanel.setBorder(BorderFactory.createEmptyBorder(20, 20, 20, 20));

        // 상단 레이블
        JLabel titleLabel = new JLabel("이름을 입력하세요", JLabel.CENTER);
        titleLabel.setFont(new Font("맑은 고딕", Font.BOLD, 18));

        // 중앙 입력 패널
        JPanel inputPanel = new JPanel(new FlowLayout());
        inputField = new JTextField(20);
        submitButton = new JButton("확인");
        inputPanel.add(inputField);
        inputPanel.add(submitButton);

        // 하단 상태 레이블
        statusLabel = new JLabel("결과가 여기 표시됩니다", JLabel.CENTER);
        statusLabel.setForeground(Color.GRAY);

        // 이벤트 처리 (람다식 사용!)
        submitButton.addActionListener(e -> {
            String name = inputField.getText().trim();
            if (!name.isEmpty()) {
                statusLabel.setText("안녕하세요, " + name + "님! 👋");
                statusLabel.setForeground(new Color(70, 130, 180));
            } else {
                statusLabel.setText("이름을 입력해주세요!");
                statusLabel.setForeground(Color.RED);
            }
        });

        mainPanel.add(titleLabel, BorderLayout.NORTH);
        mainPanel.add(inputPanel, BorderLayout.CENTER);
        mainPanel.add(statusLabel, BorderLayout.SOUTH);

        add(mainPanel);
    }

    public static void main(String[] args) {
        // EDT(Event Dispatch Thread)에서 실행 - 중요!
        SwingUtilities.invokeLater(() -> new SwingBasicExample());
    }
}그래서
SwingUtilities.invokeLater()를 사용하는 거야.이걸 무시하면 멀티스레드 환경에서 UI가 이상하게 동작하거나 예외가 발생할 수 있음!
Swing 주요 컴포넌트 총정리 📦
JTextArea 여러 줄 텍스트 입력
JPasswordField 비밀번호 입력
JSpinner 숫자/날짜 스피너
JSlider 슬라이더 입력
JComboBox 드롭다운 선택
JRadioButton 라디오 버튼
JList 목록 선택
JTable 테이블 데이터
JTree 트리 구조
JTabbedPane 탭 패널
JTable — 데이터를 표로 보여주는 핵심 컴포넌트
기업용 앱에서 가장 많이 쓰이는 컴포넌트가 바로 JTable이야.
MVC 패턴을 기반으로 설계되어 있어서 데이터와 뷰를 분리할 수 있음!
import javax.swing.*;
import javax.swing.table.*;
import java.awt.*;

public class JTableExample extends JFrame {

    public JTableExample() {
        setTitle("JTable 예제");
        setSize(600, 400);
        setDefaultCloseOperation(EXIT_ON_CLOSE);
        setLocationRelativeTo(null);

        // 컬럼 헤더 정의
        String[] columns = {"이름", "나이", "직업", "연봉(만원)"};

        // 데이터 정의
        Object[][] data = {
            {"김자바", 28, "백엔드 개발자", 4500},
            {"이스윙", 32, "풀스택 개발자", 5200},
            {"박FX", 25, "UI/UX 개발자", 3800},
            {"최코딩", 35, "시니어 개발자", 6800},
            {"정데스크", 29, "데스크톱 개발자", 4200}
        };

        // DefaultTableModel 사용
        DefaultTableModel model = new DefaultTableModel(data, columns) {
            @Override
            public boolean isCellEditable(int row, int column) {
                return column != 0; // 이름 컬럼은 수정 불가
            }
        };

        JTable table = new JTable(model);
        table.setRowHeight(30);
        table.setFont(new Font("맑은 고딕", Font.PLAIN, 13));
        table.getTableHeader().setFont(new Font("맑은 고딕", Font.BOLD, 13));

        // 연봉 컬럼 오른쪽 정렬
        DefaultTableCellRenderer rightRenderer = new DefaultTableCellRenderer();
        rightRenderer.setHorizontalAlignment(JLabel.RIGHT);
        table.getColumnModel().getColumn(3).setCellRenderer(rightRenderer);

        // 스크롤 패널에 추가 (JTable은 항상 JScrollPane에 넣어야 함!)
        JScrollPane scrollPane = new JScrollPane(table);
        add(scrollPane);

        setVisible(true);
    }

    public static void main(String[] args) {
        SwingUtilities.invokeLater(() -> new JTableExample());
    }
}
Swing 이벤트 처리 완전 이해 🎮
Swing의 이벤트 처리는 옵저버 패턴을 기반으로 해.
이벤트 소스(버튼 등)에 리스너를 등록하면, 이벤트 발생 시 리스너가 호출되는 구조야.
// 다양한 이벤트 처리 방법들

// 1. 익명 클래스 방식 (전통적인 방법)
button.addActionListener(new ActionListener() {
    @Override
    public void actionPerformed(ActionEvent e) {
        System.out.println("버튼 클릭!");
    }
});

// 2. 람다식 방식 (Java 8+, 가장 깔끔함!)
button.addActionListener(e -> System.out.println("버튼 클릭!"));

// 3. 마우스 이벤트 처리
panel.addMouseListener(new MouseAdapter() {
    @Override
    public void mouseClicked(MouseEvent e) {
        System.out.println("클릭 위치: " + e.getX() + ", " + e.getY());
    }

    @Override
    public void mouseEntered(MouseEvent e) {
        panel.setBackground(Color.LIGHT_GRAY); // 마우스 오버 효과
    }

    @Override
    public void mouseExited(MouseEvent e) {
        panel.setBackground(Color.WHITE);
    }
});

// 4. 키보드 이벤트 처리
textField.addKeyListener(new KeyAdapter() {
    @Override
    public void keyPressed(KeyEvent e) {
        if (e.getKeyCode() == KeyEvent.VK_ENTER) {
            // 엔터 키 눌렸을 때 처리
            processInput();
        }
    }
});

// 5. 컴포넌트 크기 변경 이벤트
frame.addComponentListener(new ComponentAdapter() {
    @Override
    public void componentResized(ComponentEvent e) {
        System.out.println("창 크기: " + frame.getSize());
    }
});
Swing에서 커스텀 컴포넌트 만들기 🎨
기본 컴포넌트로 부족할 때는 직접 그릴 수 있어!
JPanel을 상속받고 paintComponent() 메서드를 오버라이드하면 됨.
import javax.swing.*;
import java.awt.*;
import java.awt.geom.*;

// 커스텀 원형 진행 표시 컴포넌트
public class CircularProgressBar extends JPanel {

    private int progress = 0; // 0 ~ 100
    private Color progressColor = new Color(91, 155, 213);
    private Color bgColor = new Color(230, 240, 248);

    public CircularProgressBar() {
        setPreferredSize(new Dimension(150, 150));
        setOpaque(false);
    }

    public void setProgress(int progress) {
        this.progress = Math.max(0, Math.min(100, progress));
        repaint(); // 다시 그리기 요청
    }

    @Override
    protected void paintComponent(Graphics g) {
        super.paintComponent(g);
        Graphics2D g2d = (Graphics2D) g.create();

        // 안티앨리어싱 설정 (부드러운 곡선)
        g2d.setRenderingHint(RenderingHints.KEY_ANTIALIASING,
                             RenderingHints.VALUE_ANTIALIAS_ON);

        int size = Math.min(getWidth(), getHeight()) - 20;
        int x = (getWidth() - size) / 2;
        int y = (getHeight() - size) / 2;

        // 배경 원 그리기
        g2d.setColor(bgColor);
        g2d.setStroke(new BasicStroke(12, BasicStroke.CAP_ROUND, BasicStroke.JOIN_ROUND));
        g2d.drawOval(x, y, size, size);

        // 진행 호 그리기
        g2d.setColor(progressColor);
        int angle = (int) (360.0 * progress / 100);
        g2d.drawArc(x, y, size, size, 90, -angle);

        // 텍스트 그리기
        g2d.setColor(new Color(44, 74, 110));
        g2d.setFont(new Font("맑은 고딕", Font.BOLD, 22));
        FontMetrics fm = g2d.getFontMetrics();
        String text = progress + "%";
        int textX = (getWidth() - fm.stringWidth(text)) / 2;
        int textY = (getHeight() + fm.getAscent()) / 2 - 4;
        g2d.drawString(text, textX, textY);

        g2d.dispose();
    }
}🚀 JavaFX 완전 정복 — "이게 진짜 모던 자바 UI야"
JavaFX는 자바 데스크톱 개발의 미래야. CSS 스타일링, FXML, 바인딩, 애니메이션...
웹 개발에서 쓰던 개념들이 그대로 들어와 있어서 웹 개발자들도 금방 적응할 수 있음ㅋㅋ
지금부터 JavaFX의 핵심을 하나씩 파헤쳐보자! 🔍
JavaFX 설치 및 프로젝트 설정
Java 11 이후로 JavaFX는 JDK에서 분리됐어.
OpenJFX(https://openjfx.io)에서 다운받거나, Maven/Gradle로 의존성 추가하면 됨!
<!-- Maven pom.xml에 추가 -->
<dependency>
    <groupId>org.openjfx</groupId>
    <artifactId>javafx-controls</artifactId>
    <version>21.0.1</version>
</dependency>
<dependency>
    <groupId>org.openjfx</groupId>
    <artifactId>javafx-fxml</artifactId>
    <version>21.0.1</version>
</dependency>

// Gradle build.gradle에 추가
plugins {
    id 'org.openjfx.javafxplugin' version '0.1.0'
}

javafx {
    version = "21.0.1"
    modules = ['javafx.controls', 'javafx.fxml']
}
JavaFX 기본 구조 — Stage, Scene, Node
JavaFX는 극장 비유로 이해하면 쉬워!
Stage(무대) → Scene(장면) → Node(배우/소품) 계층 구조로 이루어져 있음.
import javafx.application.Application;
import javafx.scene.*;
import javafx.scene.control.*;
import javafx.scene.layout.*;
import javafx.stage.Stage;
import javafx.geometry.Insets;
import javafx.geometry.Pos;

public class JavaFXBasicExample extends Application {

    @Override
    public void start(Stage primaryStage) {
        // Stage = 윈도우 (극장의 무대)
        primaryStage.setTitle("JavaFX 기본 예제");

        // 레이아웃 컨테이너
        VBox root = new VBox(15); // 수직 배치, 간격 15px
        root.setPadding(new Insets(20));
        root.setAlignment(Pos.CENTER);

        // 컴포넌트 생성
        Label titleLabel = new Label("JavaFX에 오신 것을 환영합니다! 🎉");
        titleLabel.setStyle("-fx-font-size: 18px; -fx-font-weight: bold; -fx-text-fill: #2c4a6e;");

        TextField nameField = new TextField();
        nameField.setPromptText("이름을 입력하세요...");
        nameField.setMaxWidth(250);

        Button greetButton = new Button("인사하기");
        greetButton.setStyle("-fx-background-color: #5b9bd5; -fx-text-fill: white; " +
                            "-fx-padding: 8 20; -fx-border-radius: 6; -fx-background-radius: 6;");

        Label resultLabel = new Label("");
        resultLabel.setStyle("-fx-text-fill: #4a6fa5; -fx-font-size: 14px;");

        // 이벤트 처리
        greetButton.setOnAction(e -> {
            String name = nameField.getText().trim();
            if (!name.isEmpty()) {
                resultLabel.setText("안녕하세요, " + name + "님! 반갑습니다 😊");
            } else {
                resultLabel.setText("이름을 입력해주세요!");
            }
        });

        // 엔터 키 처리
        nameField.setOnAction(e -> greetButton.fire());

        root.getChildren().addAll(titleLabel, nameField, greetButton, resultLabel);

        // Scene = 장면 (Stage에 올라가는 내용)
        Scene scene = new Scene(root, 450, 300);

        primaryStage.setScene(scene);
        primaryStage.show();
    }

    public static void main(String[] args) {
        launch(args); // JavaFX 앱 실행
    }
}
JavaFX 레이아웃 컨테이너 🏗️
VBox 자식 노드를 수직으로 배치
BorderPane Top/Bottom/Left/Right/Center 5영역 배치
GridPane 격자 형태 배치, 셀 병합 가능
StackPane 자식 노드를 겹쳐서 배치 (z-index 효과)
FlowPane 흘러가듯 배치, 공간 부족 시 자동 줄바꿈
TilePane 동일한 크기의 타일 형태로 배치
AnchorPane 절대 좌표 또는 앵커 기반 배치
JavaFX CSS 스타일링 — 웹처럼 꾸미기 💅
JavaFX의 가장 큰 장점 중 하나가 CSS 스타일링이야!
웹 CSS와 거의 비슷한 문법을 사용하는데, 자바FX 전용 속성은 -fx- 접두사를 붙임.
/* styles.css 파일 */

/* 루트 컨테이너 */
.root {
    -fx-background-color: #f4f8fc;
    -fx-font-family: "맑은 고딕", "Malgun Gothic", sans-serif;
}

/* 커스텀 버튼 스타일 */
.primary-button {
    -fx-background-color: #5b9bd5;
    -fx-text-fill: white;
    -fx-font-size: 14px;
    -fx-font-weight: bold;
    -fx-padding: 10 24;
    -fx-background-radius: 8;
    -fx-cursor: hand;
}

.primary-button:hover {
    -fx-background-color: #4a8ac4;
    -fx-effect: dropshadow(gaussian, rgba(91,155,213,0.4), 8, 0, 0, 2);
}

.primary-button:pressed {
    -fx-background-color: #3a7abf;
    -fx-scale-x: 0.97;
    -fx-scale-y: 0.97;
}

/* 카드 스타일 */
.card {
    -fx-background-color: white;
    -fx-background-radius: 12;
    -fx-effect: dropshadow(gaussian, rgba(0,0,0,0.1), 10, 0, 0, 3);
    -fx-padding: 20;
}

/* 입력 필드 */
.custom-field {
    -fx-background-color: #f4f8fc;
    -fx-border-color: #c8ddf0;
    -fx-border-radius: 6;
    -fx-background-radius: 6;
    -fx-padding: 8 12;
    -fx-font-size: 13px;
}

.custom-field:focused {
    -fx-border-color: #5b9bd5;
    -fx-border-width: 2;
}
// Java 코드에서 CSS 적용하기
Scene scene = new Scene(root, 600, 400);
// 외부 CSS 파일 적용
scene.getStylesheets().add(getClass().getResource("/styles.css").toExternalForm());
// 특정 노드에 스타일 클래스 추가
button.getStyleClass().add("primary-button");
cardPane.getStyleClass().add("card");
textField.getStyleClass().add("custom-field");FXML — UI와 로직을 분리하는 마법 ✨
FXML은 XML 기반의 마크업 언어로, UI 구조를 코드 대신 파일로 정의할 수 있어.
HTML처럼 생겼는데, Scene Builder라는 드래그앤드롭 도구로 시각적으로 만들 수 있음!
MVC 패턴에서 View 역할을 FXML이 담당하고, Controller 클래스가 로직을 처리함.
<?xml version="1.0" encoding="UTF-8"?>
<?import javafx.scene.layout.*?>
<?import javafx.scene.control.*?>
<?import javafx.geometry.*?>

<!-- main.fxml -->
<VBox xmlns:fx="http://javafx.com/fxml"
      fx:controller="com.example.MainController"
      spacing="15" alignment="CENTER"
      style="-fx-padding: 20; -fx-background-color: #f4f8fc;">

    <Label text="회원 정보 입력"
           style="-fx-font-size: 20px; -fx-font-weight: bold; -fx-text-fill: #2c4a6e;"/>

    <GridPane hgap="10" vgap="10" alignment="CENTER">
        <Label text="이름:" GridPane.columnIndex="0" GridPane.rowIndex="0"/>
        <TextField fx:id="nameField" promptText="이름 입력"
                   GridPane.columnIndex="1" GridPane.rowIndex="0"/>

        <Label text="이메일:" GridPane.columnIndex="0" GridPane.rowIndex="1"/>
        <TextField fx:id="emailField" promptText="이메일 입력"
                   GridPane.columnIndex="1" GridPane.rowIndex="1"/>

        <Label text="나이:" GridPane.columnIndex="0" GridPane.rowIndex="2"/>
        <Spinner fx:id="ageSpinner" min="1" max="100" initialValue="25"
                 GridPane.columnIndex="1" GridPane.rowIndex="2"/>
    </GridPane>

    <HBox spacing="10" alignment="CENTER">
        <Button text="저장" onAction="#handleSave"
                styleClass="primary-button"/>
        <Button text="초기화" onAction="#handleReset"/>
    </HBox>

    <Label fx:id="statusLabel" text=""
           style="-fx-text-fill: #4a6fa5;"/>
</VBox>
// MainController.java
import javafx.fxml.FXML;
import javafx.scene.control.*;
public class MainController {
@FXML private TextField nameField;
@FXML private TextField emailField;
@FXML private Spinner<Integer> ageSpinner;
@FXML private Label statusLabel;
@FXML
public void initialize() {
// FXML 로드 후 초기화
ageSpinner.setValueFactory(
new SpinnerValueFactory.IntegerSpinnerValueFactory(1, 100, 25)
);
}
@FXML
private void handleSave() {
String name = nameField.getText().trim();
String email = emailField.getText().trim();
int age = ageSpinner.getValue();
if (name.isEmpty() || email.isEmpty()) {
statusLabel.setText("⚠️ 모든 필드를 입력해주세요!");
statusLabel.setStyle("-fx-text-fill: #e08aaa;");
return;
}
// 저장 로직...
statusLabel.setText("✅ " + name + "님의 정보가 저장됐어요!");
statusLabel.setStyle("-fx-text-fill: #6bbf8e;");
}
@FXML
private void handleReset() {
nameField.clear();
emailField.clear();
ageSpinner.getValueFactory().setValue(25);
statusLabel.setText("");
}
}// FXML 로드하기
import javafx.fxml.FXMLLoader;
import javafx.scene.Parent;
import javafx.scene.Scene;
import javafx.stage.Stage;
public class MainApp extends Application {
@Override
public void start(Stage stage) throws Exception {
FXMLLoader loader = new FXMLLoader(getClass().getResource("/main.fxml"));
Parent root = loader.load();
// 컨트롤러 접근 (필요한 경우)
MainController controller = loader.getController();
Scene scene = new Scene(root, 500, 400);
scene.getStylesheets().add(getClass().getResource("/styles.css").toExternalForm());
stage.setTitle("FXML 예제");
stage.setScene(scene);
stage.show();
}
}⚡ JavaFX 고급 기능 — "이게 진짜 차별점이야"
Property와 Binding — 데이터 자동 동기화 🔗
JavaFX의 킬러 기능 중 하나가 바로 Property와 Binding이야!
데이터가 바뀌면 UI가 자동으로 업데이트되는 마법 같은 기능임ㅋㅋ
React의 상태 관리와 비슷한 개념이라고 생각하면 됨!
import javafx.beans.property.*;
import javafx.beans.binding.*;
import javafx.scene.control.*;

// Property 기본 사용
IntegerProperty age = new SimpleIntegerProperty(25);
StringProperty name = new SimpleStringProperty("김자바");

// 값 변경 감지
age.addListener((observable, oldValue, newValue) -> {
    System.out.println("나이 변경: " + oldValue + " → " + newValue);
});

// Binding - 두 값을 연결
Slider slider = new Slider(0, 100, 50);
Label valueLabel = new Label();

// 슬라이더 값이 바뀌면 레이블도 자동으로 바뀜!
valueLabel.textProperty().bind(
    Bindings.format("현재 값: %.0f", slider.valueProperty())
);

// 복잡한 바인딩 표현식
IntegerProperty width = new SimpleIntegerProperty(100);
IntegerProperty height = new SimpleIntegerProperty(50);
IntegerProperty area = new SimpleIntegerProperty();

// 넓이 = 가로 × 세로 (자동 계산!)
area.bind(width.multiply(height));

System.out.println("넓이: " + area.get()); // 5000
width.set(200);
System.out.println("넓이: " + area.get()); // 10000 (자동 업데이트!)

// 양방향 바인딩
TextField field1 = new TextField("초기값");
TextField field2 = new TextField();

// 두 필드가 서로 동기화됨
field1.textProperty().bindBidirectional(field2.textProperty());
JavaFX 애니메이션 — 살아있는 UI 만들기 🎬
JavaFX는 강력한 애니메이션 API를 제공해.
Timeline, Transition 클래스들을 활용하면 부드러운 애니메이션을 쉽게 만들 수 있음!
import javafx.animation.*;
import javafx.scene.shape.*;
import javafx.util.Duration;

// 1. FadeTransition - 페이드 인/아웃
FadeTransition fade = new FadeTransition(Duration.millis(500), node);
fade.setFromValue(0.0);
fade.setToValue(1.0);
fade.play();

// 2. TranslateTransition - 이동 애니메이션
TranslateTransition move = new TranslateTransition(Duration.millis(300), button);
move.setByX(100); // X축으로 100px 이동
move.setByY(50);  // Y축으로 50px 이동
move.play();

// 3. ScaleTransition - 크기 변환
ScaleTransition scale = new ScaleTransition(Duration.millis(200), node);
scale.setToX(1.1);
scale.setToY(1.1);
scale.setAutoReverse(true);
scale.setCycleCount(2);
scale.play();

// 4. RotateTransition - 회전
RotateTransition rotate = new RotateTransition(Duration.seconds(2), node);
rotate.setByAngle(360);
rotate.setCycleCount(Timeline.INDEFINITE); // 무한 반복
rotate.play();

// 5. Timeline - 가장 유연한 애니메이션
Timeline timeline = new Timeline(
    new KeyFrame(Duration.ZERO,
        new KeyValue(node.opacityProperty(), 0),
        new KeyValue(node.translateYProperty(), -20)
    ),
    new KeyFrame(Duration.millis(300),
        new KeyValue(node.opacityProperty(), 1),
        new KeyValue(node.translateYProperty(), 0)
    )
);
timeline.play();

// 6. 애니메이션 체이닝 (순서대로 실행)
SequentialTransition sequence = new SequentialTransition(
    new FadeTransition(Duration.millis(200), node),
    new TranslateTransition(Duration.millis(300), node),
    new ScaleTransition(Duration.millis(200), node)
);
sequence.play();

// 7. 병렬 애니메이션 (동시에 실행)
ParallelTransition parallel = new ParallelTransition(
    new FadeTransition(Duration.millis(500), node),
    new RotateTransition(Duration.millis(500), node)
);
parallel.play();
JavaFX 차트 — 데이터 시각화 📊
JavaFX는 다양한 차트 컴포넌트를 기본으로 제공해!
별도 라이브러리 없이도 멋진 데이터 시각화가 가능함.
import javafx.scene.chart.*;

// 1. 막대 차트 (BarChart)
CategoryAxis xAxis = new CategoryAxis();
NumberAxis yAxis = new NumberAxis();
xAxis.setLabel("월");
yAxis.setLabel("매출 (만원)");

BarChart<String, Number> barChart = new BarChart<>(xAxis, yAxis);
barChart.setTitle("월별 매출 현황");

XYChart.Series<String, Number> series = new XYChart.Series<>();
series.setName("2024년");
series.getData().add(new XYChart.Data<>("1월", 4200));
series.getData().add(new XYChart.Data<>("2월", 3800));
series.getData().add(new XYChart.Data<>("3월", 5100));
series.getData().add(new XYChart.Data<>("4월", 4700));
series.getData().add(new XYChart.Data<>("5월", 5600));

barChart.getData().add(series);

// 2. 파이 차트 (PieChart)
PieChart pieChart = new PieChart();
pieChart.setTitle("기술 스택 분포");
pieChart.getData().addAll(
    new PieChart.Data("Java", 35),
    new PieChart.Data("Python", 25),
    new PieChart.Data("JavaScript", 20),
    new PieChart.Data("기타", 20)
);

// 3. 선 차트 (LineChart)
NumberAxis lineX = new NumberAxis(1, 12, 1);
NumberAxis lineY = new NumberAxis(0, 100, 10);
LineChart<Number, Number> lineChart = new LineChart<>(lineX, lineY);
lineChart.setTitle("성장 추이");

XYChart.Series<Number, Number> lineSeries = new XYChart.Series<>();
lineSeries.setName("사용자 수 (만명)");
for (int i = 1; i <= 12; i++) {
    lineSeries.getData().add(new XYChart.Data<>(i, Math.random() * 50 + 30));
}
lineChart.getData().add(lineSeries);
JavaFX 멀티스레딩 — Task와 Service 🔄
UI 스레드에서 무거운 작업을 하면 앱이 멈춰버림ㅋㅋ
JavaFX는 Task와 Service 클래스로 백그라운드 작업을 쉽게 처리할 수 있어!
import javafx.concurrent.*;
import javafx.scene.control.*;

// Task - 일회성 백그라운드 작업
Task<String> downloadTask = new Task<>() {
    @Override
    protected String call() throws Exception {
        // 백그라운드에서 실행되는 코드
        updateMessage("다운로드 시작...");

        for (int i = 0; i <= 100; i++) {
            Thread.sleep(50); // 시뮬레이션
            updateProgress(i, 100);
            updateMessage("다운로드 중... " + i + "%");
        }

        return "다운로드 완료!";
    }
};

// 진행 상황 UI 연결
ProgressBar progressBar = new ProgressBar();
Label statusLabel = new Label();

progressBar.progressProperty().bind(downloadTask.progressProperty());
statusLabel.textProperty().bind(downloadTask.messageProperty());

// 완료 시 처리
downloadTask.setOnSucceeded(e -> {
    String result = downloadTask.getValue();
    statusLabel.textProperty().unbind();
    statusLabel.setText(result + " ✅");
});

downloadTask.setOnFailed(e -> {
    statusLabel.textProperty().unbind();
    statusLabel.setText("오류 발생: " + downloadTask.getException().getMessage());
});

// 백그라운드 스레드에서 실행
Thread thread = new Thread(downloadTask);
thread.setDaemon(true); // 앱 종료 시 같이 종료
thread.start();🏗️ 실전 프로젝트 — "진짜 앱 만들어보기"
이론만 배우면 재미없잖아ㅋㅋ 실제로 쓸 수 있는 앱을 만들어보자!
간단한 할 일 관리 앱(Todo App)을 JavaFX로 만들어볼게.
FXML + Controller + CSS + 애니메이션까지 다 써볼 수 있는 좋은 예제임!
Todo 앱 — 모델 클래스
import javafx.beans.property.*;

// Todo 아이템 모델
public class TodoItem {
    private final StringProperty title;
    private final BooleanProperty completed;
    private final StringProperty priority;

    public TodoItem(String title, String priority) {
        this.title = new SimpleStringProperty(title);
        this.completed = new SimpleBooleanProperty(false);
        this.priority = new SimpleStringProperty(priority);
    }

    // Property getter (바인딩용)
    public StringProperty titleProperty() { return title; }
    public BooleanProperty completedProperty() { return completed; }
    public StringProperty priorityProperty() { return priority; }

    // 일반 getter/setter
    public String getTitle() { return title.get(); }
    public void setTitle(String value) { title.set(value); }

    public boolean isCompleted() { return completed.get(); }
    public void setCompleted(boolean value) { completed.set(value); }

    public String getPriority() { return priority.get(); }

    @Override
    public String toString() {
        return (isCompleted() ? "✅ " : "⬜ ") + getTitle() + " [" + getPriority() + "]";
    }
}
Todo 앱 — 컨트롤러
import javafx.collections.*;
import javafx.fxml.FXML;
import javafx.scene.control.*;
import javafx.scene.layout.*;
import javafx.animation.*;
import javafx.util.Duration;

public class TodoController {

    @FXML private TextField todoInput;
    @FXML private ComboBox<String> priorityCombo;
    @FXML private ListView<TodoItem> todoList;
    @FXML private Label countLabel;
    @FXML private Button addButton;

    private ObservableList<TodoItem> items = FXCollections.observableArrayList();

    @FXML
    public void initialize() {
        // 우선순위 콤보박스 초기화
        priorityCombo.getItems().addAll("높음 🔴", "보통 🟡", "낮음 🟢");
        priorityCombo.setValue("보통 🟡");

        // 리스트뷰에 데이터 연결
        todoList.setItems(items);

        // 커스텀 셀 팩토리 (각 아이템을 어떻게 표시할지)
        todoList.setCellFactory(lv -> new ListCell<TodoItem>() {
            @Override
            protected void updateItem(TodoItem item, boolean empty) {
                super.updateItem(item, empty);
                if (empty || item == null) {
                    setText(null);
                    setGraphic(null);
                } else {
                    HBox cellBox = new HBox(10);
                    cellBox.setAlignment(javafx.geometry.Pos.CENTER_LEFT);

                    CheckBox checkBox = new CheckBox();
                    checkBox.setSelected(item.isCompleted());
                    checkBox.selectedProperty().bindBidirectional(item.completedProperty());

                    Label titleLabel = new Label(item.getTitle());
                    if (item.isCompleted()) {
                        titleLabel.setStyle("-fx-strikethrough: true; -fx-text-fill: #aaa;");
                    }

                    Label priorityLabel = new Label(item.getPriority());
                    priorityLabel.setStyle("-fx-font-size: 11px;");

                    cellBox.getChildren().addAll(checkBox, titleLabel, priorityLabel);
                    setGraphic(cellBox);
                }
            }
        });

        // 아이템 수 표시 바인딩
        countLabel.textProperty().bind(
            Bindings.format("총 %d개 / 완료 %d개",
                Bindings.size(items),
                Bindings.size(items.filtered(TodoItem::isCompleted))
            )
        );

        // 샘플 데이터
        items.add(new TodoItem("JavaFX 공부하기", "높음 🔴"));
        items.add(new TodoItem("재능넷에 포트폴리오 올리기", "보통 🟡"));
        items.add(new TodoItem("커피 마시기", "낮음 🟢"));
    }

    @FXML
    private void handleAdd() {
        String title = todoInput.getText().trim();
        if (title.isEmpty()) return;

        TodoItem newItem = new TodoItem(title, priorityCombo.getValue());
        items.add(0, newItem); // 맨 위에 추가
        todoInput.clear();

        // 추가 애니메이션
        FadeTransition fade = new FadeTransition(Duration.millis(300), todoList);
        fade.setFromValue(0.7);
        fade.setToValue(1.0);
        fade.play();
    }

    @FXML
    private void handleDelete() {
        TodoItem selected = todoList.getSelectionModel().getSelectedItem();
        if (selected != null) {
            items.remove(selected);
        }
    }

    @FXML
    private void handleClearCompleted() {
        items.removeIf(TodoItem::isCompleted);
    }
}기업용 관리 프로그램, 데이터 분석 도구, 자동화 툴 등 수요가 꽤 있거든 😊
🎨 Scene Builder — "드래그앤드롭으로 UI 만들기"
Scene Builder는 Gluon에서 만든 JavaFX용 비주얼 레이아웃 도구야.
컴포넌트를 드래그앤드롭으로 배치하고, 속성을 GUI로 설정하면
자동으로 FXML 파일이 생성됨! 웹의 Figma 같은 느낌이랄까ㅋㅋ
2. 계층 구조 뷰 — 노드 트리를 시각적으로 확인하고 편집
3. 속성 패널 — 선택한 컴포넌트의 모든 속성을 GUI로 설정
4. CSS 미리보기 — CSS 적용 결과를 실시간으로 확인
5. 컨트롤러 연결 — fx:id와 이벤트 핸들러를 GUI로 설정
6. 반응형 레이아웃 — 화면 크기 변화에 따른 레이아웃 미리보기
IntelliJ IDEA와 Scene Builder 연동
📦 배포 — "만든 앱을 세상에 내보내기"
앱을 만들었으면 배포해야지ㅋㅋ 자바 앱 배포는 예전엔 좀 복잡했는데,
요즘은 jpackage라는 도구 덕분에 훨씬 쉬워졌어!
jpackage로 네이티브 인스톨러 만들기
Java 14부터 포함된 jpackage 도구를 사용하면
Windows의 .exe/.msi, macOS의 .dmg/.pkg, Linux의 .deb/.rpm 파일을 만들 수 있어!
JRE까지 번들로 포함시킬 수 있어서 사용자가 자바를 따로 설치할 필요가 없음 🎉
# Windows .exe 인스톨러 생성
jpackage \
  --input target/ \
  --name "MyJavaFXApp" \
  --main-jar myapp.jar \
  --main-class com.example.MainApp \
  --type exe \
  --win-shortcut \
  --win-menu \
  --icon app-icon.ico \
  --app-version 1.0.0 \
  --vendor "My Company" \
  --description "멋진 JavaFX 앱"

# macOS .dmg 생성
jpackage \
  --input target/ \
  --name "MyJavaFXApp" \
  --main-jar myapp.jar \
  --main-class com.example.MainApp \
  --type dmg \
  --icon app-icon.icns \
  --app-version 1.0.0

# Linux .deb 생성
jpackage \
  --input target/ \
  --name "myjavaapp" \
  --main-jar myapp.jar \
  --main-class com.example.MainApp \
  --type deb \
  --linux-shortcut \
  --app-version 1.0.0
Maven으로 Fat JAR 만들기
<!-- pom.xml에 maven-shade-plugin 추가 -->
<plugin>
    <groupId>org.apache.maven.plugins</groupId>
    <artifactId>maven-shade-plugin</artifactId>
    <version>3.5.0</version>
    <executions>
        <execution>
            <phase>package</phase>
            <goals><goal>shade</goal></goals>
            <configuration>
                <transformers>
                    <transformer implementation="org.apache.maven.plugins.shade.resource.ManifestResourceTransformer">
                        <mainClass>com.example.MainApp</mainClass>
                    </transformer>
                </transformers>
            </configuration>
        </execution>
    </executions>
</plugin>
⚡ 성능 최적화 팁 — "빠르고 부드러운 앱 만들기"
2. 불필요한 repaint/redraw — Swing에서 setVisible(true/false)를 반복하거나, 변경 없이 repaint() 호출
3. 너무 많은 노드 생성 — JavaFX에서 수천 개의 노드를 한 번에 렌더링하면 느려짐. 가상화(VirtualFlow) 활용!
4. 이미지 매번 로드 — 같은 이미지를 반복 사용할 때마다 새로 로드하지 말고 캐싱할 것
1. ListView/TableView 가상화 활용 — 수천 개의 데이터도 화면에 보이는 것만 렌더링
2. 이미지 캐싱
// 이미지 캐싱 예시
Map<String, Image> imageCache = new HashMap<>();

Image getImage(String path) {
    return imageCache.computeIfAbsent(path,
        k -> new Image(getClass().getResourceAsStream(k)));
}// 백그라운드 스레드에서 UI 업데이트할 때
new Thread(() -> {
String result = doHeavyWork(); // 무거운 작업
Platform.runLater(() -> {
label.setText(result); // UI 업데이트는 JavaFX 스레드에서
});
}).start();💼 실무에서 쓰이는 패턴과 팁 — "이거 알면 레벨업"
화면 전환 패턴
실제 앱에서는 여러 화면을 전환해야 하는 경우가 많아.
JavaFX에서 화면 전환하는 가장 깔끔한 방법을 알아보자!
// 화면 전환 유틸리티 클래스
public class SceneManager {

    private static Stage primaryStage;
    private static Map<String, Scene> sceneCache = new HashMap<>();

    public static void init(Stage stage) {
        primaryStage = stage;
    }

    public static void switchTo(String fxmlPath) {
        try {
            if (!sceneCache.containsKey(fxmlPath)) {
                FXMLLoader loader = new FXMLLoader(
                    SceneManager.class.getResource(fxmlPath)
                );
                Parent root = loader.load();
                Scene scene = new Scene(root);
                scene.getStylesheets().add(
                    SceneManager.class.getResource("/styles.css").toExternalForm()
                );
                sceneCache.put(fxmlPath, scene);
            }

            Scene newScene = sceneCache.get(fxmlPath);

            // 페이드 전환 효과
            FadeTransition fade = new FadeTransition(
                Duration.millis(200),
                primaryStage.getScene().getRoot()
            );
            fade.setFromValue(1.0);
            fade.setToValue(0.0);
            fade.setOnFinished(e -> {
                primaryStage.setScene(newScene);
                FadeTransition fadeIn = new FadeTransition(
                    Duration.millis(200), newScene.getRoot()
                );
                fadeIn.setFromValue(0.0);
                fadeIn.setToValue(1.0);
                fadeIn.play();
            });
            fade.play();

        } catch (Exception e) {
            e.printStackTrace();
        }
    }
}

// 사용 예시
SceneManager.switchTo("/views/dashboard.fxml");
SceneManager.switchTo("/views/settings.fxml");
다크 모드 구현
요즘 앱에서 다크 모드는 필수지ㅋㅋ JavaFX에서는 CSS 파일 교체로 쉽게 구현 가능!
// 다크/라이트 모드 토글
public class ThemeManager {

    private static boolean isDark = false;
    private static Scene currentScene;

    public static void init(Scene scene) {
        currentScene = scene;
        applyTheme();
    }

    public static void toggleTheme() {
        isDark = !isDark;
        applyTheme();
    }

    private static void applyTheme() {
        currentScene.getStylesheets().clear();

        // 공통 스타일
        currentScene.getStylesheets().add(
            ThemeManager.class.getResource("/styles/base.css").toExternalForm()
        );

        // 테마별 스타일
        String themeFile = isDark ? "/styles/dark.css" : "/styles/light.css";
        currentScene.getStylesheets().add(
            ThemeManager.class.getResource(themeFile).toExternalForm()
        );
    }

    public static boolean isDarkMode() { return isDark; }
}
알림 다이얼로그 커스터마이징
// 커스텀 알림 다이얼로그
public class AlertHelper {

    public static void showSuccess(String title, String message) {
        Alert alert = new Alert(Alert.AlertType.INFORMATION);
        alert.setTitle(title);
        alert.setHeaderText(null);
        alert.setContentText("✅ " + message);

        // 커스텀 스타일 적용
        DialogPane dialogPane = alert.getDialogPane();
        dialogPane.setStyle(
            "-fx-background-color: #f0f8f4;" +
            "-fx-border-color: #6bbf8e;" +
            "-fx-border-radius: 8;" +
            "-fx-background-radius: 8;"
        );

        alert.showAndWait();
    }

    public static Optional<ButtonType> showConfirm(String title, String message) {
        Alert alert = new Alert(Alert.AlertType.CONFIRMATION);
        alert.setTitle(title);
        alert.setHeaderText(null);
        alert.setContentText("❓ " + message);

        ButtonType yesButton = new ButtonType("확인", ButtonBar.ButtonData.YES);
        ButtonType noButton = new ButtonType("취소", ButtonBar.ButtonData.NO);
        alert.getButtonTypes().setAll(yesButton, noButton);

        return alert.showAndWait();
    }
}

// 사용 예시
AlertHelper.showSuccess("저장 완료", "데이터가 성공적으로 저장됐어요!");

AlertHelper.showConfirm("삭제 확인", "정말 삭제하시겠어요?")
    .ifPresent(response -> {
        if (response.getButtonData() == ButtonBar.ButtonData.YES) {
            deleteItem();
        }
    });
📚 알아두면 좋은 JavaFX 생태계 라이브러리
JavaFX 기본 기능만으로도 충분하지만, 이런 라이브러리들을 활용하면 개발 속도가 훨씬 빨라짐!
JFoenix Material Design 컴포넌트
AtlantaFX 모던 테마 모음
AnimateFX 애니메이션 효과 모음
afterburner.fx 의존성 주입
ReactFX 반응형 프로그래밍
DataFX 데이터 바인딩 강화
SearchableComboBox 검색 가능한 콤보박스
RangeSlider 범위 선택 슬라이더
BreadCrumbBar 경로 표시 네비게이션
MasterDetailPane 마스터-디테일 레이아웃
PropertySheet 속성 편집 시트
<!-- ControlsFX Maven 의존성 -->
<dependency>
    <groupId>org.controlsfx</groupId>
    <artifactId>controlsfx</artifactId>
    <version>11.2.1</version>
</dependency>

// 토스트 알림 사용 예시
Notifications.create()
    .title("저장 완료! ✅")
    .text("파일이 성공적으로 저장됐어요.")
    .position(Pos.BOTTOM_RIGHT)
    .hideAfter(Duration.seconds(3))
    .showInformation();
🎯 어떤 걸 선택해야 할까? — 상황별 추천
레거시 시스템과의 통합
안정성이 최우선인 기업용 앱
팀원들이 Swing에 익숙한 경우
JDK만으로 배포해야 할 때
모던하고 예쁜 UI가 필요할 때
애니메이션/차트가 많은 앱
CSS로 테마 관리가 필요할 때
웹 개발 경험이 있는 팀
모던한 UI, CSS 스타일링, FXML, 바인딩, 애니메이션... 모든 면에서 Swing보다 우월함.
단, 기존 Swing 프로젝트를 유지보수해야 한다면 굳이 마이그레이션할 필요는 없어.
Swing도 여전히 충분히 강력하고 안정적이니까! 😊
그리고 자바 GUI/JavaFX 개발 실력을 키웠다면 재능넷에서 관련 재능을 공유해보는 것도 좋은 방법이야.
기업용 데스크톱 앱 개발 수요는 생각보다 꽤 있거든! 💪

댓글 작성
이 글에 대한 여러분의 생각을 들려주세요
로그인이 필요합니다
댓글을 작성하려면 먼저 로그인해주세요.
댓글 0
지식인의 숲 - 지적 재산권 보호 고지
지적 재산권 보호 고지
- 저작권 및 소유권: 본 컨텐츠는 재능넷의 독점 AI 기술로 생성되었으며, 대한민국 저작권법 및 국제 저작권 협약에 의해 보호됩니다.
- AI 생성 컨텐츠의 법적 지위: 본 AI 생성 컨텐츠는 재능넷의 지적 창작물로 인정되며, 관련 법규에 따라 저작권 보호를 받습니다.
- 사용 제한: 재능넷의 명시적 서면 동의 없이 본 컨텐츠를 복제, 수정, 배포, 또는 상업적으로 활용하는 행위는 엄격히 금지됩니다.
- 데이터 수집 금지: 본 컨텐츠에 대한 무단 스크래핑, 크롤링, 및 자동화된 데이터 수집은 법적 제재의 대상이 됩니다.
- AI 학습 제한: 재능넷의 AI 생성 컨텐츠를 타 AI 모델 학습에 무단 사용하는 행위는 금지되며, 이는 지적 재산권 침해로 간주됩니다.





아직 댓글이 없습니다.