
Ver3.5 스마트홈 IoT 제어 소스 완전정복: 조명·전원·센서 연동부터 실전 코드까지
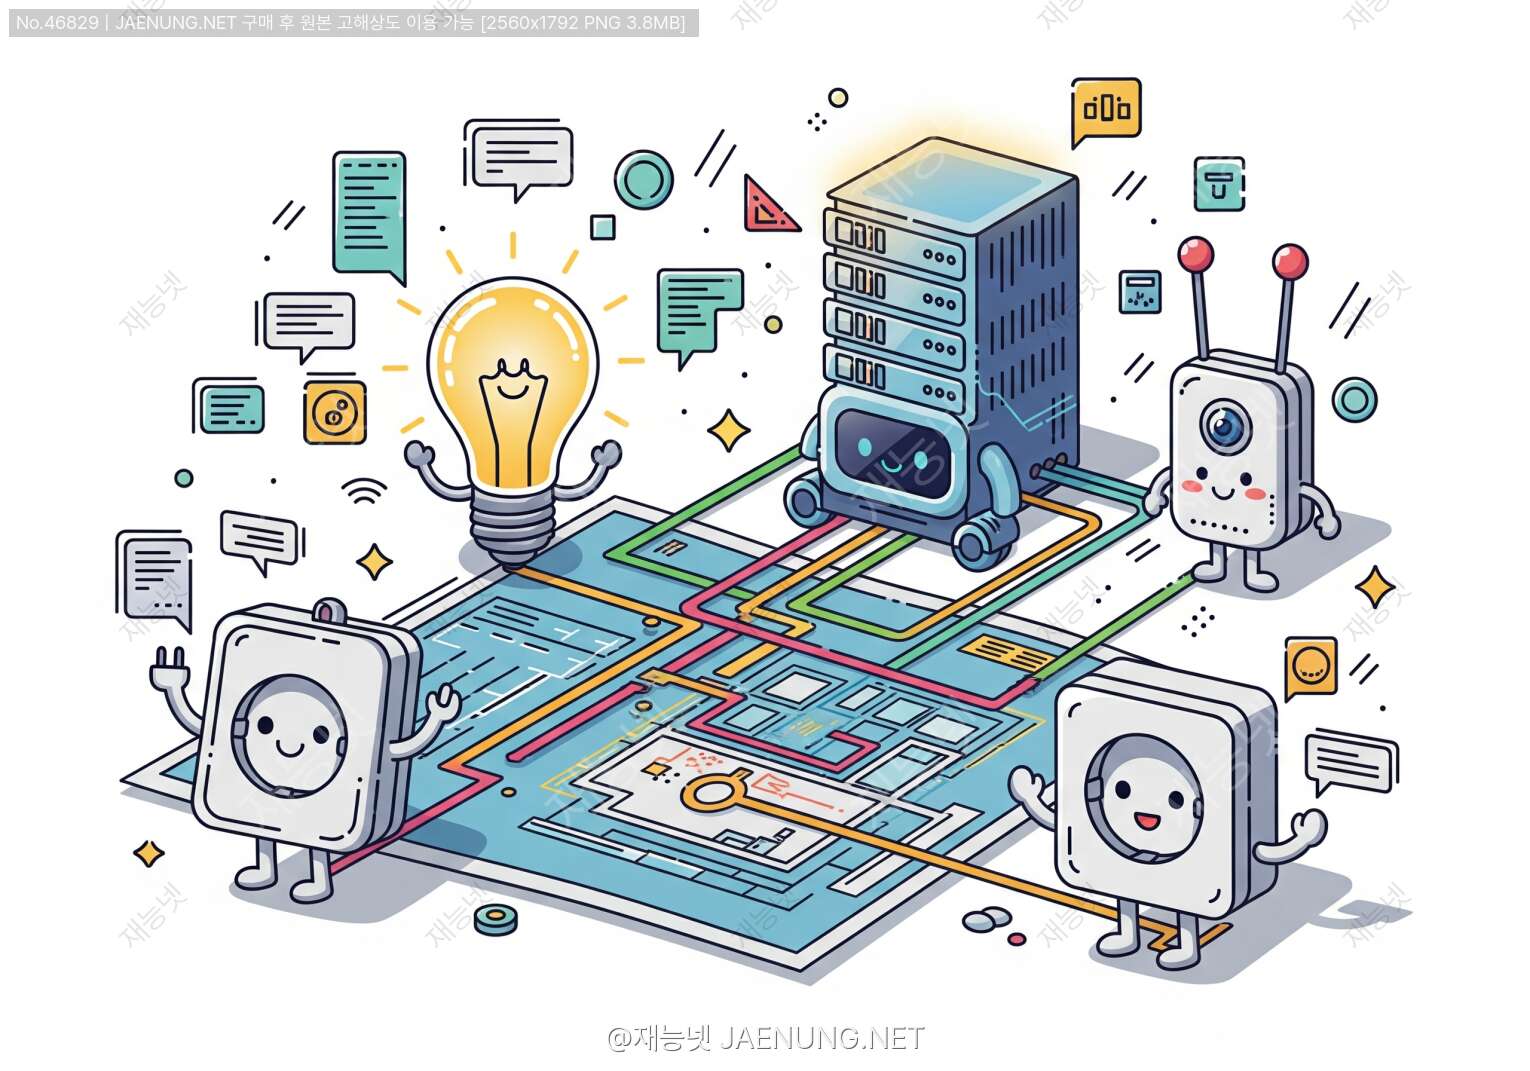
스마트홈 IoT 제어 소스 완전정복: 조명·전원·센서 연동부터 실전 코드까지
💡 직접 만드는 나만의 스마트홈 — 라즈베리파이·아두이노·MQTT·Home Assistant 실전 가이드
야, 솔직히 말해봐. 침대에 누워서 "아 불 끄기 귀찮다..." 이런 생각 한 번쯤 해봤지? 😅
그 귀찮음을 해결하려고 수십만 원짜리 스마트홈 제품 사는 것도 방법이지만, 직접 코드로 만들어버리면 훨씬 재밌고 내 입맛대로 커스터마이징도 가능하거든.
이 글에서는 IoT(Internet of Things) 기반 스마트홈 시스템을 조명 제어, 전원 관리, 센서 연동까지 실제 소스 코드와 함께 낱낱이 파헤쳐볼 거야.
아두이노, 라즈베리파이, ESP8266/ESP32, MQTT 프로토콜, 그리고 Home Assistant까지 — 겁먹지 말고 따라와봐. 생각보다 훨씬 재밌어! 🚀
이 글에서 다룰 내용 한눈에 보기
1. 스마트홈 IoT 기초 개념 — 왜 직접 만들어야 하나?
2. 핵심 하드웨어 총정리 (ESP32, 라즈베리파이, 아두이노)
3. 조명 제어 소스 코드 — LED, RGB, 스마트 전구
4. 전원 제어 소스 코드 — 릴레이 모듈, 스마트 플러그
5. 센서 연동 소스 코드 — 온도/습도, PIR, 조도 센서
6. MQTT 프로토콜로 기기 연결하기
7. Home Assistant 연동 설정
8. 실전 통합 예제 — 자동화 시나리오 구현
9. 보안 고려사항 및 팁
1. 스마트홈 IoT 기초 개념 — 왜 직접 만들어야 하나?
시중에 이미 삼성 SmartThings, 구글 Home, 애플 HomeKit 같은 완성형 스마트홈 플랫폼이 있는데 왜 굳이 직접 만드냐고? 🤔
이유는 간단해. 자유도, 비용, 그리고 재미야.
| 항목 | 완성형 제품 | 직접 제작 (DIY) |
|---|---|---|
| 초기 비용 | 높음 (기기당 3~10만원) | 낮음 (ESP32 기준 3~5천원) |
| 커스터마이징 | 제한적 | 무제한 |
| 클라우드 의존 | 높음 (서비스 종료 위험) | 로컬 운영 가능 |
| 개인정보 | 기업 서버 전송 | 내 서버에서만 처리 |
| 확장성 | 브랜드 생태계 제한 | 원하는 대로 확장 |
IoT(Internet of Things)는 말 그대로 사물이 인터넷에 연결되는 것이야.
집 안의 조명, 콘센트, 에어컨, 도어락 같은 것들이 네트워크에 연결되어 서로 통신하고 자동화되는 거지.
스마트홈 IoT 시스템의 기본 구조는 이렇게 생겼어:
2. 핵심 하드웨어 총정리
코드 짜기 전에 하드웨어부터 알아야 해. 어떤 보드를 쓰느냐에 따라 코드 스타일도 달라지거든. 🛠️
▶ESP8266 / ESP32
DIY 스마트홈의 국민 보드야. 가격이 저렴하고(ESP32 기준 3,000~6,000원), Wi-Fi가 내장되어 있어서 별도 모듈 없이 바로 인터넷에 연결할 수 있어.
ESP32는 ESP8266의 업그레이드 버전으로 블루투스까지 지원하고, 듀얼 코어 CPU에 더 많은 GPIO 핀을 가지고 있어.
| 항목 | 스펙 |
|---|---|
| CPU | Xtensa LX6 듀얼코어 240MHz |
| RAM | 520KB SRAM |
| 플래시 | 4MB (모델에 따라 다름) |
| Wi-Fi | 802.11 b/g/n (2.4GHz) |
| 블루투스 | BT 4.2 + BLE |
| GPIO | 34핀 |
| ADC | 12비트 ADC 18채널 |
| PWM | 16채널 |
▶라즈베리파이 (Raspberry Pi)
스마트홈의 두뇌 역할을 하는 싱글보드 컴퓨터야. 리눅스가 돌아가기 때문에 Home Assistant, MQTT 브로커, Node-RED 같은 서버 소프트웨어를 직접 돌릴 수 있어.
라즈베리파이 4 기준으로 4GB RAM 모델이 스마트홈 허브로 가장 많이 쓰여.
▶아두이노 (Arduino)
입문자에게 친숙한 보드야. 하지만 기본 아두이노 우노는 Wi-Fi가 없어서 스마트홈에 쓰려면 ESP8266 쉴드나 아두이노 MKR WiFi 1010 같은 Wi-Fi 지원 모델을 써야 해.
요즘은 ESP32가 아두이노 IDE에서도 개발 가능하기 때문에, 아두이노 문법 그대로 ESP32를 쓰는 경우가 많아.
- 엣지 디바이스: ESP32 (조명, 전원, 센서 제어)
- 개발 환경: Arduino IDE 또는 PlatformIO (VS Code 확장)
▶주요 부품 목록
| 부품 | 용도 | 대략 가격 |
|---|---|---|
| ESP32 개발보드 | 메인 컨트롤러 | 3,000~6,000원 |
| 5V 릴레이 모듈 | 전원 ON/OFF 제어 | 500~1,500원 |
| DHT22 센서 | 온도/습도 측정 | 2,000~4,000원 |
| HC-SR501 PIR | 움직임 감지 | 500~1,500원 |
| BH1750 조도센서 | 밝기 측정 | 1,000~2,500원 |
| WS2812B LED 스트립 | RGB 조명 | 5,000~15,000원 |
| MOSFET (IRLZ44N) | LED 밝기 PWM 제어 | 200~500원 |
| 라즈베리파이 4 (4GB) | 스마트홈 허브 | 70,000~90,000원 |
3. 조명 제어 소스 코드 — LED, RGB, 스마트 전구
자, 이제 진짜 코드 얘기야! 🎉
조명 제어는 스마트홈의 가장 기본이자 가장 많이 쓰이는 기능이야. 크게 세 가지로 나눌 수 있어:
▶기본 LED ON/OFF 제어 (ESP32 + MQTT)
가장 기본적인 예제야. ESP32가 MQTT 브로커에서 메시지를 받아서 LED를 켜고 끄는 코드야.
// ESP32 LED ON/OFF 제어 - MQTT 연동
// 필요 라이브러리: PubSubClient, WiFi

#include <WiFi.h>
#include <PubSubClient.h>

// ===== 설정값 =====
const char* ssid = "YOUR_WIFI_SSID";
const char* password = "YOUR_WIFI_PASSWORD";
const char* mqtt_server = "192.168.1.100";  // 라즈베리파이 IP
const int mqtt_port = 1883;
const char* mqtt_client_id = "esp32_light_01";

// MQTT 토픽 정의
const char* topic_light_cmd = "home/livingroom/light/set";    // 명령 수신
const char* topic_light_state = "home/livingroom/light/state"; // 상태 발행

// GPIO 핀 설정
const int LED_PIN = 2;  // ESP32 내장 LED 또는 외부 LED

WiFiClient espClient;
PubSubClient client(espClient);

// ===== Wi-Fi 연결 함수 =====
void setupWiFi() {
  Serial.print("Wi-Fi 연결 중: ");
  Serial.println(ssid);
  WiFi.begin(ssid, password);

  while (WiFi.status() != WL_CONNECTED) {
    delay(500);
    Serial.print(".");
  }

  Serial.println("\nWi-Fi 연결 완료!");
  Serial.print("IP 주소: ");
  Serial.println(WiFi.localIP());
}

// ===== MQTT 메시지 수신 콜백 =====
void mqttCallback(char* topic, byte* payload, unsigned int length) {
  // 수신된 메시지를 문자열로 변환
  String message = "";
  for (int i = 0; i < length; i++) {
    message += (char)payload[i];
  }

  Serial.print("메시지 수신 [");
  Serial.print(topic);
  Serial.print("]: ");
  Serial.println(message);

  // 조명 제어 토픽 처리
  if (String(topic) == topic_light_cmd) {
    if (message == "ON" || message == "1" || message == "true") {
      digitalWrite(LED_PIN, HIGH);
      client.publish(topic_light_state, "ON");  // 상태 발행
      Serial.println("💡 조명 ON");
    }
    else if (message == "OFF" || message == "0" || message == "false") {
      digitalWrite(LED_PIN, LOW);
      client.publish(topic_light_state, "OFF");  // 상태 발행
      Serial.println("🌑 조명 OFF");
    }
  }
}

// ===== MQTT 재연결 함수 =====
void reconnectMQTT() {
  while (!client.connected()) {
    Serial.print("MQTT 연결 시도...");

    if (client.connect(mqtt_client_id)) {
      Serial.println("연결 성공!");
      // 토픽 구독
      client.subscribe(topic_light_cmd);
      Serial.print("구독 토픽: ");
      Serial.println(topic_light_cmd);

      // 연결 시 현재 상태 발행
      int currentState = digitalRead(LED_PIN);
      client.publish(topic_light_state, currentState ? "ON" : "OFF");
    } else {
      Serial.print("연결 실패, rc=");
      Serial.print(client.state());
      Serial.println(" 5초 후 재시도...");
      delay(5000);
    }
  }
}

// ===== setup() =====
void setup() {
  Serial.begin(115200);
  pinMode(LED_PIN, OUTPUT);
  digitalWrite(LED_PIN, LOW);  // 초기 상태: OFF

  setupWiFi();

  client.setServer(mqtt_server, mqtt_port);
  client.setCallback(mqttCallback);
}

// ===== loop() =====
void loop() {
  if (!client.connected()) {
    reconnectMQTT();
  }
  client.loop();  // MQTT 메시지 처리
}
스케치 → 라이브러리 포함하기 → 라이브러리 관리에서 "PubSubClient" 검색 후 설치해줘. Nick O'Leary가 만든 버전이야.
▶PWM 밝기 조절 제어
단순 ON/OFF를 넘어서 밝기를 0~255 단계로 조절하는 코드야.
MQTT 메시지로 밝기 값(0~255)을 받아서 PWM으로 LED 밝기를 제어해.
// ESP32 PWM 밝기 조절 - MQTT 연동
// JSON 형식 메시지 처리 포함
// 필요 라이브러리: PubSubClient, WiFi, ArduinoJson

#include <WiFi.h>
#include <PubSubClient.h>
#include <ArduinoJson.h>

const char* ssid = "YOUR_WIFI_SSID";
const char* password = "YOUR_WIFI_PASSWORD";
const char* mqtt_server = "192.168.1.100";

// MQTT 토픽
const char* topic_light_cmd = "home/bedroom/light/set";
const char* topic_light_state = "home/bedroom/light/state";

// PWM 설정 (ESP32 LEDC)
const int LED_PIN = 18;
const int PWM_CHANNEL = 0;
const int PWM_FREQ = 5000;    // 5kHz
const int PWM_RESOLUTION = 8; // 8비트 = 0~255

int currentBrightness = 0;
bool lightState = false;

WiFiClient espClient;
PubSubClient client(espClient);

// 상태 JSON 발행 함수
void publishState() {
  StaticJsonDocument<128> doc;
  doc["state"] = lightState ? "ON" : "OFF";
  doc["brightness"] = currentBrightness;

  char buffer[128];
  serializeJson(doc, buffer);
  client.publish(topic_light_state, buffer, true); // retain=true

  Serial.print("상태 발행: ");
  Serial.println(buffer);
}

// MQTT 콜백
void mqttCallback(char* topic, byte* payload, unsigned int length) {
  String message = "";
  for (int i = 0; i < length; i++) {
    message += (char)payload[i];
  }

  Serial.print("수신: ");
  Serial.println(message);

  // JSON 파싱
  StaticJsonDocument<128> doc;
  DeserializationError error = deserializeJson(doc, message);

  if (!error) {
    // JSON 형식: {"state": "ON", "brightness": 128}
    if (doc.containsKey("state")) {
      String state = doc["state"].as<String>();
      lightState = (state == "ON");
    }

    if (doc.containsKey("brightness")) {
      currentBrightness = doc["brightness"].as<int>();
      currentBrightness = constrain(currentBrightness, 0, 255);
    }
  } else {
    // 단순 문자열 처리
    if (message == "ON") {
      lightState = true;
      if (currentBrightness == 0) currentBrightness = 255;
    } else if (message == "OFF") {
      lightState = false;
    }
  }

  // PWM 출력 적용
  int pwmValue = lightState ? currentBrightness : 0;
  ledcWrite(PWM_CHANNEL, pwmValue);

  Serial.print("PWM 출력: ");
  Serial.println(pwmValue);

  publishState();
}

void reconnectMQTT() {
  while (!client.connected()) {
    if (client.connect("esp32_bedroom_light")) {
      client.subscribe(topic_light_cmd);
      publishState();
    } else {
      delay(5000);
    }
  }
}

void setup() {
  Serial.begin(115200);

  // ESP32 LEDC PWM 설정
  ledcSetup(PWM_CHANNEL, PWM_FREQ, PWM_RESOLUTION);
  ledcAttachPin(LED_PIN, PWM_CHANNEL);
  ledcWrite(PWM_CHANNEL, 0);  // 초기값 0 (OFF)

  WiFi.begin(ssid, password);
  while (WiFi.status() != WL_CONNECTED) delay(500);

  client.setServer(mqtt_server, 1883);
  client.setCallback(mqttCallback);
}

void loop() {
  if (!client.connected()) reconnectMQTT();
  client.loop();
}
analogWrite()를 지원하지 않아! 대신 ledcSetup(), ledcAttachPin(), ledcWrite()를 사용해야 해. ESP32 Arduino Core 3.x 버전부터는 API가 약간 바뀌었으니 버전 확인 필수!
▶WS2812B RGB LED 스트립 제어
이제 진짜 화려한 거야! 🌈 WS2812B는 각 LED를 개별적으로 제어할 수 있는 어드레서블 LED야.
FastLED 라이브러리를 사용하면 엄청 쉽게 제어할 수 있어.
// ESP32 WS2812B RGB LED 스트립 제어 - MQTT 연동
// 필요 라이브러리: PubSubClient, WiFi, FastLED, ArduinoJson

#include <WiFi.h>
#include <PubSubClient.h>
#include <FastLED.h>
#include <ArduinoJson.h>

const char* ssid = "YOUR_WIFI_SSID";
const char* password = "YOUR_WIFI_PASSWORD";
const char* mqtt_server = "192.168.1.100";

// LED 스트립 설정
#define LED_PIN     5
#define NUM_LEDS    60    // LED 개수 (1m 기준 60개)
#define LED_TYPE    WS2812B
#define COLOR_ORDER GRB   // WS2812B는 GRB 순서!

CRGB leds[NUM_LEDS];

// MQTT 토픽
const char* topic_rgb_cmd = "home/livingroom/rgb/set";
const char* topic_rgb_state = "home/livingroom/rgb/state";

// 현재 상태
bool rgbState = false;
int brightness = 128;
int r = 255, g = 255, b = 255;  // 기본 흰색
String effect = "solid";  // 효과: solid, rainbow, pulse

WiFiClient espClient;
PubSubClient client(espClient);

// 효과 변수
unsigned long lastEffectUpdate = 0;
int hue = 0;

// 무지개 효과
void rainbowEffect() {
  if (millis() - lastEffectUpdate > 20) {
    for (int i = 0; i < NUM_LEDS; i++) {
      leds[i] = CHSV(hue + (i * 256 / NUM_LEDS), 255, brightness);
    }
    FastLED.show();
    hue++;
    lastEffectUpdate = millis();
  }
}

// 펄스 효과
void pulseEffect() {
  static int pulseVal = 0;
  static int pulseDir = 1;

  if (millis() - lastEffectUpdate > 15) {
    pulseVal += pulseDir * 3;
    if (pulseVal >= 255) { pulseVal = 255; pulseDir = -1; }
    if (pulseVal <= 0)   { pulseVal = 0;   pulseDir = 1;  }

    fill_solid(leds, NUM_LEDS, CRGB(
      map(pulseVal, 0, 255, 0, r),
      map(pulseVal, 0, 255, 0, g),
      map(pulseVal, 0, 255, 0, b)
    ));
    FastLED.show();
    lastEffectUpdate = millis();
  }
}

// 상태 발행
void publishRGBState() {
  StaticJsonDocument<256> doc;
  doc["state"] = rgbState ? "ON" : "OFF";
  doc["brightness"] = brightness;

  JsonObject color = doc.createNestedObject("color");
  color["r"] = r;
  color["g"] = g;
  color["b"] = b;

  doc["effect"] = effect;

  char buffer[256];
  serializeJson(doc, buffer);
  client.publish(topic_rgb_state, buffer, true);
}

// MQTT 콜백
void mqttCallback(char* topic, byte* payload, unsigned int length) {
  String message = "";
  for (int i = 0; i < length; i++) {
    message += (char)payload[i];
  }

  StaticJsonDocument<256> doc;
  if (deserializeJson(doc, message)) return;

  // 상태 처리
  if (doc.containsKey("state")) {
    rgbState = (String(doc["state"].as<const char*>()) == "ON");
  }

  // 밝기 처리
  if (doc.containsKey("brightness")) {
    brightness = constrain(doc["brightness"].as<int>(), 0, 255);
    FastLED.setBrightness(brightness);
  }

  // 색상 처리
  if (doc.containsKey("color")) {
    r = doc["color"]["r"] | 255;
    g = doc["color"]["g"] | 255;
    b = doc["color"]["b"] | 255;
  }

  // 효과 처리
  if (doc.containsKey("effect")) {
    effect = doc["effect"].as<String>();
  }

  // 즉시 적용 (solid 효과)
  if (!rgbState) {
    fill_solid(leds, NUM_LEDS, CRGB::Black);
    FastLED.show();
  } else if (effect == "solid") {
    fill_solid(leds, NUM_LEDS, CRGB(r, g, b));
    FastLED.show();
  }

  publishRGBState();
}

void reconnectMQTT() {
  while (!client.connected()) {
    if (client.connect("esp32_rgb_strip")) {
      client.subscribe(topic_rgb_cmd);
      publishRGBState();
    } else {
      delay(5000);
    }
  }
}

void setup() {
  Serial.begin(115200);

  // FastLED 초기화
  FastLED.addLeds<LED_TYPE, LED_PIN, COLOR_ORDER>(leds, NUM_LEDS);
  FastLED.setBrightness(brightness);
  fill_solid(leds, NUM_LEDS, CRGB::Black);
  FastLED.show();

  WiFi.begin(ssid, password);
  while (WiFi.status() != WL_CONNECTED) delay(500);

  client.setServer(mqtt_server, 1883);
  client.setCallback(mqttCallback);
}

void loop() {
  if (!client.connected()) reconnectMQTT();
  client.loop();

  // 효과 처리 (loop에서 지속 실행)
  if (rgbState) {
    if (effect == "rainbow") rainbowEffect();
    else if (effect == "pulse") pulseEffect();
  }
}
- LED 스트립 전원은 5V 2A 이상 별도 전원 공급 (60개 기준 최대 3.6A 소비)
- ESP32와 LED 스트립의 GND를 공통 연결해야 해!
4. 전원 제어 소스 코드 — 릴레이 모듈, 스마트 플러그
조명 다음은 전원 제어야. 릴레이 모듈을 사용하면 220V AC 전원도 ESP32로 제어할 수 있어.
물론 고전압 작업이니까 안전에 각별히 주의해야 해! ⚠️
▶릴레이 모듈 기본 제어
릴레이는 전자석을 이용해서 기계적 스위치를 ON/OFF하는 부품이야.
5V 릴레이 모듈은 ESP32의 3.3V GPIO로도 제어 가능한 모델을 사용해야 해 (로직 레벨 변환 내장 모델).
// ESP32 릴레이 제어 - 다중 채널 + MQTT
// 4채널 릴레이 모듈 예제

#include <WiFi.h>
#include <PubSubClient.h>
#include <ArduinoJson.h>

const char* ssid = "YOUR_WIFI_SSID";
const char* password = "YOUR_WIFI_PASSWORD";
const char* mqtt_server = "192.168.1.100";

// 릴레이 핀 설정 (4채널)
const int RELAY_PINS[] = {26, 27, 14, 12};
const int RELAY_COUNT = 4;

// 릴레이 이름 (MQTT 토픽용)
const char* RELAY_NAMES[] = {
  "outlet1",   // 콘센트 1
  "outlet2",   // 콘센트 2
  "fan",       // 선풍기
  "heater"     // 히터
};

// 릴레이 상태 저장
bool relayStates[4] = {false, false, false, false};

// 릴레이 타입: true = 활성화 HIGH, false = 활성화 LOW (모듈에 따라 다름)
// 대부분의 중국산 릴레이 모듈은 LOW 활성화!
const bool RELAY_ACTIVE_HIGH = false;

WiFiClient espClient;
PubSubClient client(espClient);

// 릴레이 제어 함수
void setRelay(int index, bool state) {
  if (index < 0 || index >= RELAY_COUNT) return;

  relayStates[index] = state;

  // 활성화 레벨에 따른 출력
  if (RELAY_ACTIVE_HIGH) {
    digitalWrite(RELAY_PINS[index], state ? HIGH : LOW);
  } else {
    // LOW 활성화 (대부분의 릴레이 모듈)
    digitalWrite(RELAY_PINS[index], state ? LOW : HIGH);
  }

  // 상태 발행
  char topic[64];
  snprintf(topic, sizeof(topic), "home/power/%s/state", RELAY_NAMES[index]);
  client.publish(topic, state ? "ON" : "OFF", true);

  Serial.printf("릴레이 %d (%s): %s\n",
    index + 1, RELAY_NAMES[index], state ? "ON" : "OFF");
}

// MQTT 콜백
void mqttCallback(char* topic, byte* payload, unsigned int length) {
  String topicStr = String(topic);
  String message = "";
  for (int i = 0; i < length; i++) {
    message += (char)payload[i];
  }

  // 토픽 파싱: home/power/{name}/set
  for (int i = 0; i < RELAY_COUNT; i++) {
    char expectedTopic[64];
    snprintf(expectedTopic, sizeof(expectedTopic),
             "home/power/%s/set", RELAY_NAMES[i]);

    if (topicStr == expectedTopic) {
      if (message == "ON" || message == "1") {
        setRelay(i, true);
      } else if (message == "OFF" || message == "0") {
        setRelay(i, false);
      } else if (message == "TOGGLE") {
        setRelay(i, !relayStates[i]);
      }
      break;
    }
  }

  // 전체 제어: home/power/all/set
  if (topicStr == "home/power/all/set") {
    bool state = (message == "ON");
    for (int i = 0; i < RELAY_COUNT; i++) {
      setRelay(i, state);
    }
  }
}

// 타이머 기반 자동 OFF 기능
struct RelayTimer {
  bool active;
  unsigned long offTime;
};
RelayTimer timers[4] = {{false,0},{false,0},{false,0},{false,0}};

void setRelayTimer(int index, int seconds) {
  timers[index].active = true;
  timers[index].offTime = millis() + (seconds * 1000UL);
  setRelay(index, true);
  Serial.printf("릴레이 %d: %d초 후 자동 OFF\n", index+1, seconds);
}

void checkTimers() {
  for (int i = 0; i < RELAY_COUNT; i++) {
    if (timers[i].active && millis() >= timers[i].offTime) {
      timers[i].active = false;
      setRelay(i, false);
      Serial.printf("릴레이 %d: 타이머 OFF\n", i+1);
    }
  }
}

void reconnectMQTT() {
  while (!client.connected()) {
    if (client.connect("esp32_relay_controller")) {
      // 모든 릴레이 토픽 구독
      for (int i = 0; i < RELAY_COUNT; i++) {
        char topic[64];
        snprintf(topic, sizeof(topic), "home/power/%s/set", RELAY_NAMES[i]);
        client.subscribe(topic);
      }
      client.subscribe("home/power/all/set");

      // 현재 상태 발행
      for (int i = 0; i < RELAY_COUNT; i++) {
        char topic[64];
        snprintf(topic, sizeof(topic), "home/power/%s/state", RELAY_NAMES[i]);
        client.publish(topic, relayStates[i] ? "ON" : "OFF", true);
      }
    } else {
      delay(5000);
    }
  }
}

void setup() {
  Serial.begin(115200);

  // 릴레이 핀 초기화
  for (int i = 0; i < RELAY_COUNT; i++) {
    pinMode(RELAY_PINS[i], OUTPUT);
    // LOW 활성화 릴레이는 초기값 HIGH (OFF 상태)
    digitalWrite(RELAY_PINS[i], RELAY_ACTIVE_HIGH ? LOW : HIGH);
    relayStates[i] = false;
  }

  WiFi.begin(ssid, password);
  while (WiFi.status() != WL_CONNECTED) delay(500);
  Serial.println("Wi-Fi 연결 완료");

  client.setServer(mqtt_server, 1883);
  client.setCallback(mqttCallback);
}

void loop() {
  if (!client.connected()) reconnectMQTT();
  client.loop();
  checkTimers();  // 타이머 체크
}
- SSR(Solid State Relay)은 기계식 릴레이보다 수명이 길고 소음이 없어. 고빈도 스위칭에 적합.
- 릴레이 코일 역기전력 보호를 위해 플라이백 다이오드를 연결하는 게 좋아 (대부분 모듈에 내장).
▶Tasmota 펌웨어 활용 (스마트 플러그)
직접 코드를 짜는 것 외에도, Tasmota라는 오픈소스 펌웨어를 ESP8266/ESP32 기반 스마트 플러그에 플래싱해서 사용하는 방법도 있어.
Tasmota는 MQTT를 기본 지원하고, Home Assistant와 자동 연동되는 강력한 펌웨어야.
| 명령 | 토픽 | 페이로드 |
|---|---|---|
| 전원 ON | cmnd/tasmota_XXXXXX/Power | ON |
| 전원 OFF | cmnd/tasmota_XXXXXX/Power | OFF |
| 토글 | cmnd/tasmota_XXXXXX/Power | TOGGLE |
| 상태 조회 | cmnd/tasmota_XXXXXX/Status | 0 |
| 에너지 모니터링 | cmnd/tasmota_XXXXXX/Status | 8 |
Tasmota가 발행하는 상태 메시지 예시:
// Tasmota 상태 메시지 예시 (JSON)
// 토픽: stat/tasmota_XXXXXX/POWER

{
  "Time": "2024-01-15T14:30:00",
  "POWER": "ON"
}

// 에너지 모니터링 메시지 (전력 측정 모델)
// 토픽: tele/tasmota_XXXXXX/SENSOR

{
  "Time": "2024-01-15T14:30:10",
  "ENERGY": {
    "TotalStartTime": "2024-01-01T00:00:00",
    "Total": 12.345,        // 총 소비 전력량 (kWh)
    "Yesterday": 0.234,     // 어제 소비량 (kWh)
    "Today": 0.089,         // 오늘 소비량 (kWh)
    "Period": 0,
    "Power": 45,            // 현재 소비 전력 (W)
    "ApparentPower": 48,
    "ReactivePower": 16,
    "Factor": 0.94,         // 역률
    "Voltage": 220,         // 전압 (V)
    "Current": 0.218        // 전류 (A)
  }
}
5. 센서 연동 소스 코드 — 온도/습도, PIR, 조도 센서
센서는 스마트홈의 눈과 귀야. 센서 데이터를 기반으로 자동화 규칙을 만들 수 있거든.
"온도가 28도 이상이면 에어컨 켜기", "움직임 감지되면 조명 켜기" 같은 것들이 다 센서 덕분에 가능해! 🎯
▶DHT22 온도/습도 센서
DHT22는 가장 많이 쓰이는 온습도 센서야. DHT11보다 정확도가 높고 측정 범위도 넓어.
(DHT11: 온도 0~50°C, 습도 20~80% / DHT22: 온도 -40~80°C, 습도 0~100%)
// ESP32 DHT22 온습도 센서 - MQTT 발행
// 필요 라이브러리: PubSubClient, WiFi, DHT sensor library, ArduinoJson

#include <WiFi.h>
#include <PubSubClient.h>
#include <DHT.h>
#include <ArduinoJson.h>

const char* ssid = "YOUR_WIFI_SSID";
const char* password = "YOUR_WIFI_PASSWORD";
const char* mqtt_server = "192.168.1.100";

// DHT 설정
#define DHT_PIN  4
#define DHT_TYPE DHT22
DHT dht(DHT_PIN, DHT_TYPE);

// MQTT 토픽
const char* topic_sensor = "home/sensor/livingroom/climate";
const char* topic_temp   = "home/sensor/livingroom/temperature";
const char* topic_humi   = "home/sensor/livingroom/humidity";

// 발행 주기 (30초)
const unsigned long PUBLISH_INTERVAL = 30000;
unsigned long lastPublish = 0;

WiFiClient espClient;
PubSubClient client(espClient);

// 센서 데이터 읽기 및 발행
void readAndPublishSensor() {
  // DHT22는 읽기 실패 시 NaN 반환
  float temperature = dht.readTemperature();
  float humidity = dht.readHumidity();

  // 유효성 검사
  if (isnan(temperature) || isnan(humidity)) {
    Serial.println("DHT22 읽기 실패!");
    return;
  }

  // 열지수(Heat Index) 계산
  float heatIndex = dht.computeHeatIndex(temperature, humidity, false);

  Serial.printf("온도: %.1f°C, 습도: %.1f%%, 열지수: %.1f°C\n",
    temperature, humidity, heatIndex);

  // JSON 형식으로 발행 (통합 토픽)
  StaticJsonDocument<256> doc;
  doc["temperature"] = round(temperature * 10) / 10.0;  // 소수점 1자리
  doc["humidity"] = round(humidity * 10) / 10.0;
  doc["heat_index"] = round(heatIndex * 10) / 10.0;
  doc["unit"] = "celsius";

  char buffer[256];
  serializeJson(doc, buffer);
  client.publish(topic_sensor, buffer, true);

  // 개별 토픽으로도 발행 (Home Assistant 자동 발견용)
  char tempStr[8], humiStr[8];
  dtostrf(temperature, 4, 1, tempStr);
  dtostrf(humidity, 4, 1, humiStr);
  client.publish(topic_temp, tempStr, true);
  client.publish(topic_humi, humiStr, true);
}

void reconnectMQTT() {
  while (!client.connected()) {
    if (client.connect("esp32_climate_sensor")) {
      Serial.println("MQTT 연결 완료");
      readAndPublishSensor();  // 연결 즉시 발행
    } else {
      delay(5000);
    }
  }
}

void setup() {
  Serial.begin(115200);
  dht.begin();

  WiFi.begin(ssid, password);
  while (WiFi.status() != WL_CONNECTED) delay(500);

  client.setServer(mqtt_server, 1883);
}

void loop() {
  if (!client.connected()) reconnectMQTT();
  client.loop();

  // 주기적 발행
  if (millis() - lastPublish >= PUBLISH_INTERVAL) {
    lastPublish = millis();
    readAndPublishSensor();
  }
}
▶PIR 움직임 감지 센서 (HC-SR501)
PIR(Passive Infrared) 센서는 사람의 체온(적외선)을 감지해서 움직임을 탐지해.
현관이나 복도에 설치해서 "사람이 오면 조명 켜기" 같은 자동화에 딱이야!
// ESP32 PIR 움직임 감지 - MQTT 연동
// HC-SR501 센서 사용

#include <WiFi.h>
#include <PubSubClient.h>

const char* ssid = "YOUR_WIFI_SSID";
const char* password = "YOUR_WIFI_PASSWORD";
const char* mqtt_server = "192.168.1.100";

// PIR 핀 설정
const int PIR_PIN = 13;

// MQTT 토픽
const char* topic_motion = "home/sensor/hallway/motion";
const char* topic_motion_count = "home/sensor/hallway/motion_count";

// 상태 변수
bool lastMotionState = false;
int motionCount = 0;
unsigned long lastMotionTime = 0;
const unsigned long MOTION_COOLDOWN = 5000;  // 5초 쿨다운

// 인터럽트 플래그
volatile bool motionDetected = false;

WiFiClient espClient;
PubSubClient client(espClient);

// PIR 인터럽트 핸들러
void IRAM_ATTR onMotionDetected() {
  motionDetected = true;
}

void publishMotionState(bool state) {
  client.publish(topic_motion, state ? "ON" : "OFF", true);

  if (state) {
    motionCount++;
    char countStr[8];
    itoa(motionCount, countStr, 10);
    client.publish(topic_motion_count, countStr, true);

    Serial.printf("🚶 움직임 감지! (총 %d회)\n", motionCount);
  } else {
    Serial.println("😴 움직임 없음");
  }
}

void reconnectMQTT() {
  while (!client.connected()) {
    if (client.connect("esp32_pir_sensor")) {
      client.publish(topic_motion, "OFF", true);
    } else {
      delay(5000);
    }
  }
}

void setup() {
  Serial.begin(115200);

  // PIR 핀 설정 (인터럽트 사용)
  pinMode(PIR_PIN, INPUT);
  attachInterrupt(digitalPinToInterrupt(PIR_PIN), onMotionDetected, CHANGE);

  WiFi.begin(ssid, password);
  while (WiFi.status() != WL_CONNECTED) delay(500);

  client.setServer(mqtt_server, 1883);

  // HC-SR501 워밍업 대기 (약 60초)
  Serial.println("PIR 센서 워밍업 중... (60초)");
  delay(60000);
  Serial.println("준비 완료!");
}

void loop() {
  if (!client.connected()) reconnectMQTT();
  client.loop();

  // 인터럽트 플래그 처리
  if (motionDetected) {
    motionDetected = false;

    bool currentState = digitalRead(PIR_PIN);

    // 상태 변화 감지
    if (currentState != lastMotionState) {
      // 쿨다운 체크 (연속 감지 방지)
      if (currentState || (millis() - lastMotionTime > MOTION_COOLDOWN)) {
        lastMotionState = currentState;
        if (currentState) lastMotionTime = millis();
        publishMotionState(currentState);
      }
    }
  }
}
▶BH1750 조도 센서
조도 센서는 주변 밝기를 측정해서 "어두워지면 조명 켜기" 같은 자동화에 사용해.
BH1750은 I2C 통신을 사용하는 디지털 조도 센서야. 측정 범위는 1~65535 lux.
// ESP32 BH1750 조도 센서 - MQTT 연동
// I2C 통신 사용
// 필요 라이브러리: BH1750, PubSubClient, WiFi

#include <WiFi.h>
#include <PubSubClient.h>
#include <Wire.h>
#include <BH1750.h>

const char* ssid = "YOUR_WIFI_SSID";
const char* password = "YOUR_WIFI_PASSWORD";
const char* mqtt_server = "192.168.1.100";

// I2C 핀 (ESP32 기본: SDA=21, SCL=22)
const int SDA_PIN = 21;
const int SCL_PIN = 22;

BH1750 lightMeter;

// MQTT 토픽
const char* topic_lux = "home/sensor/livingroom/illuminance";
const char* topic_lux_state = "home/sensor/livingroom/light_state";

// 조도 임계값 (자동화 기준)
const float LUX_DARK = 50.0;    // 50 lux 이하: 어두움
const float LUX_DIM = 200.0;    // 200 lux 이하: 흐림
const float LUX_BRIGHT = 500.0; // 500 lux 이상: 밝음

const unsigned long PUBLISH_INTERVAL = 10000;  // 10초
unsigned long lastPublish = 0;

WiFiClient espClient;
PubSubClient client(espClient);

String getLightState(float lux) {
  if (lux < LUX_DARK) return "dark";
  else if (lux < LUX_DIM) return "dim";
  else if (lux < LUX_BRIGHT) return "normal";
  else return "bright";
}

void readAndPublishLux() {
  float lux = lightMeter.readLightLevel();

  if (lux < 0) {
    Serial.println("BH1750 읽기 실패!");
    return;
  }

  String lightState = getLightState(lux);

  Serial.printf("조도: %.1f lux (%s)\n", lux, lightState.c_str());

  // 조도값 발행
  char luxStr[10];
  dtostrf(lux, 5, 1, luxStr);
  client.publish(topic_lux, luxStr, true);

  // 조도 상태 발행
  client.publish(topic_lux_state, lightState.c_str(), true);
}

void reconnectMQTT() {
  while (!client.connected()) {
    if (client.connect("esp32_light_sensor")) {
      readAndPublishLux();
    } else {
      delay(5000);
    }
  }
}

void setup() {
  Serial.begin(115200);

  Wire.begin(SDA_PIN, SCL_PIN);

  if (!lightMeter.begin(BH1750::CONTINUOUS_HIGH_RES_MODE)) {
    Serial.println("BH1750 초기화 실패!");
    while (1);
  }
  Serial.println("BH1750 초기화 완료");

  WiFi.begin(ssid, password);
  while (WiFi.status() != WL_CONNECTED) delay(500);

  client.setServer(mqtt_server, 1883);
}

void loop() {
  if (!client.connected()) reconnectMQTT();
  client.loop();

  if (millis() - lastPublish >= PUBLISH_INTERVAL) {
    lastPublish = millis();
    readAndPublishLux();
  }
}
6. MQTT 프로토콜로 기기 연결하기
MQTT(Message Queuing Telemetry Transport)는 IoT에서 가장 많이 쓰이는 경량 메시지 프로토콜이야.
HTTP보다 훨씬 가볍고, 저전력 기기에서도 잘 동작해. 발행(Publish)/구독(Subscribe) 패턴을 사용해. 📨
▶Mosquitto MQTT 브로커 설치 (라즈베리파이)
# 라즈베리파이에 Mosquitto 설치
sudo apt update
sudo apt install -y mosquitto mosquitto-clients

# 서비스 시작 및 자동 시작 설정
sudo systemctl start mosquitto
sudo systemctl enable mosquitto

# 상태 확인
sudo systemctl status mosquitto
# /etc/mosquitto/mosquitto.conf 설정 파일 편집
sudo nano /etc/mosquitto/conf.d/default.conf

# 아래 내용 추가:
listener 1883
allow_anonymous true  # 개발용 (운영 시 반드시 인증 설정!)

# 로그 설정
log_dest file /var/log/mosquitto/mosquitto.log
log_type all

# 저장 후 재시작
sudo systemctl restart mosquitto
# 테스트: 터미널 1 - 구독
mosquitto_sub -h localhost -t "home/#" -v

# 테스트: 터미널 2 - 발행
mosquitto_pub -h localhost -t "home/test" -m "Hello IoT!"

# 조명 제어 테스트
mosquitto_pub -h 192.168.1.100 -t "home/livingroom/light/set" -m "ON"
mosquitto_pub -h 192.168.1.100 -t "home/livingroom/rgb/set" \
  -m '{"state":"ON","brightness":200,"color":{"r":255,"g":100,"b":50}}'
▶MQTT 토픽 설계 규칙
토픽 구조를 잘 설계해야 나중에 관리하기 편해. 일반적으로 이런 구조를 따라:
| 패턴 | 예시 | 설명 |
|---|---|---|
| home/{방}/{기기}/set | home/bedroom/light/set | 제어 명령 (구독) |
| home/{방}/{기기}/state | home/bedroom/light/state | 현재 상태 (발행) |
| home/sensor/{방}/{타입} | home/sensor/kitchen/temperature | 센서 데이터 |
| home/status/{기기ID} | home/status/esp32_01 | 기기 온라인 상태 |
▶Last Will and Testament (LWT) — 기기 오프라인 감지
LWT는 기기가 예기치 않게 연결이 끊겼을 때 브로커가 자동으로 메시지를 발행하는 기능이야.
기기가 오프라인인지 온라인인지 실시간으로 알 수 있어.
// LWT (Last Will and Testament) 설정 예제
// ESP32가 갑자기 연결이 끊기면 브로커가 자동으로 "offline" 메시지 발행

#include <WiFi.h>
#include <PubSubClient.h>

const char* mqtt_server = "192.168.1.100";
const char* device_id = "esp32_livingroom_01";

// LWT 토픽 및 메시지
char lwt_topic[64];
const char* lwt_message = "offline";
const char* online_message = "online";

WiFiClient espClient;
PubSubClient client(espClient);

void reconnectMQTT() {
  // LWT 토픽 생성
  snprintf(lwt_topic, sizeof(lwt_topic), "home/status/%s", device_id);

  while (!client.connected()) {
    // connect() 함수에 LWT 파라미터 추가
    // connect(clientId, username, password, willTopic, willQos, willRetain, willMessage)
    if (client.connect(
          device_id,          // 클라이언트 ID
          NULL,               // 사용자명 (없으면 NULL)
          NULL,               // 비밀번호 (없으면 NULL)
          lwt_topic,          // LWT 토픽
          1,                  // QoS 1
          true,               // retain
          lwt_message         // LWT 메시지
        )) {

      // 연결 성공 시 온라인 상태 발행
      client.publish(lwt_topic, online_message, true);
      Serial.println("MQTT 연결 완료 - 온라인 상태 발행");

      // 토픽 구독
      client.subscribe("home/livingroom/light/set");

    } else {
      delay(5000);
    }
  }
}

void setup() {
  Serial.begin(115200);
  WiFi.begin("YOUR_SSID", "YOUR_PASSWORD");
  while (WiFi.status() != WL_CONNECTED) delay(500);

  client.setServer(mqtt_server, 1883);
  // 콜백 설정...
}

void loop() {
  if (!client.connected()) reconnectMQTT();
  client.loop();
}
- QoS 1: 최소 1회 전달 (중복 가능, 일반적으로 사용)
- QoS 2: 정확히 1회 전달 (가장 안전하지만 느림)
스마트홈에서는 보통 QoS 1을 사용해. 센서 데이터는 QoS 0도 OK.
7. Home Assistant 연동 설정
Home Assistant(HA)는 오픈소스 스마트홈 플랫폼의 끝판왕이야. 🏆
라즈베리파이에 설치하면 수천 가지 기기와 서비스를 통합 관리할 수 있어.
MQTT Discovery 기능을 사용하면 ESP32 기기가 자동으로 HA에 등록돼!
▶Home Assistant 설치 (라즈베리파이)
# Home Assistant OS 설치 방법 (권장)
# 1. https://www.home-assistant.io/installation/ 에서 라즈베리파이용 이미지 다운로드
# 2. Raspberry Pi Imager로 SD카드에 플래싱
# 3. 라즈베리파이 부팅 후 http://homeassistant.local:8123 접속

# 또는 Docker로 설치 (기존 라즈베리파이 OS에서)
docker run -d \
  --name homeassistant \
  --privileged \
  --restart=unless-stopped \
  -e TZ=Asia/Seoul \
  -v /home/pi/homeassistant:/config \
  --network=host \
  ghcr.io/home-assistant/home-assistant:stable
▶MQTT 통합 설정 (configuration.yaml)
HA에서 MQTT 기기를 수동으로 등록하는 방법이야.
configuration.yaml 파일에 기기 정보를 추가해줘.
# /config/configuration.yaml

# MQTT 브로커 설정 (HA UI에서도 설정 가능)
mqtt:
  broker: 192.168.1.100
  port: 1883
  username: ""
  password: ""

# 조명 엔티티 등록
light:
  # 단순 ON/OFF 조명
  - platform: mqtt
    name: "거실 조명"
    unique_id: "livingroom_light_01"
    state_topic: "home/livingroom/light/state"
    command_topic: "home/livingroom/light/set"
    payload_on: "ON"
    payload_off: "OFF"
    retain: true

  # 밝기 조절 가능한 조명
  - platform: mqtt
    name: "침실 조명"
    unique_id: "bedroom_light_01"
    state_topic: "home/bedroom/light/state"
    command_topic: "home/bedroom/light/set"
    brightness_state_topic: "home/bedroom/light/state"
    brightness_command_topic: "home/bedroom/light/set"
    brightness_value_template: "{{ value_json.brightness }}"
    state_value_template: "{{ value_json.state }}"
    on_command_type: "brightness"
    retain: true

  # RGB LED 스트립
  - platform: mqtt
    name: "거실 RGB 스트립"
    unique_id: "livingroom_rgb_01"
    state_topic: "home/livingroom/rgb/state"
    command_topic: "home/livingroom/rgb/set"
    state_value_template: "{{ value_json.state }}"
    brightness_state_topic: "home/livingroom/rgb/state"
    brightness_value_template: "{{ value_json.brightness }}"
    rgb_state_topic: "home/livingroom/rgb/state"
    rgb_value_template: >
      {{ value_json.color.r }},
      {{ value_json.color.g }},
      {{ value_json.color.b }}
    effect_state_topic: "home/livingroom/rgb/state"
    effect_value_template: "{{ value_json.effect }}"
    effect_list:
      - solid
      - rainbow
      - pulse
    retain: true

# 스위치 (전원 제어)
switch:
  - platform: mqtt
    name: "콘센트 1"
    unique_id: "outlet_01"
    state_topic: "home/power/outlet1/state"
    command_topic: "home/power/outlet1/set"
    payload_on: "ON"
    payload_off: "OFF"
    retain: true

  - platform: mqtt
    name: "선풍기"
    unique_id: "fan_01"
    state_topic: "home/power/fan/state"
    command_topic: "home/power/fan/set"
    payload_on: "ON"
    payload_off: "OFF"
    retain: true

# 센서 등록
sensor:
  - platform: mqtt
    name: "거실 온도"
    unique_id: "livingroom_temperature"
    state_topic: "home/sensor/livingroom/temperature"
    unit_of_measurement: "°C"
    device_class: temperature
    value_template: "{{ value | float | round(1) }}"

  - platform: mqtt
    name: "거실 습도"
    unique_id: "livingroom_humidity"
    state_topic: "home/sensor/livingroom/humidity"
    unit_of_measurement: "%"
    device_class: humidity
    value_template: "{{ value | float | round(1) }}"

  - platform: mqtt
    name: "거실 조도"
    unique_id: "livingroom_illuminance"
    state_topic: "home/sensor/livingroom/illuminance"
    unit_of_measurement: "lx"
    device_class: illuminance

# 이진 센서 (PIR 움직임 감지)
binary_sensor:
  - platform: mqtt
    name: "복도 움직임"
    unique_id: "hallway_motion"
    state_topic: "home/sensor/hallway/motion"
    payload_on: "ON"
    payload_off: "OFF"
    device_class: motion
▶MQTT Discovery — 자동 기기 등록
수동으로 configuration.yaml을 편집하는 대신, ESP32에서 특정 형식의 메시지를 발행하면 HA가 자동으로 기기를 인식하는 MQTT Discovery 기능을 사용할 수 있어!
// ESP32 MQTT Discovery 자동 등록 예제
// Home Assistant가 자동으로 기기를 인식함

void publishDiscovery() {
  // 조명 Discovery 메시지
  // 토픽: homeassistant/light/{unique_id}/config

  StaticJsonDocument<512> lightDoc;
  lightDoc["name"] = "거실 조명";
  lightDoc["unique_id"] = "esp32_livingroom_light";
  lightDoc["state_topic"] = "home/livingroom/light/state";
  lightDoc["command_topic"] = "home/livingroom/light/set";
  lightDoc["brightness_state_topic"] = "home/livingroom/light/state";
  lightDoc["brightness_command_topic"] = "home/livingroom/light/set";
  lightDoc["brightness_value_template"] = "{{ value_json.brightness }}";
  lightDoc["state_value_template"] = "{{ value_json.state }}";
  lightDoc["payload_on"] = "ON";
  lightDoc["payload_off"] = "OFF";

  // 기기 정보 (같은 기기의 여러 엔티티를 묶어줌)
  JsonObject device = lightDoc.createNestedObject("device");
  device["identifiers"][0] = "esp32_livingroom_01";
  device["name"] = "거실 ESP32";
  device["model"] = "ESP32 DevKit";
  device["manufacturer"] = "DIY";
  device["sw_version"] = "1.0.0";

  char buffer[512];
  serializeJson(lightDoc, buffer);

  // retain=true 로 발행 (HA 재시작 후에도 유지)
  client.publish(
    "homeassistant/light/esp32_livingroom_light/config",
    buffer,
    true  // retain
  );

  Serial.println("Discovery 메시지 발행 완료!");

  // 센서 Discovery 메시지
  StaticJsonDocument<512> sensorDoc;
  sensorDoc["name"] = "거실 온도";
  sensorDoc["unique_id"] = "esp32_livingroom_temp";
  sensorDoc["state_topic"] = "home/sensor/livingroom/temperature";
  sensorDoc["unit_of_measurement"] = "°C";
  sensorDoc["device_class"] = "temperature";
  sensorDoc["value_template"] = "{{ value | float | round(1) }}";

  JsonObject sensorDevice = sensorDoc.createNestedObject("device");
  sensorDevice["identifiers"][0] = "esp32_livingroom_01";
  sensorDevice["name"] = "거실 ESP32";

  char sensorBuffer[512];
  serializeJson(sensorDoc, sensorBuffer);

  client.publish(
    "homeassistant/sensor/esp32_livingroom_temp/config",
    sensorBuffer,
    true
  );
}
homeassistant/{component}/{object_id}/config- component: light, switch, sensor, binary_sensor, climate 등
- object_id: 고유한 식별자
- 이 토픽으로 JSON 설정을 발행하면 HA가 자동으로 엔티티를 생성해!
▶Home Assistant 자동화 예제
HA의 자동화 기능으로 센서 데이터에 따라 기기를 자동 제어할 수 있어.
# /config/automations.yaml

# 자동화 1: 움직임 감지 시 복도 조명 켜기
- id: "motion_light_hallway"
  alias: "복도 움직임 감지 조명 자동화"
  description: "PIR 센서 감지 시 복도 조명 켜고, 5분 후 자동 끄기"
  trigger:
    - platform: state
      entity_id: binary_sensor.복도_움직임
      to: "on"
  action:
    - service: light.turn_on
      target:
        entity_id: light.복도_조명
      data:
        brightness: 200
    - delay: "00:05:00"  # 5분 대기
    - service: light.turn_off
      target:
        entity_id: light.복도_조명

# 자동화 2: 온도 기반 에어컨 제어
- id: "temp_aircon_control"
  alias: "온도 기반 에어컨 자동 제어"
  trigger:
    - platform: numeric_state
      entity_id: sensor.거실_온도
      above: 28
  condition:
    - condition: time
      after: "09:00:00"
      before: "23:00:00"
  action:
    - service: switch.turn_on
      target:
        entity_id: switch.에어컨

# 자동화 3: 일몰 시 거실 조명 켜기
- id: "sunset_light"
  alias: "일몰 시 거실 조명 자동 켜기"
  trigger:
    - platform: sun
      event: sunset
      offset: "-00:30:00"  # 일몰 30분 전
  condition:
    - condition: state
      entity_id: binary_sensor.거실_움직임
      state: "on"
  action:
    - service: light.turn_on
      target:
        entity_id: light.거실_rgb_스트립
      data:
        brightness: 150
        rgb_color: [255, 200, 100]  # 따뜻한 노란빛
        effect: "solid"

# 자동화 4: 조도 기반 조명 자동 제어
- id: "lux_auto_light"
  alias: "조도 낮을 때 조명 자동 켜기"
  trigger:
    - platform: state
      entity_id: sensor.거실_조도_상태
      to: "dark"
  condition:
    - condition: time
      after: "07:00:00"
      before: "22:00:00"
  action:
    - service: light.turn_on
      target:
        entity_id: light.거실_조명
8. 실전 통합 예제 — 자동화 시나리오 구현
자, 이제 모든 걸 합쳐서 완전한 스마트홈 노드를 만들어보자! 🎯
하나의 ESP32에 온습도 센서, PIR 센서, 조명 제어, 릴레이를 모두 통합한 예제야.
이걸 기반으로 각 방에 하나씩 설치하면 완성형 스마트홈이 돼!
| 핀 | 연결 부품 | 기능 |
|---|---|---|
| GPIO 4 | DHT22 | 온도/습도 측정 |
| GPIO 13 | HC-SR501 PIR | 움직임 감지 |
| GPIO 18 | MOSFET → LED | PWM 밝기 조절 |
| GPIO 5 | WS2812B 데이터 | RGB LED 스트립 |
| GPIO 26 | 릴레이 1 | 전원 제어 1 |
| GPIO 27 | 릴레이 2 | 전원 제어 2 |
| GPIO 21 | BH1750 SDA | I2C 데이터 |
| GPIO 22 | BH1750 SCL | I2C 클럭 |
// ===================================================
// 스마트홈 통합 노드 - ESP32 완전 예제
// 조명 + 전원 + 센서 + MQTT + Home Assistant Discovery
// ===================================================

#include <WiFi.h>
#include <PubSubClient.h>
#include <ArduinoJson.h>
#include <DHT.h>
#include <FastLED.h>
#include <Wire.h>
#include <BH1750.h>

// ===== 설정 =====
const char* WIFI_SSID = "YOUR_WIFI_SSID";
const char* WIFI_PASS = "YOUR_WIFI_PASSWORD";
const char* MQTT_SERVER = "192.168.1.100";
const int   MQTT_PORT = 1883;
const char* DEVICE_ID = "esp32_room01";
const char* ROOM_NAME = "bedroom";  // 방 이름

// ===== 핀 설정 =====
#define DHT_PIN     4
#define PIR_PIN     13
#define DIM_PIN     18   // PWM 조명
#define RGB_PIN     5    // WS2812B
#define RELAY1_PIN  26
#define RELAY2_PIN  27
#define SDA_PIN     21
#define SCL_PIN     22

// ===== LED 설정 =====
#define NUM_LEDS    30
#define DHT_TYPE    DHT22
#define PWM_CH      0
#define PWM_FREQ    5000
#define PWM_RES     8

CRGB leds[NUM_LEDS];
DHT dht(DHT_PIN, DHT_TYPE);
BH1750 lightMeter;

WiFiClient espClient;
PubSubClient mqtt(espClient);

// ===== 상태 변수 =====
struct DeviceState {
  // 조명
  bool dimLight = false;
  int dimBrightness = 128;
  bool rgbLight = false;
  int rgbBrightness = 128;
  int rgbR = 255, rgbG = 255, rgbB = 255;
  String rgbEffect = "solid";

  // 전원
  bool relay1 = false;
  bool relay2 = false;

  // 센서
  float temperature = 0;
  float humidity = 0;
  float lux = 0;
  bool motion = false;
} state;

// ===== MQTT 토픽 생성 헬퍼 =====
String topic(String type, String device, String action) {
  return "home/" + String(ROOM_NAME) + "/" + type + "/" + device + "/" + action;
}

// ===== 상태 발행 함수들 =====
void publishDimLight() {
  StaticJsonDocument<128> doc;
  doc["state"] = state.dimLight ? "ON" : "OFF";
  doc["brightness"] = state.dimBrightness;
  char buf[128]; serializeJson(doc, buf);
  mqtt.publish(topic("light","dim","state").c_str(), buf, true);
}

void publishRGBLight() {
  StaticJsonDocument<256> doc;
  doc["state"] = state.rgbLight ? "ON" : "OFF";
  doc["brightness"] = state.rgbBrightness;
  JsonObject color = doc.createNestedObject("color");
  color["r"] = state.rgbR;
  color["g"] = state.rgbG;
  color["b"] = state.rgbB;
  doc["effect"] = state.rgbEffect;
  char buf[256]; serializeJson(doc, buf);
  mqtt.publish(topic("light","rgb","state").c_str(), buf, true);
}

void publishRelays() {
  mqtt.publish(topic("power","relay1","state").c_str(),
               state.relay1 ? "ON" : "OFF", true);
  mqtt.publish(topic("power","relay2","state").c_str(),
               state.relay2 ? "ON" : "OFF", true);
}

void publishSensors() {
  char buf[10];

  dtostrf(state.temperature, 4, 1, buf);
  mqtt.publish(topic("sensor","temperature","state").c_str(), buf, true);

  dtostrf(state.humidity, 4, 1, buf);
  mqtt.publish(topic("sensor","humidity","state").c_str(), buf, true);

  dtostrf(state.lux, 6, 1, buf);
  mqtt.publish(topic("sensor","illuminance","state").c_str(), buf, true);

  mqtt.publish(topic("sensor","motion","state").c_str(),
               state.motion ? "ON" : "OFF", true);
}

// ===== 하드웨어 제어 함수들 =====
void applyDimLight() {
  int pwm = state.dimLight ? state.dimBrightness : 0;
  ledcWrite(PWM_CH, pwm);
}

void applyRGBLight() {
  if (!state.rgbLight) {
    fill_solid(leds, NUM_LEDS, CRGB::Black);
    FastLED.show();
    return;
  }
  FastLED.setBrightness(state.rgbBrightness);
  if (state.rgbEffect == "solid") {
    fill_solid(leds, NUM_LEDS, CRGB(state.rgbR, state.rgbG, state.rgbB));
    FastLED.show();
  }
  // rainbow, pulse 효과는 loop()에서 처리
}

void applyRelay(int pin, bool state_val) {
  digitalWrite(pin, state_val ? LOW : HIGH);  // LOW 활성화
}

// ===== MQTT 콜백 =====
void mqttCallback(char* topicChar, byte* payload, unsigned int length) {
  String topicStr = String(topicChar);
  String msg = "";
  for (int i = 0; i < length; i++) msg += (char)payload[i];

  // 조명 제어
  if (topicStr == topic("light","dim","set")) {
    StaticJsonDocument<128> doc;
    if (!deserializeJson(doc, msg)) {
      if (doc.containsKey("state"))
        state.dimLight = (String(doc["state"].as<const char*>()) == "ON");
      if (doc.containsKey("brightness"))
        state.dimBrightness = constrain(doc["brightness"].as<int>(), 0, 255);
    } else {
      state.dimLight = (msg == "ON");
    }
    applyDimLight();
    publishDimLight();
  }

  // RGB 제어
  else if (topicStr == topic("light","rgb","set")) {
    StaticJsonDocument<256> doc;
    if (!deserializeJson(doc, msg)) {
      if (doc.containsKey("state"))
        state.rgbLight = (String(doc["state"].as<const char*>()) == "ON");
      if (doc.containsKey("brightness"))
        state.rgbBrightness = constrain(doc["brightness"].as<int>(), 0, 255);
      if (doc.containsKey("color")) {
        state.rgbR = doc["color"]["r"] | 255;
        state.rgbG = doc["color"]["g"] | 255;
        state.rgbB = doc["color"]["b"] | 255;
      }
      if (doc.containsKey("effect"))
        state.rgbEffect = doc["effect"].as<String>();
    }
    applyRGBLight();
    publishRGBLight();
  }

  // 릴레이 제어
  else if (topicStr == topic("power","relay1","set")) {
    state.relay1 = (msg == "ON");
    applyRelay(RELAY1_PIN, state.relay1);
    publishRelays();
  }
  else if (topicStr == topic("power","relay2","set")) {
    state.relay2 = (msg == "ON");
    applyRelay(RELAY2_PIN, state.relay2);
    publishRelays();
  }
}

// ===== MQTT Discovery 발행 =====
void publishDiscovery() {
  // 기기 정보 (공통)
  auto addDevice = [](JsonObject& obj) {
    JsonArray ids = obj.createNestedArray("identifiers");
    ids.add(DEVICE_ID);
    obj["name"] = String("방 스마트노드 (") + ROOM_NAME + ")";
    obj["model"] = "ESP32 SmartNode v1.0";
    obj["manufacturer"] = "DIY SmartHome";
  };

  // 조명 Discovery
  {
    StaticJsonDocument<512> doc;
    doc["name"] = String(ROOM_NAME) + " 조명";
    doc["unique_id"] = String(DEVICE_ID) + "_dim";
    doc["state_topic"] = topic("light","dim","state");
    doc["command_topic"] = topic("light","dim","set");
    doc["state_value_template"] = "{{ value_json.state }}";
    doc["brightness_state_topic"] = topic("light","dim","state");
    doc["brightness_value_template"] = "{{ value_json.brightness }}";
    JsonObject dev = doc.createNestedObject("device");
    addDevice(dev);
    char buf[512]; serializeJson(doc, buf);
    String discTopic = "homeassistant/light/" + String(DEVICE_ID) + "_dim/config";
    mqtt.publish(discTopic.c_str(), buf, true);
  }

  // 온도 센서 Discovery
  {
    StaticJsonDocument<384> doc;
    doc["name"] = String(ROOM_NAME) + " 온도";
    doc["unique_id"] = String(DEVICE_ID) + "_temp";
    doc["state_topic"] = topic("sensor","temperature","state");
    doc["unit_of_measurement"] = "°C";
    doc["device_class"] = "temperature";
    JsonObject dev = doc.createNestedObject("device");
    addDevice(dev);
    char buf[384]; serializeJson(doc, buf);
    String discTopic = "homeassistant/sensor/" + String(DEVICE_ID) + "_temp/config";
    mqtt.publish(discTopic.c_str(), buf, true);
  }

  Serial.println("Discovery 발행 완료!");
}

// ===== MQTT 재연결 =====
void reconnectMQTT() {
  char lwtTopic[64];
  snprintf(lwtTopic, sizeof(lwtTopic), "home/status/%s", DEVICE_ID);

  while (!mqtt.connected()) {
    Serial.print("MQTT 연결 중...");
    if (mqtt.connect(DEVICE_ID, NULL, NULL, lwtTopic, 1, true, "offline")) {
      Serial.println("연결 완료!");
      mqtt.publish(lwtTopic, "online", true);

      // 토픽 구독
      mqtt.subscribe(topic("light","dim","set").c_str());
      mqtt.subscribe(topic("light","rgb","set").c_str());
      mqtt.subscribe(topic("power","relay1","set").c_str());
      mqtt.subscribe(topic("power","relay2","set").c_str());

      // Discovery 발행
      publishDiscovery();

      // 현재 상태 발행
      publishDimLight();
      publishRGBLight();
      publishRelays();
      publishSensors();
    } else {
      Serial.printf("실패 (rc=%d), 5초 후 재시도\n", mqtt.state());
      delay(5000);
    }
  }
}

// ===== 센서 읽기 =====
unsigned long lastSensorRead = 0;
const unsigned long SENSOR_INTERVAL = 30000;

void readSensors() {
  if (millis() - lastSensorRead < SENSOR_INTERVAL) return;
  lastSensorRead = millis();

  float t = dht.readTemperature();
  float h = dht.readHumidity();
  if (!isnan(t) && !isnan(h)) {
    state.temperature = t;
    state.humidity = h;
  }

  float l = lightMeter.readLightLevel();
  if (l >= 0) state.lux = l;

  bool m = digitalRead(PIR_PIN);
  if (m != state.motion) {
    state.motion = m;
    mqtt.publish(topic("sensor","motion","state").c_str(), m ? "ON" : "OFF", true);
  }

  publishSensors();
}

// ===== 효과 처리 =====
unsigned long lastEffect = 0;
int effectHue = 0;
int pulseVal = 0, pulseDir = 1;

void handleEffects() {
  if (!state.rgbLight) return;
  if (millis() - lastEffect < 20) return;
  lastEffect = millis();

  if (state.rgbEffect == "rainbow") {
    for (int i = 0; i < NUM_LEDS; i++)
      leds[i] = CHSV(effectHue + (i * 256 / NUM_LEDS), 255, state.rgbBrightness);
    FastLED.show();
    effectHue++;
  } else if (state.rgbEffect == "pulse") {
    pulseVal += pulseDir * 3;
    if (pulseVal >= 255) { pulseVal = 255; pulseDir = -1; }
    if (pulseVal <= 0)   { pulseVal = 0;   pulseDir = 1;  }
    fill_solid(leds, NUM_LEDS, CRGB(
      map(pulseVal, 0, 255, 0, state.rgbR),
      map(pulseVal, 0, 255, 0, state.rgbG),
      map(pulseVal, 0, 255, 0, state.rgbB)
    ));
    FastLED.show();
  }
}

// ===== setup() =====
void setup() {
  Serial.begin(115200);
  Serial.println("\n🏠 스마트홈 노드 시작!");

  // 핀 초기화
  pinMode(PIR_PIN, INPUT);
  pinMode(RELAY1_PIN, OUTPUT); digitalWrite(RELAY1_PIN, HIGH);
  pinMode(RELAY2_PIN, OUTPUT); digitalWrite(RELAY2_PIN, HIGH);

  // PWM 초기화
  ledcSetup(PWM_CH, PWM_FREQ, PWM_RES);
  ledcAttachPin(DIM_PIN, PWM_CH);
  ledcWrite(PWM_CH, 0);

  // FastLED 초기화
  FastLED.addLeds<WS2812B, RGB_PIN, GRB>(leds, NUM_LEDS);
  FastLED.setBrightness(0);
  fill_solid(leds, NUM_LEDS, CRGB::Black);
  FastLED.show();

  // DHT 초기화
  dht.begin();

  // I2C + BH1750 초기화
  Wire.begin(SDA_PIN, SCL_PIN);
  lightMeter.begin(BH1750::CONTINUOUS_HIGH_RES_MODE);

  // Wi-Fi 연결
  WiFi.begin(WIFI_SSID, WIFI_PASS);
  Serial.print("Wi-Fi 연결 중");
  while (WiFi.status() != WL_CONNECTED) {
    delay(500); Serial.print(".");
  }
  Serial.printf("\nIP: %s\n", WiFi.localIP().toString().c_str());

  // MQTT 설정
  mqtt.setServer(MQTT_SERVER, MQTT_PORT);
  mqtt.setCallback(mqttCallback);
  mqtt.setBufferSize(512);  // 버퍼 크기 증가 (Discovery 메시지용)
}

// ===== loop() =====
void loop() {
  if (!mqtt.connected()) reconnectMQTT();
  mqtt.loop();

  readSensors();    // 센서 읽기
  handleEffects();  // LED 효과 처리
}
9. 보안 고려사항 및 실전 팁
스마트홈을 만들었으면 보안도 신경 써야 해. 보안이 허술하면 해커가 집 안 기기를 마음대로 제어할 수도 있거든! 😱
▶MQTT 인증 설정
# Mosquitto 인증 설정

# 1. 비밀번호 파일 생성
sudo mosquitto_passwd -c /etc/mosquitto/passwd iot_user
# 비밀번호 입력 프롬프트가 나타남

# 2. /etc/mosquitto/conf.d/default.conf 수정
listener 1883
allow_anonymous false           # 익명 접속 차단
password_file /etc/mosquitto/passwd  # 비밀번호 파일 지정

# 3. TLS 암호화 설정 (선택사항, 외부 접속 시 필수)
listener 8883
cafile /etc/mosquitto/certs/ca.crt
certfile /etc/mosquitto/certs/server.crt
keyfile /etc/mosquitto/certs/server.key
require_certificate false

# 재시작
sudo systemctl restart mosquitto
// ESP32에서 MQTT 인증 사용
// connect() 함수에 사용자명/비밀번호 추가

const char* mqtt_user = "iot_user";
const char* mqtt_pass = "your_secure_password";

// reconnectMQTT() 함수에서:
if (client.connect(device_id, mqtt_user, mqtt_pass, lwtTopic, 1, true, "offline")) {
  // 연결 성공
}
▶Wi-Fi 보안 팁
allow_anonymous true로 운영하지 마. 특히 외부에서 접속 가능한 경우에는 TLS 암호화도 적용해.▶ESP32 OTA 업데이트 코드
// ESP32 OTA (Over-The-Air) 업데이트 설정
// 네트워크를 통해 펌웨어를 원격 업데이트

#include <WiFi.h>
#include <ArduinoOTA.h>

void setupOTA() {
  ArduinoOTA.setHostname("esp32-smartnode-01");
  ArduinoOTA.setPassword("ota_password_here");  // OTA 비밀번호

  ArduinoOTA.onStart([]() {
    String type = (ArduinoOTA.getCommand() == U_FLASH) ? "스케치" : "파일시스템";
    Serial.println("OTA 시작: " + type);
  });

  ArduinoOTA.onEnd([]() {
    Serial.println("\nOTA 완료! 재시작...");
  });

  ArduinoOTA.onProgress([](unsigned int progress, unsigned int total) {
    Serial.printf("진행: %u%%\r", (progress / (total / 100)));
  });

  ArduinoOTA.onError([](ota_error_t error) {
    Serial.printf("OTA 오류[%u]: ", error);
    if (error == OTA_AUTH_ERROR) Serial.println("인증 실패");
    else if (error == OTA_BEGIN_ERROR) Serial.println("시작 실패");
    else if (error == OTA_CONNECT_ERROR) Serial.println("연결 실패");
    else if (error == OTA_RECEIVE_ERROR) Serial.println("수신 실패");
    else if (error == OTA_END_ERROR) Serial.println("종료 실패");
  });

  ArduinoOTA.begin();
  Serial.println("OTA 준비 완료");
}

void setup() {
  Serial.begin(115200);
  WiFi.begin("YOUR_SSID", "YOUR_PASS");
  while (WiFi.status() != WL_CONNECTED) delay(500);

  setupOTA();
  // ... 나머지 초기화
}

void loop() {
  ArduinoOTA.handle();  // OTA 처리 (반드시 loop에 포함!)
  // ... 나머지 코드
}
▶WiFiManager — 설정 파일 없이 Wi-Fi 설정
코드에 Wi-Fi 비밀번호를 하드코딩하는 대신, WiFiManager 라이브러리를 사용하면 스마트폰으로 Wi-Fi 설정을 할 수 있어.
// WiFiManager 사용 예제
// 처음 실행 시 AP 모드로 동작, 스마트폰으로 접속해서 Wi-Fi 설정
// 필요 라이브러리: WiFiManager by tzapu

#include <WiFiManager.h>

void setup() {
  Serial.begin(115200);

  WiFiManager wm;

  // 커스텀 파라미터 추가 (MQTT 서버 주소 등)
  WiFiManagerParameter mqtt_server("mqtt", "MQTT 서버 IP", "192.168.1.100", 16);
  wm.addParameter(&mqtt_server);

  // 설정 포털 타임아웃 (180초)
  wm.setConfigPortalTimeout(180);

  // 자동 연결 시도, 실패 시 "SmartHome-Setup" AP 생성
  if (!wm.autoConnect("SmartHome-Setup", "setup1234")) {
    Serial.println("Wi-Fi 연결 실패, 재시작...");
    ESP.restart();
  }

  Serial.println("Wi-Fi 연결 완료!");
  Serial.print("MQTT 서버: ");
  Serial.println(mqtt_server.getValue());

  // MQTT 서버 주소를 NVS에 저장
  // preferences.putString("mqtt_server", mqtt_server.getValue());
}
10. 트러블슈팅 & 자주 묻는 질문
실제로 만들다 보면 이런저런 문제가 생기기 마련이야. 자주 발생하는 문제들을 정리해봤어. 🔧
A: 여러 원인이 있어:
1. client.setKeepAlive(60)으로 킵얼라이브 시간 설정
2. client.loop()가 너무 오래 걸리는 코드 때문에 타임아웃 발생 → delay() 대신 millis() 기반 타이머 사용
3. Wi-Fi 신호 불안정 → WiFi.setAutoReconnect(true) 설정
4. MQTT 버퍼 크기 부족 → client.setBufferSize(512) 또는 더 크게 설정
A: DHT22는 최소 2초 간격으로 읽어야 해. 너무 빠르게 읽으면 NaN이 나와.
또한 데이터 핀에 4.7kΩ 풀업 저항을 VCC와 데이터 핀 사이에 연결해줘.
ESP32의 경우 내부 풀업을 사용할 수도 있어: pinMode(DHT_PIN, INPUT_PULLUP)
A: WS2812B는 GRB 순서야, RGB가 아니야! FastLED에서 COLOR_ORDER GRB로 설정했는지 확인해.
또한 데이터 라인에 330Ω 저항을 직렬로 연결하고, ESP32와 LED 스트립의 GND를 공통 연결했는지 확인해.
A: ESP32 부팅 시 GPIO 핀이 잠깐 HIGH가 되는 현상이야.
LOW 활성화 릴레이를 사용하고, setup()에서 pinMode() 전에 digitalWrite(RELAY_PIN, HIGH)를 먼저 실행해줘.
또는 릴레이 모듈의 IN 핀에 10kΩ 풀업 저항을 연결해서 부팅 시 HIGH 상태를 유지시켜.
A: MQTT LWT(Last Will and Testament)를 설정하고, ESP32가 연결될 때 "online" 메시지를 발행하도록 해.
HA에서 availability_topic을 설정하면 기기 온라인/오프라인 상태를 정확히 표시할 수 있어.
또한 retain: true로 상태 메시지를 발행하면 HA 재시작 후에도 마지막 상태를 유지해.
A: ESP32의 MAC 주소를 클라이언트 ID에 포함시켜:
String clientId = "esp32_" + WiFi.macAddress();
MAC 주소는 기기마다 고유하기 때문에 충돌이 없어.
▶유용한 개발 도구들
| 도구 | 용도 | 링크/설치 |
|---|---|---|
| MQTT Explorer | MQTT 메시지 모니터링 GUI | mqtt-explorer.com |
| PlatformIO | VS Code 기반 ESP32 개발환경 | platformio.org |
| Node-RED | 시각적 자동화 플로우 편집기 | nodered.org |
| ESPHome | YAML 기반 ESP32 펌웨어 생성 | esphome.io |
| Tasmota | ESP8266/32 오픈소스 펌웨어 | tasmota.github.io |
| Fritzing | 회로도 설계 도구 | fritzing.org |
마무리 — 나만의 스마트홈을 완성해봐!
자, 여기까지 왔으면 이제 스마트홈 IoT 제어의 핵심을 다 파악한 거야! 🎊
정리하자면:
처음에는 LED 하나 켜고 끄는 것부터 시작해서, 점점 센서를 추가하고, 자동화 규칙을 만들다 보면 어느새 완전한 스마트홈이 완성돼 있을 거야. 🏠✨
이런 IoT 프로젝트를 혼자 하기 어렵거나, 더 전문적인 도움이 필요하다면 재능넷에서 IoT/임베디드 개발 전문가를 찾아볼 수도 있어. 하드웨어 설계부터 소프트웨어 개발, Home Assistant 커스터마이징까지 다양한 전문가들이 도움을 줄 수 있거든!
자, 이제 납땜 인두 들고 시작해봐! 💪🔥
관련 키워드

댓글 작성
이 글에 대한 여러분의 생각을 들려주세요
로그인이 필요합니다
댓글을 작성하려면 먼저 로그인해주세요.
댓글 0
지식인의 숲 - 지적 재산권 보호 고지
지적 재산권 보호 고지
- 저작권 및 소유권: 본 컨텐츠는 재능넷의 독점 AI 기술로 생성되었으며, 대한민국 저작권법 및 국제 저작권 협약에 의해 보호됩니다.
- AI 생성 컨텐츠의 법적 지위: 본 AI 생성 컨텐츠는 재능넷의 지적 창작물로 인정되며, 관련 법규에 따라 저작권 보호를 받습니다.
- 사용 제한: 재능넷의 명시적 서면 동의 없이 본 컨텐츠를 복제, 수정, 배포, 또는 상업적으로 활용하는 행위는 엄격히 금지됩니다.
- 데이터 수집 금지: 본 컨텐츠에 대한 무단 스크래핑, 크롤링, 및 자동화된 데이터 수집은 법적 제재의 대상이 됩니다.
- AI 학습 제한: 재능넷의 AI 생성 컨텐츠를 타 AI 모델 학습에 무단 사용하는 행위는 금지되며, 이는 지적 재산권 침해로 간주됩니다.





아직 댓글이 없습니다.