
Ver3.5 PHP 웹소켓과 ReactPHP를 활용한 실시간 통신 구현
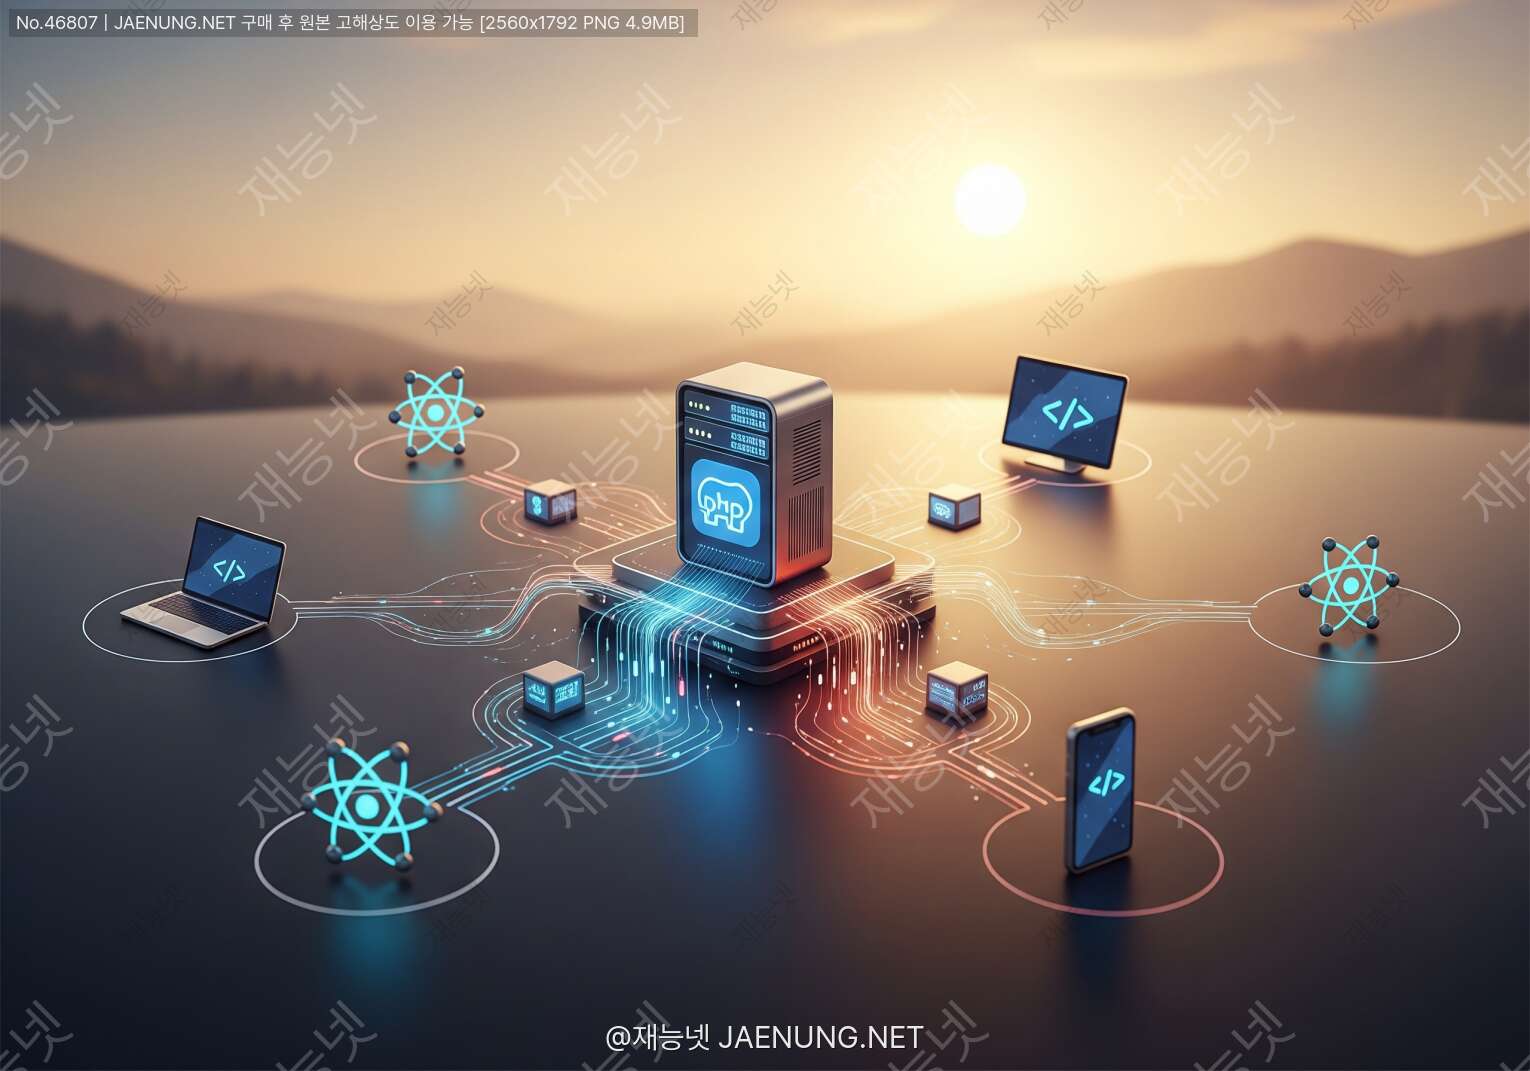
PHP 웹소켓과 ReactPHP를 활용한 실시간 통신 구현
PHP로도 실시간 채팅, 알림, 라이브 대시보드 다 됩니다 🚀
ReactPHP 기반 비동기 웹소켓 서버 완전 정복!
야 솔직히 말하자면... PHP로 실시간 통신 구현한다고 하면 주변에서 "그게 돼?" 하는 반응 많이 받았을 거야 ㅋㅋㅋ 😅
Node.js가 실시간 통신의 왕처럼 군림하던 시절, PHP는 그냥 "요청 오면 응답하고 끝" 하는 전통적인 방식으로만 알려져 있었거든.
근데 ReactPHP가 등장하면서 판이 완전히 바뀌었어! PHP도 이벤트 루프 기반의 비동기 처리가 가능해졌고, 웹소켓 서버도 뚝딱 만들 수 있게 됐지.
🌐 웹소켓(WebSocket)이 뭔데? 기초부터 잡자
HTTP 통신 방식 알지? 클라이언트가 요청 보내면 서버가 응답하고 연결 끊기는 방식. 이걸 단방향 통신이라고 해.
근데 실시간 채팅이나 주식 시세 같은 거 구현하려면 서버에서 클라이언트한테 먼저 데이터를 밀어줘야 하잖아?
그래서 나온 게 바로 WebSocket이야! 🎯
한 번 연결되면 클라이언트나 서버가 명시적으로 끊을 때까지 연결이 유지돼. HTTP처럼 요청마다 새로 연결 안 해도 됨!
② 양방향 통신(Full-Duplex)
클라이언트 → 서버, 서버 → 클라이언트 동시에 데이터 주고받기 가능. 진짜 쌍방향이야.
③ 낮은 오버헤드
HTTP 헤더 없이 프레임 단위로 데이터 전송. 훨씬 가볍고 빠름.
④ 표준 프로토콜
RFC 6455로 표준화된 프로토콜. ws:// 또는 wss://(보안) 스킴 사용.
HTTP Polling vs WebSocket 비교
| 방식 | 동작 원리 | 장점 | 단점 |
|---|---|---|---|
| Short Polling | 주기적으로 HTTP 요청 | 구현 쉬움 | 불필요한 요청 많음, 지연 발생 |
| Long Polling | 응답 올 때까지 연결 유지 | 실시간에 가까움 | 서버 리소스 낭비 |
| SSE | 서버→클라이언트 단방향 | 간단한 구현 | 단방향만 가능 |
| WebSocket ⭐ | 지속 연결 양방향 | 빠름, 효율적, 양방향 | 서버 구현 복잡 |
⚡ ReactPHP란? PHP의 비동기 혁명
PHP는 원래 동기(synchronous) 방식이야. 코드가 위에서 아래로 순서대로 실행되고, 하나 끝나야 다음 거 실행됨.
근데 실시간 서버를 만들려면 이벤트 루프(Event Loop) 기반의 비동기 처리가 필요해.
그게 바로 ReactPHP가 해결해주는 문제야! ㅋㅋㅋ 완전 게임체인저지 🎮
react/stream 스트림 처리 - 데이터 읽기/쓰기
react/socket 소켓 서버/클라이언트
react/http HTTP 서버
react/promise 프로미스 패턴
react/dns 비동기 DNS 조회
react/mysql 비동기 MySQL 쿼리
이벤트 루프가 뭔지 쉽게 이해해보자
카페 알바 비유로 설명해줄게 ☕
동기 방식(기존 PHP): 손님 A 주문 받고 → 커피 다 만들고 → A한테 주고 → 그다음에 손님 B 주문 받음. 한 번에 한 명씩만 처리.
비동기 방식(ReactPHP): 손님 A 주문 받고 → 커피 기계 돌려놓고 → 손님 B 주문 받고 → 손님 C 주문 받고 → 커피 기계 완료 알림 오면 A한테 줌. 동시에 여러 명 처리!
🛠️ 개발 환경 세팅 - 시작이 반이다!
자, 이제 진짜 시작해보자! 환경 세팅부터 차근차근 해볼게. 겁먹지 마 ㅋㅋㅋ 생각보다 어렵지 않아 😎
필요한 것들
Composer PHP 패키지 매니저
ReactPHP 비동기 이벤트 루프
Ratchet WebSocket 라이브러리
Redis (선택사항, 다중 서버 환경)
MySQL/MariaDB (선택사항, 메시지 저장)
Step 1: Composer로 패키지 설치
mkdir php-websocket-demo
cd php-websocket-demo
composer init# Ratchet 설치 (ReactPHP 기반 WebSocket 라이브러리)
composer require cboden/ratchet
# ReactPHP 추가 컴포넌트
composer require react/event-loop
composer require react/socket
composer require react/promise
# 비동기 MySQL (선택사항)
composer require react/mysql
# Redis 클라이언트 (선택사항)
composer require clue/redis-react{
"name": "myapp/websocket-server",
"require": {
"cboden/ratchet": "^0.4",
"react/event-loop": "^1.3",
"react/socket": "^1.12",
"react/promise": "^2.9"
},
"autoload": {
"psr-4": {
"MyApp\\": "src/"
}
}
}php-websocket-demo/
├── src/
│ ├── Chat.php # 채팅 로직
│ ├── Notification.php # 알림 처리
│ └── Dashboard.php # 대시보드
├── bin/
│ └── server.php # 서버 실행 파일
├── public/
│ └── index.html # 클라이언트 페이지
├── vendor/ # Composer 패키지
└── composer.jsonext-sockets, ext-pcntl 확장이 있으면 더 잘 동작해. php -m | grep sockets로 확인해봐!
💻 기본 WebSocket 서버 구현 - 드디어 코딩!
Ratchet은 MessageComponentInterface를 구현하면 WebSocket 서버를 만들 수 있어.
4개의 메서드만 구현하면 되니까 생각보다 심플해! ㅋㅋㅋ 😄
MessageComponentInterface의 4가지 메서드
| 메서드 | 호출 시점 | 역할 |
|---|---|---|
onOpen() |
새 클라이언트 연결 시 | 연결 초기화, 클라이언트 등록 |
onMessage() |
메시지 수신 시 | 메시지 처리 및 브로드캐스트 |
onClose() |
연결 종료 시 | 클라이언트 제거, 정리 작업 |
onError() |
에러 발생 시 | 에러 처리, 연결 종료 |
src/Chat.php - 채팅 서버 구현
<?php

namespace MyApp;

use Ratchet\MessageComponentInterface;
use Ratchet\ConnectionInterface;
use SplObjectStorage;

class Chat implements MessageComponentInterface
{
    // 연결된 클라이언트들을 저장하는 객체 스토리지
    protected SplObjectStorage $clients;

    // 채팅방별 클라이언트 관리
    protected array $rooms = [];

    // 사용자 정보 저장
    protected array $users = [];

    public function __construct()
    {
        $this->clients = new SplObjectStorage();
        echo "🚀 채팅 서버가 시작되었습니다!\n";
    }

    /**
     * 새 클라이언트가 연결될 때 호출
     */
    public function onOpen(ConnectionInterface $conn): void
    {
        // 클라이언트 등록
        $this->clients->attach($conn);

        // 연결 정보 저장
        $this->users[$conn->resourceId] = [
            'id'       => $conn->resourceId,
            'username' => '익명_' . $conn->resourceId,
            'room'     => 'general',
            'conn'     => $conn,
        ];

        // 기본 채팅방에 추가
        $this->rooms['general'][$conn->resourceId] = $conn;

        echo "✅ 새 연결: {$conn->resourceId} (총 {$this->clients->count()}명)\n";

        // 연결 성공 메시지 전송
        $conn->send(json_encode([
            'type'    => 'system',
            'message' => '채팅 서버에 연결되었습니다!',
            'userId'  => $conn->resourceId,
            'time'    => date('H:i:s'),
        ]));

        // 현재 접속자 수 브로드캐스트
        $this->broadcastUserCount();
    }

    /**
     * 메시지 수신 시 호출
     */
    public function onMessage(ConnectionInterface $from, string $msg): void
    {
        // JSON 파싱
        $data = json_decode($msg, true);

        if (!$data || !isset($data['type'])) {
            $from->send(json_encode([
                'type'    => 'error',
                'message' => '잘못된 메시지 형식입니다.',
            ]));
            return;
        }

        // 메시지 타입별 처리
        switch ($data['type']) {
            case 'chat':
                $this->handleChatMessage($from, $data);
                break;

            case 'join_room':
                $this->handleJoinRoom($from, $data);
                break;

            case 'set_username':
                $this->handleSetUsername($from, $data);
                break;

            case 'private_message':
                $this->handlePrivateMessage($from, $data);
                break;

            default:
                $from->send(json_encode([
                    'type'    => 'error',
                    'message' => '알 수 없는 메시지 타입입니다.',
                ]));
        }
    }

    /**
     * 채팅 메시지 처리
     */
    private function handleChatMessage(ConnectionInterface $from, array $data): void
    {
        $userId   = $from->resourceId;
        $user     = $this->users[$userId];
        $room     = $user['room'];
        $message  = htmlspecialchars($data['message'] ?? '', ENT_QUOTES, 'UTF-8');

        if (empty(trim($message))) {
            return;
        }

        $response = json_encode([
            'type'     => 'chat',
            'userId'   => $userId,
            'username' => $user['username'],
            'message'  => $message,
            'room'     => $room,
            'time'     => date('H:i:s'),
        ]);

        // 같은 방의 모든 클라이언트에게 전송
        foreach ($this->rooms[$room] ?? [] as $client) {
            $client->send($response);
        }

        echo "💬 [{$room}] {$user['username']}: {$message}\n";
    }

    /**
     * 채팅방 입장 처리
     */
    private function handleJoinRoom(ConnectionInterface $from, array $data): void
    {
        $userId  = $from->resourceId;
        $newRoom = $data['room'] ?? 'general';
        $oldRoom = $this->users[$userId]['room'];

        // 기존 방에서 제거
        unset($this->rooms[$oldRoom][$userId]);

        // 새 방에 추가
        $this->rooms[$newRoom][$userId] = $from;
        $this->users[$userId]['room']   = $newRoom;

        $from->send(json_encode([
            'type'    => 'system',
            'message' => "'{$newRoom}' 방에 입장했습니다!",
            'room'    => $newRoom,
        ]));

        echo "🚪 {$this->users[$userId]['username']}이(가) {$newRoom}에 입장\n";
    }

    /**
     * 사용자명 설정
     */
    private function handleSetUsername(ConnectionInterface $from, array $data): void
    {
        $userId      = $from->resourceId;
        $newUsername = htmlspecialchars($data['username'] ?? '', ENT_QUOTES, 'UTF-8');

        if (empty(trim($newUsername))) {
            return;
        }

        $oldUsername = $this->users[$userId]['username'];
        $this->users[$userId]['username'] = $newUsername;

        // 방 전체에 알림
        $room = $this->users[$userId]['room'];
        $response = json_encode([
            'type'    => 'system',
            'message' => "{$oldUsername}님이 {$newUsername}(으)로 이름을 변경했습니다.",
            'room'    => $room,
        ]);

        foreach ($this->rooms[$room] ?? [] as $client) {
            $client->send($response);
        }
    }

    /**
     * 1:1 개인 메시지
     */
    private function handlePrivateMessage(ConnectionInterface $from, array $data): void
    {
        $targetId = $data['targetId'] ?? null;
        $message  = htmlspecialchars($data['message'] ?? '', ENT_QUOTES, 'UTF-8');

        if (!$targetId || !isset($this->users[$targetId])) {
            $from->send(json_encode([
                'type'    => 'error',
                'message' => '대상 사용자를 찾을 수 없습니다.',
            ]));
            return;
        }

        $fromUser   = $this->users[$from->resourceId];
        $targetConn = $this->users[$targetId]['conn'];

        $response = json_encode([
            'type'     => 'private_message',
            'from'     => $fromUser['username'],
            'message'  => $message,
            'time'     => date('H:i:s'),
        ]);

        $targetConn->send($response);
        $from->send($response); // 발신자에게도 전송
    }

    /**
     * 연결 종료 시 호출
     */
    public function onClose(ConnectionInterface $conn): void
    {
        $userId = $conn->resourceId;
        $user   = $this->users[$userId] ?? null;

        // 클라이언트 제거
        $this->clients->detach($conn);

        if ($user) {
            // 방에서 제거
            $room = $user['room'];
            unset($this->rooms[$room][$userId]);
            unset($this->users[$userId]);

            // 방 전체에 퇴장 알림
            $response = json_encode([
                'type'    => 'system',
                'message' => "{$user['username']}님이 퇴장했습니다.",
                'room'    => $room,
            ]);

            foreach ($this->rooms[$room] ?? [] as $client) {
                $client->send($response);
            }
        }

        echo "❌ 연결 종료: {$userId} (총 {$this->clients->count()}명)\n";
        $this->broadcastUserCount();
    }

    /**
     * 에러 발생 시 호출
     */
    public function onError(ConnectionInterface $conn, \Exception $e): void
    {
        echo "⚠️ 에러 발생: {$e->getMessage()}\n";
        $conn->close();
    }

    /**
     * 전체 접속자 수 브로드캐스트
     */
    private function broadcastUserCount(): void
    {
        $response = json_encode([
            'type'  => 'user_count',
            'count' => $this->clients->count(),
        ]);

        foreach ($this->clients as $client) {
            $client->send($response);
        }
    }
}🚀 서버 실행 파일 만들기
이제 서버를 실제로 실행하는 파일을 만들어보자. Ratchet의 App 클래스를 사용하면 돼!
bin/server.php
<?php

require dirname(__DIR__) . '/vendor/autoload.php';

use Ratchet\Server\IoServer;
use Ratchet\Http\HttpServer;
use Ratchet\WebSocket\WsServer;
use MyApp\Chat;

// 포트 설정 (환경변수 또는 기본값 8080)
$port = (int)($_ENV['WS_PORT'] ?? 8080);

echo "🌐 WebSocket 서버 시작 중...\n";
echo "📡 포트: {$port}\n";
echo "⏰ 시작 시간: " . date('Y-m-d H:i:s') . "\n\n";

// 서버 생성
$server = IoServer::factory(
    new HttpServer(
        new WsServer(
            new Chat()
        )
    ),
    $port
);

echo "✅ 서버가 성공적으로 시작되었습니다!\n";
echo "🔗 ws://localhost:{$port} 에서 대기 중...\n\n";

// 이벤트 루프 실행 (무한 루프)
$server->run();
서버 실행 명령어
# 기본 실행
php bin/server.php

# 포트 지정
WS_PORT=9090 php bin/server.php

# 백그라운드 실행 (Linux/Mac)
nohup php bin/server.php > logs/server.log 2>&1 &

# 프로세스 확인
ps aux | grep server.php🖥️ 클라이언트(브라우저) 구현
서버만 있으면 뭐해 ㅋㅋㅋ 클라이언트도 만들어야지! 브라우저의 WebSocket API를 사용해서 연결해보자 😄
public/index.html - 채팅 클라이언트
<!DOCTYPE html>
<html lang="ko">
<head>
    <meta charset="UTF-8">
    <meta name="viewport" content="width=device-width, initial-scale=1.0">
    <title>PHP WebSocket 채팅</title>
    <style>
        * { box-sizing: border-box; margin: 0; padding: 0; }
        body { font-family: 'Noto Sans KR', sans-serif; background: #f0f4f8; }
        .container { max-width: 800px; margin: 20px auto; padding: 0 16px; }
        .chat-box { background: #fff; border-radius: 16px; overflow: hidden;
                    box-shadow: 0 4px 20px rgba(0,0,0,0.1); }
        .chat-header { background: #4a90b8; color: #fff; padding: 16px 20px;
                       display: flex; justify-content: space-between; align-items: center; }
        .chat-messages { height: 400px; overflow-y: auto; padding: 16px; }
        .message { margin-bottom: 12px; }
        .message.system { text-align: center; color: #888; font-size: 0.85em; }
        .message.mine { text-align: right; }
        .message.mine .bubble { background: #4a90b8; color: #fff; }
        .bubble { display: inline-block; background: #f0f4f8; border-radius: 12px;
                  padding: 8px 14px; max-width: 70%; word-break: break-word; }
        .username { font-size: 0.8em; color: #888; margin-bottom: 4px; }
        .chat-input { display: flex; gap: 8px; padding: 16px; border-top: 1px solid #eee; }
        .chat-input input { flex: 1; padding: 10px 14px; border: 1px solid #ddd;
                            border-radius: 8px; font-size: 1em; }
        .chat-input button { padding: 10px 20px; background: #4a90b8; color: #fff;
                             border: none; border-radius: 8px; cursor: pointer; }
        .status { width: 10px; height: 10px; border-radius: 50%;
                  background: #ff6b6b; display: inline-block; margin-right: 6px; }
        .status.connected { background: #7ac99a; }
    </style>
</head>
<body>
    <div class="container">
        <div class="chat-box">
            <div class="chat-header">
                <span><span class="status" id="status"></span>PHP WebSocket 채팅</span>
                <span id="userCount">0명 접속 중</span>
            </div>
            <div class="chat-messages" id="messages"></div>
            <div class="chat-input">
                <input type="text" id="username" placeholder="닉네임" style="max-width:120px">
                <input type="text" id="messageInput" placeholder="메시지를 입력하세요...">
                <button onclick="sendMessage()">전송</button>
            </div>
        </div>
    </div>

    <script>
        let ws = null;
        let myUserId = null;
        let reconnectTimer = null;
        const WS_URL = 'ws://localhost:8080';

        function connect() {
            ws = new WebSocket(WS_URL);

            ws.onopen = function() {
                console.log('✅ WebSocket 연결 성공!');
                document.getElementById('status').classList.add('connected');
                clearTimeout(reconnectTimer);
            };

            ws.onmessage = function(event) {
                const data = JSON.parse(event.data);
                handleMessage(data);
            };

            ws.onclose = function() {
                console.log('❌ 연결 종료. 재연결 시도...');
                document.getElementById('status').classList.remove('connected');
                // 3초 후 재연결 시도
                reconnectTimer = setTimeout(connect, 3000);
            };

            ws.onerror = function(error) {
                console.error('⚠️ WebSocket 에러:', error);
            };
        }

        function handleMessage(data) {
            switch(data.type) {
                case 'system':
                    if (data.userId) myUserId = data.userId;
                    addSystemMessage(data.message);
                    break;
                case 'chat':
                    addChatMessage(data);
                    break;
                case 'user_count':
                    document.getElementById('userCount').textContent =
                        data.count + '명 접속 중';
                    break;
                case 'error':
                    console.error('서버 에러:', data.message);
                    break;
            }
        }

        function addChatMessage(data) {
            const messages = document.getElementById('messages');
            const div = document.createElement('div');
            div.className = 'message' + (data.userId == myUserId ? ' mine' : '');
            div.innerHTML = `
                <div class="username">${data.username} · ${data.time}</div>
                <div class="bubble">${data.message}</div>
            `;
            messages.appendChild(div);
            messages.scrollTop = messages.scrollHeight;
        }

        function addSystemMessage(msg) {
            const messages = document.getElementById('messages');
            const div = document.createElement('div');
            div.className = 'message system';
            div.textContent = msg;
            messages.appendChild(div);
            messages.scrollTop = messages.scrollHeight;
        }

        function sendMessage() {
            const input = document.getElementById('messageInput');
            const usernameInput = document.getElementById('username');
            const message = input.value.trim();

            if (!message || !ws || ws.readyState !== WebSocket.OPEN) return;

            // 닉네임 설정
            if (usernameInput.value.trim()) {
                ws.send(JSON.stringify({
                    type: 'set_username',
                    username: usernameInput.value.trim()
                }));
            }

            // 메시지 전송
            ws.send(JSON.stringify({
                type: 'chat',
                message: message
            }));

            input.value = '';
        }

        // 엔터키로 전송
        document.getElementById('messageInput').addEventListener('keypress', function(e) {
            if (e.key === 'Enter') sendMessage();
        });

        // 연결 시작
        connect();
    </script>
</body>
</html>🔔 고급 기능: 실시간 알림 시스템 구현
채팅만 하면 심심하지 ㅋㅋㅋ 실제 서비스에서 많이 쓰는 실시간 알림 시스템도 만들어보자!
재능넷 같은 플랫폼에서도 "새 주문이 들어왔어요!", "메시지가 왔어요!" 같은 알림이 실시간으로 오잖아? 그게 바로 이런 방식으로 구현되는 거야 😎
src/Notification.php
<?php

namespace MyApp;

use Ratchet\MessageComponentInterface;
use Ratchet\ConnectionInterface;
use SplObjectStorage;

class Notification implements MessageComponentInterface
{
    protected SplObjectStorage $clients;

    // 사용자 ID별 연결 매핑
    protected array $userConnections = [];

    // 구독 채널별 연결 관리
    protected array $channels = [];

    public function __construct()
    {
        $this->clients = new SplObjectStorage();
    }

    public function onOpen(ConnectionInterface $conn): void
    {
        $this->clients->attach($conn);

        // 쿼리스트링에서 인증 토큰 파싱
        $queryString = $conn->httpRequest->getUri()->getQuery();
        parse_str($queryString, $params);

        $token  = $params['token'] ?? null;
        $userId = $this->validateToken($token);

        if (!$userId) {
            $conn->send(json_encode([
                'type'    => 'error',
                'message' => '인증이 필요합니다.',
            ]));
            $conn->close();
            return;
        }

        // 사용자 연결 등록
        $this->userConnections[$userId] = $conn;
        $conn->userId = $userId;

        // 기본 채널 구독
        $this->subscribeChannel($conn, "user.{$userId}");

        $conn->send(json_encode([
            'type'   => 'connected',
            'userId' => $userId,
        ]));

        echo "🔔 알림 서버 연결: 사용자 {$userId}\n";
    }

    public function onMessage(ConnectionInterface $from, string $msg): void
    {
        $data = json_decode($msg, true);

        switch ($data['type'] ?? '') {
            case 'subscribe':
                // 채널 구독
                $channel = $data['channel'] ?? '';
                if ($this->canSubscribe($from->userId, $channel)) {
                    $this->subscribeChannel($from, $channel);
                    $from->send(json_encode([
                        'type'    => 'subscribed',
                        'channel' => $channel,
                    ]));
                }
                break;

            case 'unsubscribe':
                // 채널 구독 해제
                $channel = $data['channel'] ?? '';
                $this->unsubscribeChannel($from, $channel);
                break;

            case 'ping':
                // 연결 유지 확인
                $from->send(json_encode(['type' => 'pong']));
                break;
        }
    }

    /**
     * 특정 사용자에게 알림 전송 (외부에서 호출)
     */
    public function sendToUser(int $userId, array $notification): void
    {
        if (isset($this->userConnections[$userId])) {
            $conn = $this->userConnections[$userId];
            $conn->send(json_encode([
                'type'         => 'notification',
                'notification' => $notification,
                'time'         => date('Y-m-d H:i:s'),
            ]));
        }
    }

    /**
     * 특정 채널에 브로드캐스트
     */
    public function broadcastToChannel(string $channel, array $data): void
    {
        if (!isset($this->channels[$channel])) {
            return;
        }

        $message = json_encode([
            'type'    => 'broadcast',
            'channel' => $channel,
            'data'    => $data,
            'time'    => date('Y-m-d H:i:s'),
        ]);

        foreach ($this->channels[$channel] as $conn) {
            $conn->send($message);
        }

        echo "📢 채널 [{$channel}] 브로드캐스트: " . count($this->channels[$channel]) . "명\n";
    }

    /**
     * 채널 구독
     */
    private function subscribeChannel(ConnectionInterface $conn, string $channel): void
    {
        if (!isset($this->channels[$channel])) {
            $this->channels[$channel] = [];
        }
        $this->channels[$channel][$conn->resourceId] = $conn;
    }

    /**
     * 채널 구독 해제
     */
    private function unsubscribeChannel(ConnectionInterface $conn, string $channel): void
    {
        unset($this->channels[$channel][$conn->resourceId]);
    }

    /**
     * 구독 권한 확인
     */
    private function canSubscribe(int $userId, string $channel): bool
    {
        // 자신의 채널은 항상 구독 가능
        if ($channel === "user.{$userId}") {
            return true;
        }

        // 공개 채널 구독 가능
        if (str_starts_with($channel, 'public.')) {
            return true;
        }

        // 그 외 권한 체크 로직 추가
        return false;
    }

    /**
     * 토큰 검증 (실제로는 JWT 검증 등 구현)
     */
    private function validateToken(?string $token): ?int
    {
        if (!$token) return null;

        // 실제 구현에서는 JWT 검증 또는 DB 조회
        // 여기서는 예시로 간단히 처리
        // return JWTHelper::getUserId($token);

        return 1; // 테스트용
    }

    public function onClose(ConnectionInterface $conn): void
    {
        $this->clients->detach($conn);

        if (isset($conn->userId)) {
            unset($this->userConnections[$conn->userId]);

            // 모든 채널에서 제거
            foreach ($this->channels as $channel => &$connections) {
                unset($connections[$conn->resourceId]);
            }
        }

        echo "🔕 알림 서버 연결 종료: {$conn->resourceId}\n";
    }

    public function onError(ConnectionInterface $conn, \Exception $e): void
    {
        echo "⚠️ 에러: {$e->getMessage()}\n";
        $conn->close();
    }
}
⏱️ 타이머 활용 - 주기적 작업 처리
ReactPHP의 이벤트 루프를 직접 활용하면 타이머 기능도 쓸 수 있어!
실시간 대시보드에서 주기적으로 데이터를 업데이트하거나, 하트비트(heartbeat)를 보내는 데 유용해 😊
src/Dashboard.php - 실시간 대시보드
<?php

namespace MyApp;

use Ratchet\MessageComponentInterface;
use Ratchet\ConnectionInterface;
use React\EventLoop\LoopInterface;
use SplObjectStorage;

class Dashboard implements MessageComponentInterface
{
    protected SplObjectStorage $clients;
    protected LoopInterface $loop;

    // 대시보드 데이터 (실제로는 DB에서 가져옴)
    protected array $metrics = [
        'visitors'    => 0,
        'orders'      => 0,
        'revenue'     => 0,
        'activeUsers' => 0,
    ];

    public function __construct(LoopInterface $loop)
    {
        $this->clients = new SplObjectStorage();
        $this->loop    = $loop;

        // 1초마다 메트릭 업데이트 및 브로드캐스트
        $this->loop->addPeriodicTimer(1.0, function() {
            $this->updateMetrics();
            $this->broadcastMetrics();
        });

        // 30초마다 하트비트 전송
        $this->loop->addPeriodicTimer(30.0, function() {
            $this->sendHeartbeat();
        });

        echo "📊 대시보드 서버 시작!\n";
    }

    public function onOpen(ConnectionInterface $conn): void
    {
        $this->clients->attach($conn);

        // 연결 즉시 현재 메트릭 전송
        $conn->send(json_encode([
            'type'    => 'metrics',
            'data'    => $this->metrics,
            'time'    => date('H:i:s'),
        ]));

        echo "📈 대시보드 연결: {$conn->resourceId}\n";
    }

    public function onMessage(ConnectionInterface $from, string $msg): void
    {
        $data = json_decode($msg, true);

        // 특정 메트릭 구독 요청 처리
        if (($data['type'] ?? '') === 'subscribe_metric') {
            $from->subscribedMetrics = $data['metrics'] ?? [];
        }
    }

    /**
     * 메트릭 업데이트 (실제로는 DB 쿼리)
     */
    private function updateMetrics(): void
    {
        // 실제 구현에서는 DB에서 데이터 가져오기
        $this->metrics = [
            'visitors'    => rand(100, 500),
            'orders'      => rand(10, 50),
            'revenue'     => rand(100000, 500000),
            'activeUsers' => $this->clients->count(),
            'timestamp'   => time(),
        ];
    }

    /**
     * 모든 클라이언트에 메트릭 브로드캐스트
     */
    private function broadcastMetrics(): void
    {
        if ($this->clients->count() === 0) return;

        $message = json_encode([
            'type' => 'metrics',
            'data' => $this->metrics,
            'time' => date('H:i:s'),
        ]);

        foreach ($this->clients as $client) {
            $client->send($message);
        }
    }

    /**
     * 하트비트 전송 (연결 유지 확인)
     */
    private function sendHeartbeat(): void
    {
        $message = json_encode(['type' => 'heartbeat', 'time' => time()]);

        foreach ($this->clients as $client) {
            $client->send($message);
        }
    }

    public function onClose(ConnectionInterface $conn): void
    {
        $this->clients->detach($conn);
        echo "📉 대시보드 연결 종료: {$conn->resourceId}\n";
    }

    public function onError(ConnectionInterface $conn, \Exception $e): void
    {
        echo "⚠️ 에러: {$e->getMessage()}\n";
        $conn->close();
    }
}

// 대시보드 서버 실행 (별도 파일에서)
// bin/dashboard.php
/*
require dirname(__DIR__) . '/vendor/autoload.php';

use Ratchet\Server\IoServer;
use Ratchet\Http\HttpServer;
use Ratchet\WebSocket\WsServer;
use React\EventLoop\Loop;
use MyApp\Dashboard;

$loop = Loop::get();

$server = new IoServer(
    new HttpServer(
        new WsServer(
            new Dashboard($loop)
        )
    ),
    new \React\Socket\SocketServer('0.0.0.0:8081', [], $loop),
    $loop
);

$server->run();
*/addPeriodicTimer로 주기적 작업, addTimer로 일회성 지연 실행 다 가능해. Node.js의 setInterval/setTimeout이랑 완전 비슷한 개념이야 ㅋㅋㅋ
🔴 Redis Pub/Sub으로 다중 서버 동기화
서버가 여러 대면 어떻게 해? 서버 A에 연결된 클라이언트한테 서버 B에서 메시지를 보내야 할 때 문제가 생기잖아!
이걸 해결하는 게 바로 Redis Pub/Sub이야. 서버들이 Redis를 통해 메시지를 주고받는 방식! 🎯
<?php

namespace MyApp;

use Ratchet\MessageComponentInterface;
use Ratchet\ConnectionInterface;
use React\EventLoop\LoopInterface;
use Clue\React\Redis\RedisClient;
use SplObjectStorage;

class ChatWithRedis implements MessageComponentInterface
{
    protected SplObjectStorage $clients;
    protected LoopInterface $loop;
    protected ?RedisClient $publisher = null;
    protected ?RedisClient $subscriber = null;
    protected array $users = [];

    public function __construct(LoopInterface $loop)
    {
        $this->clients = new SplObjectStorage();
        $this->loop    = $loop;

        $this->setupRedis();
    }

    /**
     * Redis 연결 설정
     */
    private function setupRedis(): void
    {
        $factory = new \Clue\React\Redis\Factory($this->loop);

        // Publisher 연결
        $factory->createClient('redis://127.0.0.1:6379')->then(
            function(RedisClient $client) {
                $this->publisher = $client;
                echo "✅ Redis Publisher 연결 성공\n";
            },
            function(\Exception $e) {
                echo "❌ Redis Publisher 연결 실패: {$e->getMessage()}\n";
            }
        );

        // Subscriber 연결 (별도 연결 필요!)
        $factory->createClient('redis://127.0.0.1:6379')->then(
            function(RedisClient $client) {
                $this->subscriber = $client;
                echo "✅ Redis Subscriber 연결 성공\n";

                // 채팅 채널 구독
                $this->subscriber->subscribe('chat.general', 'chat.room1', 'chat.room2');

                // 메시지 수신 처리
                $this->subscriber->on('message', function($channel, $message) {
                    $this->handleRedisMessage($channel, $message);
                });
            },
            function(\Exception $e) {
                echo "❌ Redis Subscriber 연결 실패: {$e->getMessage()}\n";
            }
        );
    }

    /**
     * Redis에서 메시지 수신 시 처리
     */
    private function handleRedisMessage(string $channel, string $message): void
    {
        $data = json_decode($message, true);

        // 채널에 해당하는 방 이름 추출
        $room = str_replace('chat.', '', $channel);

        // 해당 방의 모든 클라이언트에게 전송
        foreach ($this->users as $userId => $user) {
            if ($user['room'] === $room) {
                $user['conn']->send($message);
            }
        }
    }

    public function onOpen(ConnectionInterface $conn): void
    {
        $this->clients->attach($conn);
        $this->users[$conn->resourceId] = [
            'id'   => $conn->resourceId,
            'room' => 'general',
            'conn' => $conn,
        ];
    }

    public function onMessage(ConnectionInterface $from, string $msg): void
    {
        $data = json_decode($msg, true);

        if (($data['type'] ?? '') === 'chat') {
            $user    = $this->users[$from->resourceId];
            $room    = $user['room'];
            $channel = "chat.{$room}";

            $payload = json_encode([
                'type'    => 'chat',
                'userId'  => $from->resourceId,
                'message' => htmlspecialchars($data['message'] ?? ''),
                'room'    => $room,
                'time'    => date('H:i:s'),
                'server'  => gethostname(), // 어느 서버에서 왔는지
            ]);

            // Redis에 Publish (다른 서버들도 받을 수 있도록)
            if ($this->publisher) {
                $this->publisher->publish($channel, $payload);
            }
        }
    }

    public function onClose(ConnectionInterface $conn): void
    {
        $this->clients->detach($conn);
        unset($this->users[$conn->resourceId]);
    }

    public function onError(ConnectionInterface $conn, \Exception $e): void
    {
        echo "⚠️ 에러: {$e->getMessage()}\n";
        $conn->close();
    }
}🌐 Nginx 리버스 프록시 설정
실제 서비스에서는 WebSocket 서버를 직접 외부에 노출하지 않고 Nginx를 앞에 두는 게 일반적이야.
SSL 처리도 Nginx에서 하고, WebSocket 연결을 내부 서버로 프록시하는 방식! 😎
/etc/nginx/sites-available/websocket.conf
# WebSocket 업스트림 서버 설정
upstream websocket_servers {
    # 여러 WebSocket 서버 로드밸런싱
    # ip_hash는 같은 클라이언트가 같은 서버로 연결되도록 보장
    ip_hash;
    server 127.0.0.1:8080;
    server 127.0.0.1:8081;
    server 127.0.0.1:8082;
}

server {
    listen 80;
    listen 443 ssl http2;
    server_name ws.example.com;

    # SSL 설정
    ssl_certificate     /etc/ssl/certs/example.com.crt;
    ssl_certificate_key /etc/ssl/private/example.com.key;
    ssl_protocols       TLSv1.2 TLSv1.3;

    # HTTP → HTTPS 리다이렉트
    if ($scheme = http) {
        return 301 https://$server_name$request_uri;
    }

    # WebSocket 프록시 설정
    location /ws {
        proxy_pass http://websocket_servers;

        # WebSocket 업그레이드 헤더 설정 (필수!)
        proxy_http_version 1.1;
        proxy_set_header Upgrade $http_upgrade;
        proxy_set_header Connection "upgrade";

        # 실제 클라이언트 IP 전달
        proxy_set_header X-Real-IP $remote_addr;
        proxy_set_header X-Forwarded-For $proxy_add_x_forwarded_for;
        proxy_set_header Host $host;

        # 타임아웃 설정 (WebSocket은 오래 연결 유지)
        proxy_read_timeout  3600s;
        proxy_send_timeout  3600s;
        proxy_connect_timeout 60s;

        # 버퍼링 비활성화 (실시간 전송을 위해)
        proxy_buffering off;
    }

    # 일반 HTTP 요청
    location / {
        root /var/www/html/public;
        index index.html;
        try_files $uri $uri/ =404;
    }
}
proxy_http_version 1.1과 Upgrade, Connection 헤더 설정은 필수야! 이게 없으면 WebSocket 핸드셰이크가 실패해.
🔧 Supervisor로 프로세스 관리
서버가 죽으면 어떡해? ㅋㅋㅋ 자동으로 재시작해주는 프로세스 매니저가 필요해!
Supervisor를 사용하면 PHP WebSocket 서버를 데몬으로 관리할 수 있어 😊
/etc/supervisor/conf.d/websocket.conf
[program:php-websocket]
; 실행 명령어
command=php /var/www/html/bin/server.php

; 작업 디렉토리
directory=/var/www/html

; 자동 시작
autostart=true

; 비정상 종료 시 자동 재시작
autorestart=true

; 재시작 전 대기 시간 (초)
startsecs=5

; 최대 재시작 횟수
startretries=10

; 실행 사용자
user=www-data

; 로그 설정
stdout_logfile=/var/log/supervisor/websocket.log
stdout_logfile_maxbytes=50MB
stdout_logfile_backups=10
stderr_logfile=/var/log/supervisor/websocket-error.log
stderr_logfile_maxbytes=50MB

; 환경 변수
environment=WS_PORT="8080",APP_ENV="production"

; 프로세스 그룹 (여러 인스턴스 실행 시)
; numprocs=3
; process_name=%(program_name)s_%(process_num)02d
Supervisor 명령어
# 설정 다시 읽기
sudo supervisorctl reread
sudo supervisorctl update

# 서버 시작/중지/재시작
sudo supervisorctl start php-websocket
sudo supervisorctl stop php-websocket
sudo supervisorctl restart php-websocket

# 상태 확인
sudo supervisorctl status

# 로그 실시간 확인
sudo supervisorctl tail -f php-websocket
🔒 WebSocket 보안 - 이거 빠뜨리면 큰일나!
실시간 통신 구현했다고 끝이 아니야! 보안 처리 안 하면 진짜 위험해 ㅋㅋㅋ 😱
WebSocket 서버에서 꼭 챙겨야 할 보안 사항들 정리해줄게.
허용된 도메인에서만 연결 가능하도록 Origin 헤더 검증 필수!
② 인증 토큰 검증
연결 시 JWT 토큰이나 세션 토큰으로 사용자 인증
③ 메시지 크기 제한
너무 큰 메시지로 서버 과부하 방지
④ Rate Limiting
초당 메시지 수 제한으로 스팸/DDoS 방지
⑤ 입력값 검증 및 이스케이프
XSS 방지를 위한 htmlspecialchars 처리
⑥ WSS(WebSocket Secure) 사용
SSL/TLS 암호화 통신 필수 (wss://)
Origin 검증 구현
<?php

namespace MyApp;

use Ratchet\MessageComponentInterface;
use Ratchet\ConnectionInterface;
use Ratchet\Http\HttpServerInterface;
use Psr\Http\Message\RequestInterface;

class SecureChat implements MessageComponentInterface, HttpServerInterface
{
    // 허용된 Origin 목록
    protected array $allowedOrigins = [
        'https://example.com',
        'https://www.example.com',
        'http://localhost:3000', // 개발 환경
    ];

    // Rate Limiting: 사용자별 메시지 카운트
    protected array $messageCount = [];
    protected int $maxMessagesPerSecond = 10;

    /**
     * HTTP 요청 처리 (WebSocket 핸드셰이크 전)
     */
    public function onOpen(ConnectionInterface $conn, RequestInterface $request = null): void
    {
        // Origin 검증
        $origin = $request ? $request->getHeaderLine('Origin') : '';

        if (!$this->isOriginAllowed($origin)) {
            echo "🚫 허용되지 않은 Origin: {$origin}\n";
            $conn->close();
            return;
        }

        // 토큰 검증
        $queryString = $request ? $request->getUri()->getQuery() : '';
        parse_str($queryString, $params);
        $token = $params['token'] ?? '';

        if (!$this->validateToken($token)) {
            $conn->send(json_encode([
                'type'    => 'error',
                'message' => '인증 실패',
            ]));
            $conn->close();
            return;
        }

        // Rate Limiting 초기화
        $this->messageCount[$conn->resourceId] = [
            'count'     => 0,
            'resetTime' => time() + 1,
        ];

        echo "✅ 보안 연결 성공: {$conn->resourceId}\n";
    }

    public function onMessage(ConnectionInterface $from, string $msg): void
    {
        // Rate Limiting 체크
        if (!$this->checkRateLimit($from)) {
            $from->send(json_encode([
                'type'    => 'error',
                'message' => '메시지 전송 속도가 너무 빠릅니다.',
            ]));
            return;
        }

        // 메시지 크기 제한 (10KB)
        if (strlen($msg) > 10240) {
            $from->send(json_encode([
                'type'    => 'error',
                'message' => '메시지가 너무 큽니다.',
            ]));
            return;
        }

        // JSON 파싱 검증
        $data = json_decode($msg, true);
        if (json_last_error() !== JSON_ERROR_NONE) {
            $from->send(json_encode([
                'type'    => 'error',
                'message' => '잘못된 JSON 형식입니다.',
            ]));
            return;
        }

        // 실제 메시지 처리...
    }

    /**
     * Origin 허용 여부 확인
     */
    private function isOriginAllowed(string $origin): bool
    {
        if (empty($origin)) return false;
        return in_array($origin, $this->allowedOrigins, true);
    }

    /**
     * Rate Limiting 체크
     */
    private function checkRateLimit(ConnectionInterface $conn): bool
    {
        $id = $conn->resourceId;

        if (!isset($this->messageCount[$id])) {
            return true;
        }

        $now = time();

        // 1초가 지났으면 카운트 리셋
        if ($now >= $this->messageCount[$id]['resetTime']) {
            $this->messageCount[$id] = [
                'count'     => 0,
                'resetTime' => $now + 1,
            ];
        }

        $this->messageCount[$id]['count']++;

        return $this->messageCount[$id]['count'] <= $this->maxMessagesPerSecond;
    }

    /**
     * JWT 토큰 검증
     */
    private function validateToken(string $token): bool
    {
        if (empty($token)) return false;

        // 실제 구현에서는 JWT 라이브러리 사용
        // try {
        //     $decoded = JWT::decode($token, new Key($secretKey, 'HS256'));
        //     return true;
        // } catch (\Exception $e) {
        //     return false;
        // }

        return strlen($token) > 10; // 테스트용
    }

    public function onClose(ConnectionInterface $conn): void
    {
        unset($this->messageCount[$conn->resourceId]);
    }

    public function onError(ConnectionInterface $conn, \Exception $e): void
    {
        $conn->close();
    }
}
⚡ 성능 최적화 팁
서버 만들었으면 이제 빠르게 만들어야지! ㅋㅋㅋ 성능 최적화 꿀팁들 알려줄게 🍯
연결이 끊어진 클라이언트 참조를 즉시 제거해야 메모리 누수 방지 가능.
unset() 적극 활용!② JSON 처리 최적화
json_encode/json_decode는 비용이 있어. 자주 쓰는 응답은 미리 인코딩해서 캐싱.③ 비동기 DB 쿼리
react/mysql로 비동기 DB 쿼리 사용. 동기 쿼리는 이벤트 루프를 블로킹함!④ 메시지 배치 처리
여러 클라이언트에게 같은 메시지 보낼 때 한 번만 인코딩하고 재사용.
⑤ 연결 수 제한
서버당 최대 연결 수 설정으로 과부하 방지. 보통 서버 스펙에 따라 1000~10000개.
비동기 MySQL 쿼리 예시
<?php

use React\MySQL\Factory as MySQLFactory;
use React\MySQL\QueryResult;
use React\EventLoop\Loop;

$loop    = Loop::get();
$factory = new MySQLFactory($loop);

// 비동기 MySQL 연결
$connection = $factory->createLazyConnection(
    'user:password@localhost/chatdb'
);

// 비동기 쿼리 실행 (이벤트 루프를 블로킹하지 않음!)
$connection->query(
    'SELECT * FROM messages WHERE room = ? ORDER BY created_at DESC LIMIT 50',
    ['general']
)->then(
    function(QueryResult $result) {
        $messages = $result->resultRows;
        echo "✅ 메시지 " . count($messages) . "개 조회 완료\n";

        // 클라이언트에게 전송...
        foreach ($messages as $msg) {
            // $conn->send(json_encode($msg));
        }
    },
    function(\Exception $e) {
        echo "❌ DB 쿼리 실패: {$e->getMessage()}\n";
    }
);

// 메시지 저장 (비동기)
function saveMessage(
    $connection,
    int $userId,
    string $room,
    string $message
): void {
    $connection->query(
        'INSERT INTO messages (user_id, room, message, created_at) VALUES (?, ?, ?, NOW())',
        [$userId, $room, $message]
    )->then(
        function(QueryResult $result) {
            echo "✅ 메시지 저장 완료 (ID: {$result->insertId})\n";
        },
        function(\Exception $e) {
            echo "❌ 메시지 저장 실패: {$e->getMessage()}\n";
        }
    );
}

$loop->run();react/mysql 같은 비동기 드라이버를 사용해야 해.
🧪 WebSocket 서버 테스트 방법
만든 거 테스트는 해봐야지! ㅋㅋㅋ 다양한 방법으로 WebSocket 서버를 테스트해보자 🔍
1. wscat으로 CLI 테스트
# wscat 설치 (Node.js 필요)
npm install -g wscat

# WebSocket 서버에 연결
wscat -c ws://localhost:8080

# 연결 후 메시지 전송
> {"type":"chat","message":"안녕하세요!"}
> {"type":"set_username","username":"테스터"}
> {"type":"join_room","room":"room1"}

# SSL 연결
wscat -c wss://ws.example.com/ws
2. PHP로 WebSocket 클라이언트 테스트
<?php

require 'vendor/autoload.php';

use Ratchet\Client\WebSocket;
use React\EventLoop\Loop;

$loop = Loop::get();

// WebSocket 클라이언트로 연결
\Ratchet\Client\connect('ws://127.0.0.1:8080', [], [], $loop)
    ->then(
        function(WebSocket $conn) use ($loop) {
            echo "✅ 서버에 연결되었습니다!\n";

            // 메시지 수신 처리
            $conn->on('message', function($msg) use ($conn) {
                $data = json_decode($msg, true);
                echo "📨 수신: " . json_encode($data, JSON_UNESCAPED_UNICODE) . "\n";
            });

            // 테스트 메시지 전송
            $conn->send(json_encode([
                'type'    => 'set_username',
                'username' => '테스트봇',
            ]));

            $conn->send(json_encode([
                'type'    => 'chat',
                'message' => '안녕하세요! 테스트 메시지입니다.',
            ]));

            // 5초 후 연결 종료
            $loop->addTimer(5.0, function() use ($conn) {
                $conn->close();
                echo "🔌 연결 종료\n";
            });

            // 연결 종료 이벤트
            $conn->on('close', function($code = null, $reason = null) {
                echo "❌ 연결 종료: {$code} - {$reason}\n";
            });
        },
        function(\Exception $e) {
            echo "❌ 연결 실패: {$e->getMessage()}\n";
        }
    );

$loop->run();
3. 부하 테스트
# Artillery로 WebSocket 부하 테스트
npm install -g artillery

# artillery.yml 설정 파일
# config:
#   target: "ws://localhost:8080"
#   phases:
#     - duration: 60
#       arrivalRate: 10
#       name: "점진적 부하 증가"
# scenarios:
#   - engine: "ws"
#     flow:
#       - send: '{"type":"chat","message":"부하 테스트"}'
#       - think: 1
#       - send: '{"type":"chat","message":"계속 테스트"}'

artillery run artillery.yml
🎯 실전 활용 사례 - 이런 데 써먹어!
PHP WebSocket으로 뭘 만들 수 있는지 실제 사례들 살펴보자! 생각보다 활용 범위가 엄청 넓어 😮
① 실시간 채팅: 구매자와 판매자 간 실시간 1:1 채팅
② 주문 알림: 새 주문 들어왔을 때 즉시 알림
③ 결제 완료 알림: 결제 처리 완료 시 실시간 상태 업데이트
④ 리뷰 알림: 새 리뷰 작성 시 판매자에게 즉시 알림
⑤ 라이브 경매: 실시간 입찰 현황 업데이트
🔍 자주 만나는 문제와 해결법
개발하다 보면 이런저런 문제 만나게 되는데, 미리 알아두면 시간 절약이 엄청나! ㅋㅋㅋ 😅
| 문제 | 원인 | 해결법 |
|---|---|---|
| 연결 즉시 끊김 | Origin 검증 실패 | allowedOrigins 설정 확인 |
| 메모리 계속 증가 | 연결 해제 시 참조 미제거 | onClose에서 unset() 확인 |
| 이벤트 루프 멈춤 | 동기 블로킹 코드 사용 | 비동기 드라이버로 교체 |
| Nginx 502 에러 | WebSocket 업그레이드 헤더 누락 | Upgrade/Connection 헤더 설정 |
| 메시지 순서 뒤바뀜 | 비동기 처리 순서 문제 | Promise 체이닝으로 순서 보장 |
| 연결 수 제한 초과 | OS 파일 디스크립터 한계 | ulimit -n 값 증가 |
| SSL 핸드셰이크 실패 | 인증서 문제 | Nginx에서 SSL 처리 후 내부는 ws:// |
파일 디스크립터 한계 늘리기
# 현재 한계 확인
ulimit -n

# 임시로 늘리기
ulimit -n 65536

# 영구 설정 (/etc/security/limits.conf)
www-data soft nofile 65536
www-data hard nofile 65536

# 시스템 전체 설정 (/etc/sysctl.conf)
fs.file-max = 2097152

# 적용
sudo sysctl -pmemory_get_usage(true)를 주기적으로 로깅해서 메모리 증가 패턴을 모니터링해봐. 연결 수 대비 메모리 사용량이 선형으로 증가하면 누수 의심!
⚖️ ReactPHP vs 다른 PHP WebSocket 솔루션 비교
PHP WebSocket 구현 방법이 ReactPHP/Ratchet만 있는 건 아니야! 다른 옵션들도 알아보자 🤔
| 솔루션 | 특징 | 장점 | 단점 | 추천 상황 |
|---|---|---|---|---|
| Ratchet + ReactPHP | PHP 순수 구현 | PHP 생태계 통합, 유연성 | 설정 복잡, 성능 한계 | 중소규모 서비스 |
| Swoole | C 확장 기반 | 매우 빠름, 코루틴 지원 | 확장 설치 필요 | 고성능 필요 시 |
| Workerman | PHP 멀티프로세스 | 안정적, 멀티코어 활용 | 메모리 사용량 높음 | 대규모 연결 |
| Laravel Reverb | Laravel 공식 WS | Laravel 통합 완벽 | Laravel 의존성 | Laravel 프로젝트 |
| Pusher/Ably | 외부 서비스 | 관리 불필요, 안정적 | 비용 발생, 의존성 | 빠른 개발 필요 시 |
🎨 Laravel Reverb - PHP WebSocket의 미래
Laravel 11에서 공식 출시된 Laravel Reverb는 ReactPHP 기반의 WebSocket 서버야.
Laravel 생태계와 완벽하게 통합되어서 정말 편리하게 실시간 기능을 구현할 수 있어! 😍
# Laravel Reverb 설치
composer require laravel/reverb

# 설정 파일 발행
php artisan reverb:install

# 서버 실행
php artisan reverb:start

# 프로덕션 환경 (포트, 호스트 지정)
php artisan reverb:start --host=0.0.0.0 --port=8080 --env=production
<?php
// app/Events/MessageSent.php
namespace App\Events;
use Illuminate\Broadcasting\Channel;
use Illuminate\Broadcasting\InteractsWithSockets;
use Illuminate\Contracts\Broadcasting\ShouldBroadcast;
use Illuminate\Foundation\Events\Dispatchable;
class MessageSent implements ShouldBroadcast
{
use Dispatchable, InteractsWithSockets;
public function __construct(
public readonly string $message,
public readonly string $username,
) {}
// 브로드캐스트할 채널 지정
public function broadcastOn(): array
{
return [
new Channel('chat'),
];
}
// 브로드캐스트할 데이터
public function broadcastWith(): array
{
return [
'message' => $this->message,
'username' => $this->username,
'time' => now()->format('H:i:s'),
];
}
}
// 컨트롤러에서 이벤트 발생
// MessageSent::dispatch('안녕하세요!', '사용자명');
// 또는
// broadcast(new MessageSent('안녕하세요!', '사용자명'));// 클라이언트 (JavaScript) - Laravel Echo 사용
import Echo from 'laravel-echo';
import Pusher from 'pusher-js';
window.Pusher = Pusher;
window.Echo = new Echo({
broadcaster: 'reverb',
key: import.meta.env.VITE_REVERB_APP_KEY,
wsHost: import.meta.env.VITE_REVERB_HOST,
wsPort: import.meta.env.VITE_REVERB_PORT,
wssPort: import.meta.env.VITE_REVERB_PORT,
forceTLS: false,
enabledTransports: ['ws', 'wss'],
});
// 채널 구독 및 이벤트 리스닝
Echo.channel('chat')
.listen('MessageSent', (data) => {
console.log('새 메시지:', data.message);
// UI 업데이트...
});🎉 마무리 - PHP 웹소켓 완전 정복!
자, 여기까지 왔으면 PHP로 WebSocket 서버 구현하는 거 이제 두렵지 않지? ㅋㅋㅋ 😄
오늘 배운 내용 정리해볼게!
- ✅ WebSocket 프로토콜의 개념과 HTTP와의 차이점
- ✅ ReactPHP 이벤트 루프 기반 비동기 처리 원리
- ✅ Ratchet으로 WebSocket 서버 구현 (Chat, Notification, Dashboard)
- ✅ 클라이언트(브라우저) WebSocket API 활용
- ✅ Redis Pub/Sub으로 다중 서버 동기화
- ✅ Nginx 리버스 프록시 설정
- ✅ Supervisor로 프로세스 관리
- ✅ 보안 처리 (Origin 검증, Rate Limiting, 인증)
- ✅ 성능 최적화 (비동기 DB, 메모리 관리)
- ✅ 트러블슈팅 가이드
- ✅ Laravel Reverb 소개
프로그래밍 실력을 키우고 싶다면 직접 만들어보는 게 최고야!
재능넷 같은 플랫폼에서 PHP 개발 전문가를 찾아서 멘토링을 받아보는 것도 좋은 방법이야.
실제 프로젝트 경험이 있는 개발자한테 배우면 이론보다 훨씬 빠르게 실력이 늘거든 😊
2. Redis Pub/Sub 연동해서 다중 서버 테스트
3. Laravel Reverb로 마이그레이션 해보기
4. Swoole 확장으로 성능 비교해보기
5. 실제 서비스에 적용해보기!

댓글 작성
이 글에 대한 여러분의 생각을 들려주세요
로그인이 필요합니다
댓글을 작성하려면 먼저 로그인해주세요.
댓글 0
지식인의 숲 - 지적 재산권 보호 고지
지적 재산권 보호 고지
- 저작권 및 소유권: 본 컨텐츠는 재능넷의 독점 AI 기술로 생성되었으며, 대한민국 저작권법 및 국제 저작권 협약에 의해 보호됩니다.
- AI 생성 컨텐츠의 법적 지위: 본 AI 생성 컨텐츠는 재능넷의 지적 창작물로 인정되며, 관련 법규에 따라 저작권 보호를 받습니다.
- 사용 제한: 재능넷의 명시적 서면 동의 없이 본 컨텐츠를 복제, 수정, 배포, 또는 상업적으로 활용하는 행위는 엄격히 금지됩니다.
- 데이터 수집 금지: 본 컨텐츠에 대한 무단 스크래핑, 크롤링, 및 자동화된 데이터 수집은 법적 제재의 대상이 됩니다.
- AI 학습 제한: 재능넷의 AI 생성 컨텐츠를 타 AI 모델 학습에 무단 사용하는 행위는 금지되며, 이는 지적 재산권 침해로 간주됩니다.



아직 댓글이 없습니다.