

Ver3.0 CI/CD 자동화 스크립트 예제 with GitHub Actions
CI/CD 자동화 스크립트 예제 with GitHub Actions
🎯 CI/CD가 뭔데 이렇게 난리야?
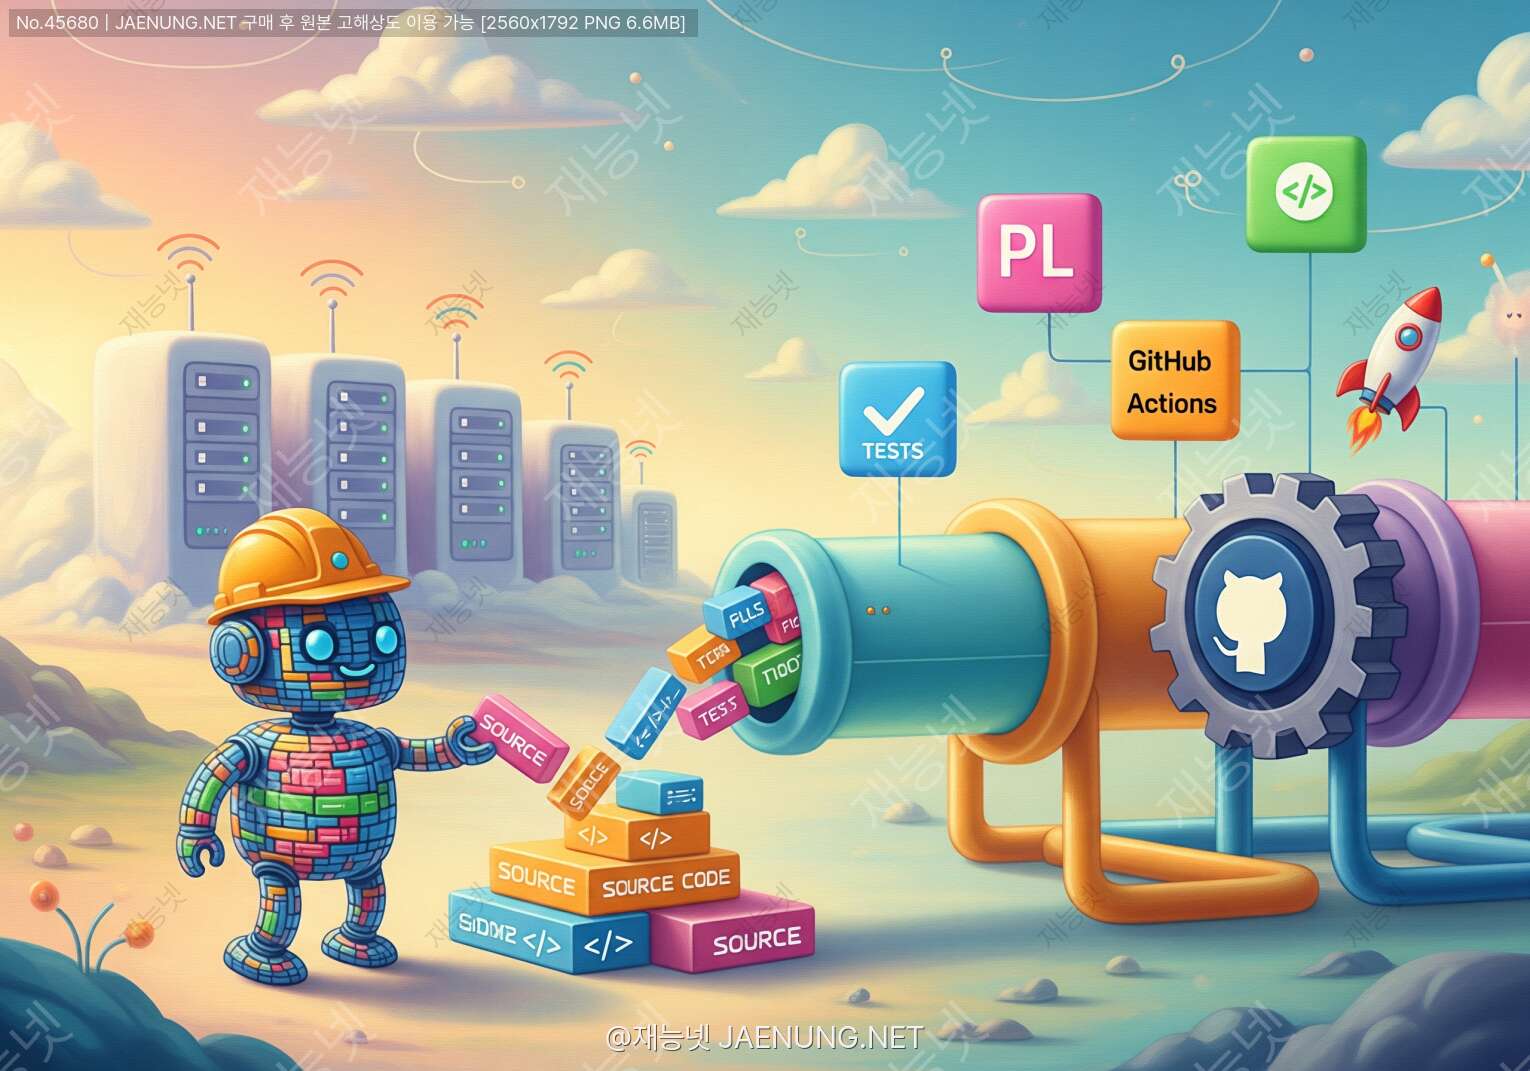
요즘 개발자들 사이에서 CI/CD 얘기 안 나오는 곳이 없죠ㅋㅋㅋ 근데 솔직히 처음 들으면 "이게 뭔 소린가" 싶잖아요? CI/CD는 Continuous Integration(지속적 통합)과 Continuous Deployment(지속적 배포)의 약자인데요, 쉽게 말하면 코드 짜고 → 테스트하고 → 배포하는 과정을 자동으로 해주는 마법 같은 거예요 ✨
예전에는 개발자가 코드 작성하고, 수동으로 빌드하고, 테스트 돌리고, 서버에 접속해서 배포하고... 이 모든 걸 손으로 했어야 했어요. 근데 이제는? GitHub Actions 같은 도구로 한 번만 설정해두면 코드 푸시할 때마다 알아서 다 해줍니다ㅋㅋㅋ 개발자는 그냥 코드만 짜면 돼요!
재능넷 같은 플랫폼에서도 CI/CD 자동화 관련 재능을 거래하는 분들이 많아요. 프로젝트 초기 세팅이 어렵다면 전문가의 도움을 받는 것도 좋은 방법이죠!
🔧 GitHub Actions가 뭐길래?
GitHub Actions는 GitHub에서 제공하는 CI/CD 플랫폼이에요. 쉽게 말하면 GitHub 저장소에서 특정 이벤트가 발생하면 자동으로 작업을 실행해주는 로봇이라고 보면 돼요ㅋㅋㅋ
예를 들어 "main 브랜치에 코드가 푸시되면 → 자동으로 테스트 돌리고 → 테스트 통과하면 → 자동으로 배포해줘!" 이런 식으로 설정할 수 있죠. 그리고 이 모든 게 무료예요! (물론 사용량 제한은 있지만 개인 프로젝트에는 충분함)
• Public 저장소: 무제한 사용
• Private 저장소: 월 2,000분 무료
• 동시 실행 작업: 최대 20개
GitHub Actions의 핵심 개념들
자동화된 프로세스 전체를 의미해요. YAML 파일로 정의하고
.github/workflows/ 디렉토리에 저장합니다.
워크플로우를 트리거하는 특정 활동이에요. push, pull_request, schedule 등이 있죠.
워크플로우 안에서 실행되는 작업 단위예요. 여러 개의 step으로 구성됩니다.
Job 안에서 실행되는 개별 작업이에요. 명령어를 실행하거나 액션을 사용할 수 있어요.
재사용 가능한 작업 단위예요. GitHub Marketplace에서 다른 사람들이 만든 액션을 가져다 쓸 수도 있죠!
워크플로우를 실행하는 서버예요. GitHub에서 제공하는 호스팅 러너를 쓰거나 직접 서버를 구축할 수도 있어요.
📝 기본 워크플로우 파일 구조
자, 이제 본격적으로 코드를 볼 시간이에요! GitHub Actions는 YAML 형식으로 작성하는데요, 처음엔 좀 낯설 수 있지만 몇 번 보다 보면 금방 익숙해져요ㅋㅋㅋ
name: CI/CD Pipeline

on:
  push:
    branches: [ main ]
  pull_request:
    branches: [ main ]

jobs:
  build:
    runs-on: ubuntu-latest

    steps:
    - uses: actions/checkout@v3

    - name: Setup Node.js
      uses: actions/setup-node@v3
      with:
        node-version: '18'

    - name: Install dependencies
      run: npm install

    - name: Run tests
      run: npm test

    - name: Build project
      run: npm run build
위 코드를 하나씩 뜯어볼까요?
name: 워크플로우의 이름이에요. GitHub Actions 탭에서 이 이름으로 표시됩니다.
on: 언제 이 워크플로우를 실행할지 정의해요. 여기서는 main 브랜치에 push하거나 PR을 만들 때 실행되죠.
jobs: 실행할 작업들을 정의해요. 여러 개의 job을 병렬로 실행할 수도 있어요!
runs-on: 어떤 운영체제에서 실행할지 지정해요. ubuntu-latest, windows-latest, macos-latest 등을 선택할 수 있죠.
steps: 순차적으로 실행될 단계들이에요. 각 step은 uses(액션 사용) 또는 run(명령어 실행)을 가질 수 있어요.
🚀 실전 예제 1: Node.js 프로젝트 CI/CD
가장 많이 사용되는 Node.js 프로젝트의 CI/CD 파이프라인을 만들어볼게요. 이건 진짜 실무에서 바로 쓸 수 있는 수준이에요!
name: Node.js CI/CD

on:
  push:
    branches: [ main, develop ]
  pull_request:
    branches: [ main ]

env:
  NODE_VERSION: '18.x'

jobs:
  test:
    name: Test
    runs-on: ubuntu-latest

    strategy:
      matrix:
        node-version: [16.x, 18.x, 20.x]

    steps:
    - name: Checkout code
      uses: actions/checkout@v3

    - name: Setup Node.js ${{ matrix.node-version }}
      uses: actions/setup-node@v3
      with:
        node-version: ${{ matrix.node-version }}
        cache: 'npm'

    - name: Install dependencies
      run: npm ci

    - name: Run linter
      run: npm run lint

    - name: Run tests
      run: npm test -- --coverage

    - name: Upload coverage to Codecov
      uses: codecov/codecov-action@v3
      with:
        file: ./coverage/coverage-final.json
        fail_ci_if_error: true

  build:
    name: Build
    needs: test
    runs-on: ubuntu-latest

    steps:
    - name: Checkout code
      uses: actions/checkout@v3

    - name: Setup Node.js
      uses: actions/setup-node@v3
      with:
        node-version: ${{ env.NODE_VERSION }}
        cache: 'npm'

    - name: Install dependencies
      run: npm ci

    - name: Build application
      run: npm run build

    - name: Upload build artifacts
      uses: actions/upload-artifact@v3
      with:
        name: build-files
        path: dist/
        retention-days: 7

  deploy:
    name: Deploy to Production
    needs: build
    runs-on: ubuntu-latest
    if: github.ref == 'refs/heads/main' && github.event_name == 'push'

    steps:
    - name: Checkout code
      uses: actions/checkout@v3

    - name: Download build artifacts
      uses: actions/download-artifact@v3
      with:
        name: build-files
        path: dist/

    - name: Deploy to server
      uses: easingthemes/ssh-deploy@v4
      with:
        ssh-private-key: ${{ secrets.SSH_PRIVATE_KEY }}
        remote-host: ${{ secrets.REMOTE_HOST }}
        remote-user: ${{ secrets.REMOTE_USER }}
        source: "dist/"
        target: "/var/www/html/"

    - name: Send Slack notification
      uses: 8398a7/action-slack@v3
      with:
        status: ${{ job.status }}
        text: 'Deployment completed! 🎉'
        webhook_url: ${{ secrets.SLACK_WEBHOOK_URL }}
      if: always()
와... 코드가 좀 길죠?ㅋㅋㅋ 근데 이게 실무에서 쓰는 진짜 수준이에요. 하나씩 설명해드릴게요!
🎯 핵심 포인트 설명
strategy.matrix를 사용하면 여러 버전에서 동시에 테스트할 수 있어요. 위 예제에서는 Node.js 16, 18, 20 버전에서 모두 테스트하죠. 이렇게 하면 버전 호환성 문제를 미리 발견할 수 있어요!
needs 키워드로 작업 간 의존성을 설정할 수 있어요. build는 test가 성공해야 실행되고, deploy는 build가 성공해야 실행되죠. 이렇게 하면 테스트 실패 시 배포가 안 되니까 안전해요!
if 조건으로 특정 상황에만 작업을 실행할 수 있어요. deploy job은 main 브랜치에 push할 때만 실행되도록 설정했죠. develop 브랜치는 테스트와 빌드만 하고 배포는 안 해요!
빌드 결과물을 아티팩트로 저장하면 다른 job에서 재사용할 수 있어요. 매번 다시 빌드할 필요 없이 효율적이죠! 위 예제에서는 build job에서 만든 파일을 deploy job에서 다운로드해서 사용해요.
SSH 키, API 토큰, 비밀번호 같은 민감한 정보는 절대 코드에 직접 넣으면 안 돼요! GitHub Secrets에 저장하고
${{ secrets.SECRET_NAME }} 형식으로 사용하세요. 저장소 Settings → Secrets and variables → Actions에서 설정할 수 있어요.
🐍 실전 예제 2: Python 프로젝트 CI/CD
Python 프로젝트도 많이 쓰죠? Django나 Flask 같은 웹 프레임워크, 또는 데이터 분석 프로젝트에 적용할 수 있는 예제를 준비했어요!
name: Python CI/CD

on:
  push:
    branches: [ main, develop ]
  pull_request:
    branches: [ main ]
  schedule:
    - cron: '0 0 * * 0'  # 매주 일요일 자정에 실행

jobs:
  lint-and-test:
    name: Lint and Test
    runs-on: ubuntu-latest

    strategy:
      matrix:
        python-version: ['3.9', '3.10', '3.11']

    steps:
    - name: Checkout code
      uses: actions/checkout@v3

    - name: Set up Python ${{ matrix.python-version }}
      uses: actions/setup-python@v4
      with:
        python-version: ${{ matrix.python-version }}
        cache: 'pip'

    - name: Install dependencies
      run: |
        python -m pip install --upgrade pip
        pip install -r requirements.txt
        pip install -r requirements-dev.txt

    - name: Lint with flake8
      run: |
        pip install flake8
        flake8 . --count --select=E9,F63,F7,F82 --show-source --statistics
        flake8 . --count --exit-zero --max-complexity=10 --max-line-length=127 --statistics

    - name: Format check with black
      run: |
        pip install black
        black --check .

    - name: Type check with mypy
      run: |
        pip install mypy
        mypy .
      continue-on-error: true

    - name: Run tests with pytest
      run: |
        pip install pytest pytest-cov
        pytest --cov=./ --cov-report=xml --cov-report=html

    - name: Upload coverage reports
      uses: codecov/codecov-action@v3
      with:
        file: ./coverage.xml
        flags: unittests
        name: codecov-umbrella

  security-scan:
    name: Security Scan
    runs-on: ubuntu-latest

    steps:
    - name: Checkout code
      uses: actions/checkout@v3

    - name: Set up Python
      uses: actions/setup-python@v4
      with:
        python-version: '3.11'

    - name: Install dependencies
      run: |
        python -m pip install --upgrade pip
        pip install -r requirements.txt

    - name: Run Bandit security scan
      run: |
        pip install bandit
        bandit -r . -f json -o bandit-report.json
      continue-on-error: true

    - name: Run Safety check
      run: |
        pip install safety
        safety check --json
      continue-on-error: true

    - name: Upload security reports
      uses: actions/upload-artifact@v3
      with:
        name: security-reports
        path: bandit-report.json

  build-and-deploy:
    name: Build and Deploy
    needs: [lint-and-test, security-scan]
    runs-on: ubuntu-latest
    if: github.ref == 'refs/heads/main'

    steps:
    - name: Checkout code
      uses: actions/checkout@v3

    - name: Set up Python
      uses: actions/setup-python@v4
      with:
        python-version: '3.11'

    - name: Install dependencies
      run: |
        python -m pip install --upgrade pip
        pip install -r requirements.txt

    - name: Build Docker image
      run: |
        docker build -t myapp:${{ github.sha }} .
        docker tag myapp:${{ github.sha }} myapp:latest

    - name: Login to Docker Hub
      uses: docker/login-action@v2
      with:
        username: ${{ secrets.DOCKER_USERNAME }}
        password: ${{ secrets.DOCKER_PASSWORD }}

    - name: Push Docker image
      run: |
        docker push myapp:${{ github.sha }}
        docker push myapp:latest

    - name: Deploy to production
      uses: appleboy/ssh-action@master
      with:
        host: ${{ secrets.PROD_HOST }}
        username: ${{ secrets.PROD_USER }}
        key: ${{ secrets.SSH_PRIVATE_KEY }}
        script: |
          cd /opt/myapp
          docker-compose pull
          docker-compose up -d
          docker system prune -af
🔍 Python 특화 기능들
Python 프로젝트에서는 코드 품질과 보안이 특히 중요하죠. 위 예제에서 사용한 도구들을 살펴볼게요!
Python 코드를 일관된 스타일로 자동 포맷팅해줘요. "타협 없는 코드 포매터"라는 별명답게 설정 옵션이 거의 없어요ㅋㅋㅋ 그냥 Black이 정한 대로 따르면 돼요!
PEP 8 스타일 가이드 준수 여부를 체크해줘요. 코드에 잠재적인 버그나 안 좋은 패턴이 있으면 알려주죠.
코드에서 보안 취약점을 찾아줘요. SQL 인젝션, 하드코딩된 비밀번호, 안전하지 않은 함수 사용 등을 감지합니다.
설치된 패키지들의 알려진 보안 취약점을 체크해줘요. requirements.txt에 있는 패키지들이 안전한지 확인하죠.
Python에서 가장 인기 있는 테스트 프레임워크예요. 코드 커버리지도 함께 측정할 수 있어요!
schedule 이벤트를 사용하면 정해진 시간에 자동으로 워크플로우를 실행할 수 있어요. 위 예제에서는 매주 일요일 자정에 전체 테스트와 보안 스캔을 돌리도록 설정했죠. Cron 표현식을 사용하는데, 온라인 Cron 생성기를 쓰면 쉽게 만들 수 있어요!
🐳 실전 예제 3: Docker 컨테이너 빌드 및 배포
요즘 대부분의 프로젝트가 Docker를 사용하죠? 컨테이너 이미지를 자동으로 빌드하고 Docker Hub나 AWS ECR에 푸시하는 워크플로우를 만들어볼게요!
name: Docker Build and Push

on:
  push:
    branches: [ main ]
    tags:
      - 'v*.*.*'
  pull_request:
    branches: [ main ]

env:
  REGISTRY: ghcr.io
  IMAGE_NAME: ${{ github.repository }}

jobs:
  build-and-push:
    name: Build and Push Docker Image
    runs-on: ubuntu-latest
    permissions:
      contents: read
      packages: write

    steps:
    - name: Checkout code
      uses: actions/checkout@v3

    - name: Set up QEMU
      uses: docker/setup-qemu-action@v2

    - name: Set up Docker Buildx
      uses: docker/setup-buildx-action@v2

    - name: Log in to GitHub Container Registry
      uses: docker/login-action@v2
      with:
        registry: ${{ env.REGISTRY }}
        username: ${{ github.actor }}
        password: ${{ secrets.GITHUB_TOKEN }}

    - name: Log in to Docker Hub
      uses: docker/login-action@v2
      with:
        username: ${{ secrets.DOCKERHUB_USERNAME }}
        password: ${{ secrets.DOCKERHUB_TOKEN }}

    - name: Extract metadata
      id: meta
      uses: docker/metadata-action@v4
      with:
        images: |
          ${{ env.REGISTRY }}/${{ env.IMAGE_NAME }}
          ${{ secrets.DOCKERHUB_USERNAME }}/${{ github.event.repository.name }}
        tags: |
          type=ref,event=branch
          type=ref,event=pr
          type=semver,pattern={{version}}
          type=semver,pattern={{major}}.{{minor}}
          type=semver,pattern={{major}}
          type=sha

    - name: Build and push Docker image
      uses: docker/build-push-action@v4
      with:
        context: .
        platforms: linux/amd64,linux/arm64
        push: ${{ github.event_name != 'pull_request' }}
        tags: ${{ steps.meta.outputs.tags }}
        labels: ${{ steps.meta.outputs.labels }}
        cache-from: type=gha
        cache-to: type=gha,mode=max
        build-args: |
          BUILD_DATE=${{ github.event.head_commit.timestamp }}
          VCS_REF=${{ github.sha }}
          VERSION=${{ steps.meta.outputs.version }}

    - name: Run Trivy vulnerability scanner
      uses: aquasecurity/trivy-action@master
      with:
        image-ref: ${{ env.REGISTRY }}/${{ env.IMAGE_NAME }}:${{ steps.meta.outputs.version }}
        format: 'sarif'
        output: 'trivy-results.sarif'

    - name: Upload Trivy results to GitHub Security
      uses: github/codeql-action/upload-sarif@v2
      with:
        sarif_file: 'trivy-results.sarif'

    - name: Generate SBOM
      uses: anchore/sbom-action@v0
      with:
        image: ${{ env.REGISTRY }}/${{ env.IMAGE_NAME }}:${{ steps.meta.outputs.version }}
        format: spdx-json
        output-file: sbom.spdx.json

    - name: Upload SBOM
      uses: actions/upload-artifact@v3
      with:
        name: sbom
        path: sbom.spdx.json

  deploy-to-kubernetes:
    name: Deploy to Kubernetes
    needs: build-and-push
    runs-on: ubuntu-latest
    if: github.ref == 'refs/heads/main'

    steps:
    - name: Checkout code
      uses: actions/checkout@v3

    - name: Configure AWS credentials
      uses: aws-actions/configure-aws-credentials@v2
      with:
        aws-access-key-id: ${{ secrets.AWS_ACCESS_KEY_ID }}
        aws-secret-access-key: ${{ secrets.AWS_SECRET_ACCESS_KEY }}
        aws-region: ap-northeast-2

    - name: Update kubeconfig
      run: |
        aws eks update-kubeconfig --name my-cluster --region ap-northeast-2

    - name: Deploy to Kubernetes
      run: |
        kubectl set image deployment/myapp \
          myapp=${{ env.REGISTRY }}/${{ env.IMAGE_NAME }}:${{ github.sha }} \
          --record
        kubectl rollout status deployment/myapp

    - name: Verify deployment
      run: |
        kubectl get pods -l app=myapp
        kubectl get services myapp
🎨 Docker 워크플로우 고급 기능
platforms: linux/amd64,linux/arm64를 설정하면 AMD64와 ARM64 아키텍처용 이미지를 동시에 빌드할 수 있어요. M1/M2 Mac이나 AWS Graviton 인스턴스에서도 사용할 수 있죠!
docker/metadata-action을 사용하면 Git 브랜치, 태그, 커밋 SHA 등을 기반으로 자동으로 Docker 이미지 태그를 생성해줘요. 버전 관리가 훨씬 쉬워지죠!
cache-from과 cache-to를 설정하면 이전 빌드의 레이어를 재사용해서 빌드 시간을 크게 단축할 수 있어요. GitHub Actions 캐시를 사용하면 무료로 이용 가능!
Trivy는 컨테이너 이미지의 취약점을 스캔해주는 도구예요. 알려진 CVE(Common Vulnerabilities and Exposures)를 찾아내고 GitHub Security 탭에 결과를 업로드해줘요.
SBOM(Software Bill of Materials)은 이미지에 포함된 모든 패키지와 라이브러리 목록이에요. 공급망 보안을 위해 점점 더 중요해지고 있죠!
☁️ 실전 예제 4: AWS 배포 자동화
AWS를 사용하는 프로젝트가 많죠? S3, CloudFront, ECS, Lambda 등 다양한 AWS 서비스에 자동으로 배포하는 방법을 알아볼게요!
📦 S3 + CloudFront 정적 웹사이트 배포
name: Deploy to AWS S3 and CloudFront

on:
  push:
    branches: [ main ]

jobs:
  deploy:
    name: Deploy to S3
    runs-on: ubuntu-latest

    steps:
    - name: Checkout code
      uses: actions/checkout@v3

    - name: Setup Node.js
      uses: actions/setup-node@v3
      with:
        node-version: '18'
        cache: 'npm'

    - name: Install dependencies
      run: npm ci

    - name: Build project
      run: npm run build
      env:
        REACT_APP_API_URL: ${{ secrets.API_URL }}
        REACT_APP_ENV: production

    - name: Configure AWS credentials
      uses: aws-actions/configure-aws-credentials@v2
      with:
        aws-access-key-id: ${{ secrets.AWS_ACCESS_KEY_ID }}
        aws-secret-access-key: ${{ secrets.AWS_SECRET_ACCESS_KEY }}
        aws-region: ap-northeast-2

    - name: Sync files to S3
      run: |
        aws s3 sync ./build s3://${{ secrets.S3_BUCKET }} \
          --delete \
          --cache-control "public, max-age=31536000" \
          --exclude "*.html" \
          --exclude "service-worker.js"

        aws s3 sync ./build s3://${{ secrets.S3_BUCKET }} \
          --exclude "*" \
          --include "*.html" \
          --include "service-worker.js" \
          --cache-control "public, max-age=0, must-revalidate"

    - name: Invalidate CloudFront cache
      run: |
        aws cloudfront create-invalidation \
          --distribution-id ${{ secrets.CLOUDFRONT_DISTRIBUTION_ID }} \
          --paths "/*"

    - name: Send deployment notification
      uses: 8398a7/action-slack@v3
      with:
        status: ${{ job.status }}
        text: |
          🚀 Deployment to production completed!
          Commit: ${{ github.event.head_commit.message }}
          Author: ${{ github.event.head_commit.author.name }}
        webhook_url: ${{ secrets.SLACK_WEBHOOK_URL }}
      if: always()
🐳 ECS Fargate 배포
name: Deploy to AWS ECS

on:
  push:
    branches: [ main ]

env:
  AWS_REGION: ap-northeast-2
  ECR_REPOSITORY: my-app
  ECS_SERVICE: my-app-service
  ECS_CLUSTER: my-cluster
  ECS_TASK_DEFINITION: .aws/task-definition.json
  CONTAINER_NAME: my-app

jobs:
  deploy:
    name: Deploy to ECS
    runs-on: ubuntu-latest

    steps:
    - name: Checkout code
      uses: actions/checkout@v3

    - name: Configure AWS credentials
      uses: aws-actions/configure-aws-credentials@v2
      with:
        aws-access-key-id: ${{ secrets.AWS_ACCESS_KEY_ID }}
        aws-secret-access-key: ${{ secrets.AWS_SECRET_ACCESS_KEY }}
        aws-region: ${{ env.AWS_REGION }}

    - name: Login to Amazon ECR
      id: login-ecr
      uses: aws-actions/amazon-ecr-login@v1

    - name: Build, tag, and push image to Amazon ECR
      id: build-image
      env:
        ECR_REGISTRY: ${{ steps.login-ecr.outputs.registry }}
        IMAGE_TAG: ${{ github.sha }}
      run: |
        docker build -t $ECR_REGISTRY/$ECR_REPOSITORY:$IMAGE_TAG .
        docker push $ECR_REGISTRY/$ECR_REPOSITORY:$IMAGE_TAG
        echo "image=$ECR_REGISTRY/$ECR_REPOSITORY:$IMAGE_TAG" >> $GITHUB_OUTPUT

    - name: Fill in the new image ID in the Amazon ECS task definition
      id: task-def
      uses: aws-actions/amazon-ecs-render-task-definition@v1
      with:
        task-definition: ${{ env.ECS_TASK_DEFINITION }}
        container-name: ${{ env.CONTAINER_NAME }}
        image: ${{ steps.build-image.outputs.image }}

    - name: Deploy Amazon ECS task definition
      uses: aws-actions/amazon-ecs-deploy-task-definition@v1
      with:
        task-definition: ${{ steps.task-def.outputs.task-definition }}
        service: ${{ env.ECS_SERVICE }}
        cluster: ${{ env.ECS_CLUSTER }}
        wait-for-service-stability: true

    - name: Verify deployment
      run: |
        aws ecs describe-services \
          --cluster ${{ env.ECS_CLUSTER }} \
          --services ${{ env.ECS_SERVICE }} \
          --query 'services[0].deployments' \
          --output table
⚡ Lambda 함수 배포
name: Deploy to AWS Lambda

on:
  push:
    branches: [ main ]
    paths:
      - 'lambda/**'

jobs:
  deploy:
    name: Deploy Lambda Function
    runs-on: ubuntu-latest

    steps:
    - name: Checkout code
      uses: actions/checkout@v3

    - name: Setup Python
      uses: actions/setup-python@v4
      with:
        python-version: '3.11'

    - name: Install dependencies
      run: |
        cd lambda
        pip install -r requirements.txt -t .

    - name: Create deployment package
      run: |
        cd lambda
        zip -r ../lambda-deployment.zip .

    - name: Configure AWS credentials
      uses: aws-actions/configure-aws-credentials@v2
      with:
        aws-access-key-id: ${{ secrets.AWS_ACCESS_KEY_ID }}
        aws-secret-access-key: ${{ secrets.AWS_SECRET_ACCESS_KEY }}
        aws-region: ap-northeast-2

    - name: Deploy to Lambda
      run: |
        aws lambda update-function-code \
          --function-name my-lambda-function \
          --zip-file fileb://lambda-deployment.zip

    - name: Update Lambda configuration
      run: |
        aws lambda update-function-configuration \
          --function-name my-lambda-function \
          --environment "Variables={
            ENV=production,
            API_KEY=${{ secrets.API_KEY }},
            DB_HOST=${{ secrets.DB_HOST }}
          }"

    - name: Publish new version
      run: |
        aws lambda publish-version \
          --function-name my-lambda-function \
          --description "Deployed from GitHub Actions - ${{ github.sha }}"

    - name: Update alias
      run: |
        VERSION=$(aws lambda list-versions-by-function \
          --function-name my-lambda-function \
          --query 'Versions[-1].Version' \
          --output text)

        aws lambda update-alias \
          --function-name my-lambda-function \
          --name production \
          --function-version $VERSION
GitHub Actions에서 AWS 리소스를 사용할 때는 비용이 발생할 수 있어요. 불필요한 빌드를 줄이기 위해
paths 필터를 사용하거나, 특정 시간대에만 배포하도록 스케줄을 설정하는 것도 좋은 방법이에요!
🧪 실전 예제 5: 테스트 자동화 고급 패턴
테스트는 CI/CD의 핵심이죠! 단순히 테스트만 돌리는 게 아니라, 다양한 환경에서 테스트하고 결과를 시각화하는 방법을 알아볼게요ㅋㅋㅋ
🎭 E2E 테스트 with Playwright
name: E2E Tests

on:
  push:
    branches: [ main, develop ]
  pull_request:
    branches: [ main ]
  schedule:
    - cron: '0 */6 * * *'  # 6시간마다 실행

jobs:
  test:
    name: E2E Tests
    runs-on: ubuntu-latest
    timeout-minutes: 60

    strategy:
      fail-fast: false
      matrix:
        browser: [chromium, firefox, webkit]
        shard: [1, 2, 3, 4]

    steps:
    - name: Checkout code
      uses: actions/checkout@v3

    - name: Setup Node.js
      uses: actions/setup-node@v3
      with:
        node-version: '18'
        cache: 'npm'

    - name: Install dependencies
      run: npm ci

    - name: Install Playwright Browsers
      run: npx playwright install --with-deps ${{ matrix.browser }}

    - name: Run Playwright tests
      run: |
        npx playwright test \
          --project=${{ matrix.browser }} \
          --shard=${{ matrix.shard }}/4
      env:
        BASE_URL: ${{ secrets.STAGING_URL }}
        TEST_USER_EMAIL: ${{ secrets.TEST_USER_EMAIL }}
        TEST_USER_PASSWORD: ${{ secrets.TEST_USER_PASSWORD }}

    - name: Upload test results
      uses: actions/upload-artifact@v3
      if: always()
      with:
        name: playwright-report-${{ matrix.browser }}-${{ matrix.shard }}
        path: playwright-report/
        retention-days: 30

    - name: Upload test videos
      uses: actions/upload-artifact@v3
      if: failure()
      with:
        name: test-videos-${{ matrix.browser }}-${{ matrix.shard }}
        path: test-results/
        retention-days: 7

  merge-reports:
    name: Merge Test Reports
    needs: test
    runs-on: ubuntu-latest
    if: always()

    steps:
    - name: Checkout code
      uses: actions/checkout@v3

    - name: Setup Node.js
      uses: actions/setup-node@v3
      with:
        node-version: '18'

    - name: Download all artifacts
      uses: actions/download-artifact@v3
      with:
        path: all-reports

    - name: Merge reports
      run: |
        npx playwright merge-reports --reporter html all-reports/playwright-report-*

    - name: Upload merged report
      uses: actions/upload-artifact@v3
      with:
        name: merged-playwright-report
        path: playwright-report/
        retention-days: 30

    - name: Deploy report to GitHub Pages
      uses: peaceiris/actions-gh-pages@v3
      if: github.ref == 'refs/heads/main'
      with:
        github_token: ${{ secrets.GITHUB_TOKEN }}
        publish_dir: ./playwright-report
        destination_dir: test-reports/${{ github.run_number }}
📊 성능 테스트 with Lighthouse
name: Performance Tests

on:
  push:
    branches: [ main ]
  pull_request:
    branches: [ main ]

jobs:
  lighthouse:
    name: Lighthouse Performance Test
    runs-on: ubuntu-latest

    steps:
    - name: Checkout code
      uses: actions/checkout@v3

    - name: Setup Node.js
      uses: actions/setup-node@v3
      with:
        node-version: '18'

    - name: Install dependencies
      run: npm ci

    - name: Build project
      run: npm run build

    - name: Serve built files
      run: |
        npm install -g serve
        serve -s build -l 3000 &
        sleep 5

    - name: Run Lighthouse CI
      uses: treosh/lighthouse-ci-action@v9
      with:
        urls: |
          http://localhost:3000
          http://localhost:3000/about
          http://localhost:3000/products
        uploadArtifacts: true
        temporaryPublicStorage: true
        runs: 3

    - name: Check Lighthouse scores
      uses: treosh/lighthouse-ci-action@v9
      with:
        urls: http://localhost:3000
        configPath: './.lighthouserc.json'
        uploadArtifacts: true
        temporaryPublicStorage: true

    - name: Comment PR with results
      uses: actions/github-script@v6
      if: github.event_name == 'pull_request'
      with:
        script: |
          const fs = require('fs');
          const results = JSON.parse(fs.readFileSync('.lighthouseci/manifest.json'));
          const summary = results.map(r => {
            return `
            ### ${r.url}
            - Performance: ${r.summary.performance * 100}
            - Accessibility: ${r.summary.accessibility * 100}
            - Best Practices: ${r.summary['best-practices'] * 100}
            - SEO: ${r.summary.seo * 100}
            `;
          }).join('\n');

          github.rest.issues.createComment({
            issue_number: context.issue.number,
            owner: context.repo.owner,
            repo: context.repo.repo,
            body: `## 🚦 Lighthouse Performance Report\n${summary}`
          });
shard 옵션을 사용하면 테스트를 여러 개의 작은 그룹으로 나눠서 병렬로 실행할 수 있어요. 테스트가 많을 때 실행 시간을 크게 줄일 수 있죠! 위 예제에서는 각 브라우저마다 4개의 샤드로 나눠서 총 12개의 작업이 동시에 실행돼요.
🔐 보안 및 시크릿 관리
CI/CD 파이프라인에서 가장 중요한 게 보안이에요! API 키, 비밀번호, 토큰 같은 민감한 정보를 안전하게 관리하는 방법을 알아볼게요ㅋㅋㅋ
🔑 GitHub Secrets 사용하기
GitHub Secrets는 민감한 정보를 암호화해서 저장하는 기능이에요. 저장소 Settings → Secrets and variables → Actions에서 설정할 수 있죠.
특정 저장소에서만 사용할 수 있는 시크릿이에요. 가장 일반적으로 사용하죠.
특정 환경(production, staging 등)에서만 사용할 수 있는 시크릿이에요. 환경별로 다른 값을 설정할 수 있어요!
조직의 여러 저장소에서 공유할 수 있는 시크릿이에요. 회사에서 사용할 때 유용하죠.
name: Secure Deployment

on:
  push:
    branches: [ main ]

jobs:
  deploy:
    name: Deploy with Secrets
    runs-on: ubuntu-latest
    environment: production

    steps:
    - name: Checkout code
      uses: actions/checkout@v3

    - name: Use secrets safely
      env:
        # 환경 변수로 시크릿 전달
        API_KEY: ${{ secrets.API_KEY }}
        DB_PASSWORD: ${{ secrets.DB_PASSWORD }}
        AWS_ACCESS_KEY: ${{ secrets.AWS_ACCESS_KEY_ID }}
      run: |
        # 시크릿은 로그에 자동으로 마스킹됨
        echo "Deploying with API key: ***"

        # 환경 변수로 안전하게 사용
        ./deploy.sh

    - name: Use secrets in actions
      uses: aws-actions/configure-aws-credentials@v2
      with:
        # 액션에 직접 전달
        aws-access-key-id: ${{ secrets.AWS_ACCESS_KEY_ID }}
        aws-secret-access-key: ${{ secrets.AWS_SECRET_ACCESS_KEY }}
        aws-region: ap-northeast-2

    - name: Mask custom values
      run: |
        # 추가로 마스킹하고 싶은 값이 있다면
        echo "::add-mask::$CUSTOM_SECRET"
        echo "Custom secret: $CUSTOM_SECRET"
1. 절대 로그에 출력하지 마세요! GitHub Actions는 자동으로 시크릿을 마스킹하지만, base64 인코딩이나 다른 방식으로 변환하면 노출될 수 있어요.
2. Pull Request에서 조심하세요! Fork된 저장소의 PR에서는 시크릿에 접근할 수 없어요. 이건 보안을 위한 거예요!
3. 환경 보호 규칙을 설정하세요! production 환경에는 승인 프로세스를 추가하는 게 좋아요.
4. 정기적으로 로테이션하세요! API 키나 토큰은 주기적으로 갱신하는 게 안전해요.
🛡️ 환경 보호 규칙 설정
name: Protected Deployment

on:
  push:
    branches: [ main ]

jobs:
  deploy-staging:
    name: Deploy to Staging
    runs-on: ubuntu-latest
    environment: staging
    steps:
    - name: Deploy to staging
      run: echo "Deploying to staging..."

  deploy-production:
    name: Deploy to Production
    needs: deploy-staging
    runs-on: ubuntu-latest
    environment:
      name: production
      url: https://myapp.com
    steps:
    - name: Wait for approval
      run: echo "Deployment approved!"

    - name: Deploy to production
      run: echo "Deploying to production..."
Environment를 설정하면 배포 전에 승인을 받도록 할 수 있어요. Settings → Environments에서 설정 가능하죠!
📊 모니터링 및 알림
CI/CD 파이프라인이 잘 돌아가는지 모니터링하고, 문제가 생기면 바로 알림을 받는 게 중요하죠! 다양한 알림 방법을 알아볼게요.
💬 Slack 알림
name: Deployment with Notifications

on:
  push:
    branches: [ main ]

jobs:
  deploy:
    name: Deploy and Notify
    runs-on: ubuntu-latest

    steps:
    - name: Checkout code
      uses: actions/checkout@v3

    - name: Send start notification
      uses: 8398a7/action-slack@v3
      with:
        status: custom
        custom_payload: |
          {
            text: '🚀 Deployment started!',
            attachments: [{
              color: '#0099ff',
              fields: [{
                title: 'Repository',
                value: '${{ github.repository }}',
                short: true
              }, {
                title: 'Branch',
                value: '${{ github.ref }}',
                short: true
              }, {
                title: 'Commit',
                value: '${{ github.event.head_commit.message }}',
                short: false
              }, {
                title: 'Author',
                value: '${{ github.event.head_commit.author.name }}',
                short: true
              }]
            }]
          }
        webhook_url: ${{ secrets.SLACK_WEBHOOK_URL }}

    - name: Build and deploy
      run: |
        npm ci
        npm run build
        npm run deploy

    - name: Send success notification
      if: success()
      uses: 8398a7/action-slack@v3
      with:
        status: success
        text: '✅ Deployment completed successfully!'
        webhook_url: ${{ secrets.SLACK_WEBHOOK_URL }}

    - name: Send failure notification
      if: failure()
      uses: 8398a7/action-slack@v3
      with:
        status: failure
        text: '❌ Deployment failed! Please check the logs.'
        webhook_url: ${{ secrets.SLACK_WEBHOOK_URL }}
📧 이메일 알림
name: Email Notifications

on:
  push:
    branches: [ main ]
  schedule:
    - cron: '0 9 * * 1'  # 매주 월요일 오전 9시

jobs:
  test-and-notify:
    name: Run Tests and Send Report
    runs-on: ubuntu-latest

    steps:
    - name: Checkout code
      uses: actions/checkout@v3

    - name: Run tests
      run: npm test -- --coverage
      continue-on-error: true

    - name: Generate test report
      run: |
        echo "Test Results Summary" > report.txt
        echo "===================" >> report.txt
        cat coverage/coverage-summary.txt >> report.txt

    - name: Send email report
      uses: dawidd6/action-send-mail@v3
      with:
        server_address: smtp.gmail.com
        server_port: 465
        username: ${{ secrets.EMAIL_USERNAME }}
        password: ${{ secrets.EMAIL_PASSWORD }}
        subject: 'CI/CD Report - ${{ github.repository }}'
        to: team@example.com
        from: GitHub Actions
        body: file://report.txt
        attachments: coverage/lcov-report/index.html
📱 Discord 알림
name: Discord Notifications

on:
  push:
    branches: [ main ]
  pull_request:
    types: [opened, synchronize, reopened]

jobs:
  notify:
    name: Send Discord Notification
    runs-on: ubuntu-latest

    steps:
    - name: Checkout code
      uses: actions/checkout@v3

    - name: Send Discord notification
      uses: sarisia/actions-status-discord@v1
      if: always()
      with:
        webhook: ${{ secrets.DISCORD_WEBHOOK }}
        status: ${{ job.status }}
        title: "Deployment Status"
        description: |
          **Repository:** ${{ github.repository }}
          **Branch:** ${{ github.ref }}
          **Commit:** ${{ github.event.head_commit.message }}
          **Author:** ${{ github.event.head_commit.author.name }}
        color: 0x0099ff
        username: GitHub Actions
        avatar_url: https://github.githubassets.com/images/modules/logos_page/GitHub-Mark.png
너무 많은 알림은 오히려 역효과예요! 중요한 이벤트(main 브랜치 배포, 테스트 실패 등)에만 알림을 보내고, 개발 브랜치는 조용히 처리하는 게 좋아요.
if 조건을 잘 활용하세요!
🎨 고급 워크플로우 패턴
이제 좀 더 고급 기능들을 알아볼까요? 실무에서 정말 유용한 패턴들이에요ㅋㅋㅋ
🔄 Reusable Workflows (재사용 가능한 워크플로우)
같은 작업을 여러 저장소에서 반복한다면? 워크플로우를 재사용 가능하게 만들 수 있어요!
# .github/workflows/reusable-deploy.yml
name: Reusable Deploy Workflow

on:
  workflow_call:
    inputs:
      environment:
        required: true
        type: string
      node-version:
        required: false
        type: string
        default: '18'
    secrets:
      deploy-token:
        required: true
    outputs:
      deployment-url:
        description: "The URL of the deployment"
        value: ${{ jobs.deploy.outputs.url }}

jobs:
  deploy:
    name: Deploy to ${{ inputs.environment }}
    runs-on: ubuntu-latest
    outputs:
      url: ${{ steps.deploy.outputs.url }}

    steps:
    - name: Checkout code
      uses: actions/checkout@v3

    - name: Setup Node.js
      uses: actions/setup-node@v3
      with:
        node-version: ${{ inputs.node-version }}

    - name: Build
      run: |
        npm ci
        npm run build

    - name: Deploy
      id: deploy
      run: |
        echo "Deploying to ${{ inputs.environment }}..."
        echo "url=https://${{ inputs.environment }}.example.com" >> $GITHUB_OUTPUT
      env:
        DEPLOY_TOKEN: ${{ secrets.deploy-token }}
이제 다른 워크플로우에서 이걸 호출할 수 있어요!
# .github/workflows/main.yml
name: Main Deployment Pipeline

on:
  push:
    branches: [ main ]

jobs:
  deploy-staging:
    name: Deploy to Staging
    uses: ./.github/workflows/reusable-deploy.yml
    with:
      environment: staging
      node-version: '18'
    secrets:
      deploy-token: ${{ secrets.STAGING_DEPLOY_TOKEN }}

  deploy-production:
    name: Deploy to Production
    needs: deploy-staging
    uses: ./.github/workflows/reusable-deploy.yml
    with:
      environment: production
      node-version: '18'
    secrets:
      deploy-token: ${{ secrets.PROD_DEPLOY_TOKEN }}

  notify:
    name: Send Notification
    needs: deploy-production
    runs-on: ubuntu-latest
    steps:
    - name: Print deployment URL
      run: |
        echo "Deployed to: ${{ needs.deploy-production.outputs.deployment-url }}"
🎯 Composite Actions (복합 액션)
여러 스텝을 하나의 액션으로 묶을 수도 있어요!
# .github/actions/setup-node-app/action.yml
name: 'Setup Node.js Application'
description: 'Setup Node.js and install dependencies with caching'

inputs:
  node-version:
    description: 'Node.js version to use'
    required: false
    default: '18'
  install-command:
    description: 'Command to install dependencies'
    required: false
    default: 'npm ci'

runs:
  using: "composite"
  steps:
    - name: Setup Node.js
      uses: actions/setup-node@v3
      with:
        node-version: ${{ inputs.node-version }}
        cache: 'npm'

    - name: Cache node modules
      uses: actions/cache@v3
      with:
        path: ~/.npm
        key: ${{ runner.os }}-node-${{ hashFiles('**/package-lock.json') }}
        restore-keys: |
          ${{ runner.os }}-node-

    - name: Install dependencies
      run: ${{ inputs.install-command }}
      shell: bash

    - name: Print versions
      run: |
        echo "Node version: $(node --version)"
        echo "NPM version: $(npm --version)"
      shell: bash
이제 워크플로우에서 간단하게 사용할 수 있어요!
jobs:
  build:
    runs-on: ubuntu-latest
    steps:
    - uses: actions/checkout@v3

    - name: Setup Node.js app
      uses: ./.github/actions/setup-node-app
      with:
        node-version: '18'

    - name: Build
      run: npm run build
🔀 Matrix Strategy 고급 활용
name: Advanced Matrix Build

on: [push]

jobs:
  build:
    runs-on: ${{ matrix.os }}

    strategy:
      fail-fast: false
      matrix:
        os: [ubuntu-latest, windows-latest, macos-latest]
        node-version: [16, 18, 20]
        include:
          # 특정 조합에 추가 설정
          - os: ubuntu-latest
            node-version: 20
            experimental: true
          - os: windows-latest
            node-version: 18
            arch: x64
        exclude:
          # 특정 조합 제외
          - os: macos-latest
            node-version: 16

    steps:
    - uses: actions/checkout@v3

    - name: Setup Node.js ${{ matrix.node-version }}
      uses: actions/setup-node@v3
      with:
        node-version: ${{ matrix.node-version }}
        architecture: ${{ matrix.arch || 'x64' }}

    - name: Install dependencies
      run: npm ci

    - name: Run tests
      run: npm test
      continue-on-error: ${{ matrix.experimental || false }}

    - name: Build
      run: npm run build
🐛 트러블슈팅 및 디버깅
워크플로우가 실패하면 어떻게 해야 할까요? 디버깅 팁을 알려드릴게요!
🔍 디버그 로깅 활성화
저장소 Settings → Secrets에서 다음 시크릿을 추가하면 상세한 로그를 볼 수 있어요:
ACTIONS_STEP_DEBUG = true : 각 스텝의 상세 로그 출력
ACTIONS_RUNNER_DEBUG = true : 러너의 상세 로그 출력
🧪 로컬에서 테스트하기
act라는 도구를 사용하면 로컬에서 GitHub Actions를 테스트할 수 있어요!
# act 설치 (macOS)
brew install act

# act 설치 (Linux)
curl https://raw.githubusercontent.com/nektos/act/master/install.sh | sudo bash

# 워크플로우 실행
act push

# 특정 job만 실행
act -j build

# 시크릿 전달
act -s GITHUB_TOKEN=your_token

# 특정 이벤트 시뮬레이션
act pull_request
📝 유용한 디버깅 스텝
jobs:
  debug:
    runs-on: ubuntu-latest
    steps:
    - name: Dump GitHub context
      env:
        GITHUB_CONTEXT: ${{ toJson(github) }}
      run: echo "$GITHUB_CONTEXT"

    - name: Dump job context
      env:
        JOB_CONTEXT: ${{ toJson(job) }}
      run: echo "$JOB_CONTEXT"

    - name: Dump steps context
      env:
        STEPS_CONTEXT: ${{ toJson(steps) }}
      run: echo "$STEPS_CONTEXT"

    - name: Dump runner context
      env:
        RUNNER_CONTEXT: ${{ toJson(runner) }}
      run: echo "$RUNNER_CONTEXT"

    - name: List environment variables
      run: env | sort

    - name: Check disk space
      run: df -h

    - name: Check memory
      run: free -h

    - name: List installed software
      run: |
        echo "Node: $(node --version)"
        echo "NPM: $(npm --version)"
        echo "Python: $(python --version)"
        echo "Docker: $(docker --version)"
⚠️ 흔한 에러와 해결 방법
명령어가 실패했다는 뜻이에요. 로그를 자세히 보고 어떤 명령어에서 실패했는지 확인하세요.
continue-on-error: true를 추가하면 에러가 나도 다음 스텝을 계속 실행할 수 있어요.
권한 문제예요.
permissions 섹션에서 필요한 권한을 추가하세요. 예: contents: write, packages: write 등
액션을 찾을 수 없다는 뜻이에요. 액션 이름이나 버전을 확인하세요.
uses: actions/checkout@v3처럼 정확한 버전을 명시하는 게 좋아요.
작업이 너무 오래 걸려서 타임아웃됐어요.
timeout-minutes를 늘리거나, 작업을 최적화하세요. 기본값은 360분(6시간)이에요.
💡 실무 베스트 프랙티스
실제 프로젝트에서 CI/CD를 운영하면서 배운 노하우들을 공유할게요! 이거 진짜 중요해요ㅋㅋㅋ
✅ DO - 이렇게 하세요!
하나의 워크플로우에 너무 많은 작업을 넣지 마세요. 목적별로 분리하는 게 좋아요. 예: ci.yml, deploy.yml, release.yml
의존성 설치는 시간이 오래 걸려요.
actions/cache나 actions/setup-node의 cache 옵션을 사용하면 빌드 시간을 크게 줄일 수 있어요!
uses: actions/checkout@v3처럼 정확한 버전을 명시하세요. @main이나 @master는 예상치 못한 변경으로 워크플로우가 깨질 수 있어요.
모든 브랜치에서 배포할 필요는 없어요.
if 조건으로 필요한 경우에만 실행하세요.
절대 코드에 하드코딩하지 마세요! GitHub Secrets를 사용하고, 정기적으로 로테이션하세요.
배포가 실패했는데 모르고 있으면 큰일이죠! Slack이나 이메일로 알림을 받도록 설정하세요.
배포 전에 반드시 테스트를 통과해야 해요.
needs로 의존성을 설정하세요.
배포가 잘못되면 빠르게 이전 버전으로 돌아갈 수 있어야 해요. Git 태그나 Docker 이미지 태그를 활용하세요.
❌ DON'T - 이건 하지 마세요!
항상 PR을 통해 코드 리뷰를 받고 머지하세요. Branch protection rules를 설정하는 게 좋아요.
"급하니까 테스트는 나중에..."는 절대 안 돼요! 테스트는 선택이 아니라 필수예요.
staging 환경에서 먼저 테스트하고, 문제없으면 프로덕션에 배포하세요.
모든 커밋마다 알림을 보내면 알림 피로도가 생겨요. 중요한 이벤트만 알림을 보내세요.
간단하고 이해하기 쉬운 워크플로우가 좋은 워크플로우예요. 복잡하면 유지보수가 어려워요.
🎓 학습 리소스 및 다음 단계
여기까지 읽으셨다면 GitHub Actions의 기본은 마스터하신 거예요! 축하드려요 🎉 이제 더 깊이 공부하고 싶다면 이런 것들을 살펴보세요.
📚 공식 문서 및 가이드
https://docs.github.com/en/actions
가장 정확하고 최신 정보를 얻을 수 있는 곳이에요. 영어지만 번역 기능을 사용하면 충분히 이해할 수 있어요!
https://github.com/marketplace?type=actions
다른 사람들이 만든 수천 개의 액션을 찾을 수 있어요. 직접 만들기 전에 여기서 찾아보세요!
https://github.com/sdras/awesome-actions
유용한 액션들을 모아놓은 큐레이션 리스트예요. 진짜 awesome해요ㅋㅋㅋ
🛠️ 유용한 도구들
https://github.com/nektos/act
https://github.com/rhysd/actionlint
마켓플레이스에서 "GitHub Actions" 검색
🎯 다음 단계 추천
개인 프로젝트에 CI/CD를 적용해보세요. 실패해도 괜찮아요!
Marketplace에서 유용한 액션들을 찾아서 사용해보세요.
반복되는 작업이 있다면 직접 액션을 만들어보세요.
Matrix, Reusable Workflows, Composite Actions 등을 활용해보세요.
GitHub Discussions나 Stack Overflow에서 질문하고 답변하면서 배워요!
🎬 마무리하며
와... 여기까지 읽으셨다니 대단하세요!ㅋㅋㅋ CI/CD 자동화는 처음엔 어렵게 느껴질 수 있지만, 한 번 익숙해지면 정말 편해요. 수동으로 배포하던 시절로는 절대 돌아갈 수 없을 거예요 😎
GitHub Actions는 계속 발전하고 있어요. 새로운 기능들이 추가되고, 더 많은 액션들이 만들어지고 있죠. 공식 문서를 자주 확인하고, 커뮤니티에서 다른 사람들의 워크플로우를 참고하면서 계속 배워나가세요!
CI/CD 구축이 어렵거나 프로젝트에 맞는 최적화된 파이프라인이 필요하다면, 재능넷(https://www.jaenung.net)에서 전문가의 도움을 받아보세요. 경험 많은 개발자들이 프로젝트 특성에 맞는 CI/CD 파이프라인을 구축해드릴 거예요!
이 글이 여러분의 개발 생산성을 높이는 데 도움이 되었으면 좋겠어요. 질문이나 피드백이 있다면 언제든 댓글로 남겨주세요! 함께 배우고 성장하는 개발자 커뮤니티를 만들어가요 🚀
그럼 여러분의 프로젝트에 멋진 CI/CD 파이프라인이 구축되길 바라면서, 여기서 마치겠습니다. Happy coding! 💻✨
댓글 0
지식인의 숲 - 지적 재산권 보호 고지
지적 재산권 보호 고지
- 저작권 및 소유권: 본 컨텐츠는 재능넷의 독점 AI 기술로 생성되었으며, 대한민국 저작권법 및 국제 저작권 협약에 의해 보호됩니다.
- AI 생성 컨텐츠의 법적 지위: 본 AI 생성 컨텐츠는 재능넷의 지적 창작물로 인정되며, 관련 법규에 따라 저작권 보호를 받습니다.
- 사용 제한: 재능넷의 명시적 서면 동의 없이 본 컨텐츠를 복제, 수정, 배포, 또는 상업적으로 활용하는 행위는 엄격히 금지됩니다.
- 데이터 수집 금지: 본 컨텐츠에 대한 무단 스크래핑, 크롤링, 및 자동화된 데이터 수집은 법적 제재의 대상이 됩니다.
- AI 학습 제한: 재능넷의 AI 생성 컨텐츠를 타 AI 모델 학습에 무단 사용하는 행위는 금지되며, 이는 지적 재산권 침해로 간주됩니다.

![[C / C++] 프로그램 대행 / 응용프로그램 / 알고리즘](https://static.jaenung.net/storage/list_img1/kbigbell_2018091111324044828.png)


![[ C, C++, PYTHON, MFC, OPENCV , 스크래치 ]개발해드립니다.](https://static.jaenung.net/storage/list_img2/root10729_20191225041542240661.jpg)


댓글 작성
이 글에 대한 여러분의 생각을 들려주세요
로그인이 필요합니다
댓글을 작성하려면 먼저 로그인해주세요.