
Ver3.0 JavaScript 디자인 패턴과 모듈 패턴 옵저버 패턴 구현
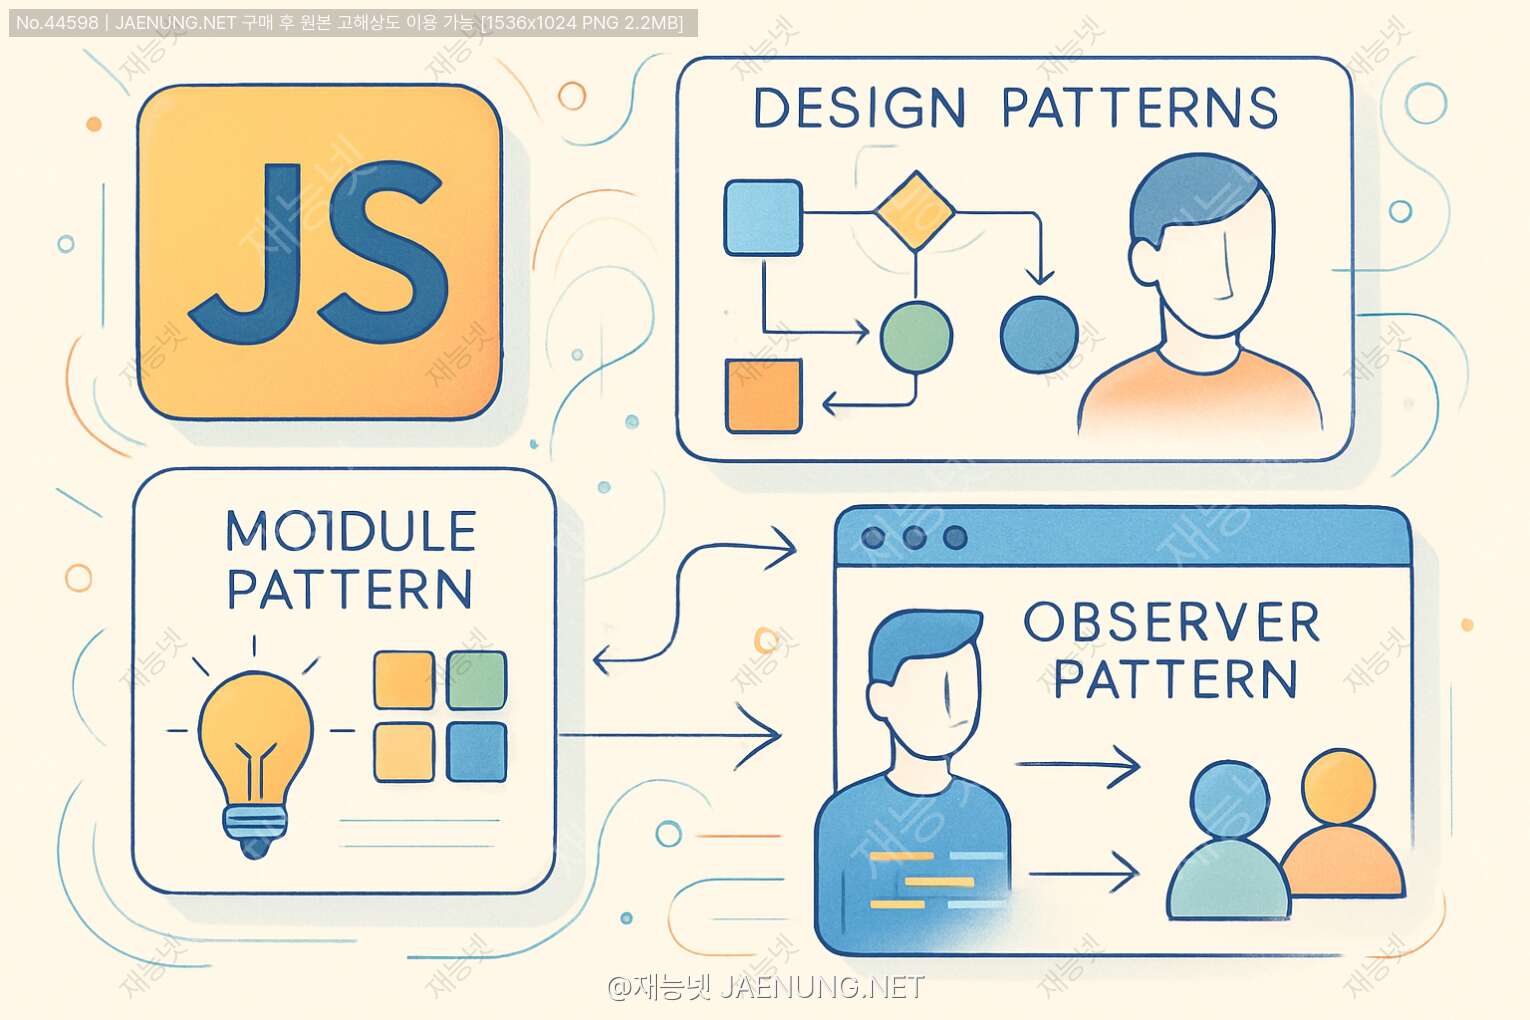
JavaScript 디자인 패턴과 모듈 패턴 옵저버 패턴 구현
코드 품질을 한 단계 업그레이드하는 실전 패턴 가이드 🚀
요즘 프론트엔드 개발하다 보면 코드가 점점 스파게티처럼 꼬이는 경험 해보셨죠? ㅋㅋㅋ 저도 처음엔 그냥 막 짜다가 나중에 유지보수할 때 "이거 내가 짠 건가?" 싶을 때가 한두 번이 아니었어요 😅
그래서 오늘은 JavaScript에서 진짜 실무에서 많이 쓰이는 디자인 패턴들을 깊이 있게 파헤쳐볼 거예요! 특히 모듈 패턴이랑 옵저버 패턴은 알아두면 코드 퀄리티가 확 달라지거든요 💪
🎯 디자인 패턴이 뭔데 이렇게 난리야?
디자인 패턴은 쉽게 말하면 코딩계의 레시피라고 보면 돼요 ㅋㅋ 요리할 때 레시피 보고 하면 실패 확률이 줄어들잖아요? 코딩도 마찬가지예요!
수많은 개발자들이 비슷한 문제를 겪으면서 "아 이렇게 하면 되겠네!"라고 정리해놓은 베스트 프랙티스들이 바로 디자인 패턴이에요. 특히 JavaScript는 프로토타입 기반 언어라서 클래스 기반 언어들과는 좀 다른 접근이 필요하거든요 🤔
💡 왜 디자인 패턴을 써야 할까?
1. 코드 재사용성 - 검증된 솔루션을 재활용할 수 있어요
2. 유지보수성 - 나중에 봐도 이해하기 쉬운 구조
3. 커뮤니케이션 - 팀원들과 "옵저버 패턴으로 구현했어요"라고 말하면 바로 이해됨
4. 확장성 - 기능 추가할 때 기존 코드 건드리지 않아도 됨
5. 버그 감소 - 이미 검증된 방식이라 예상치 못한 버그가 적어요
근데 주의할 점! 디자인 패턴이 만능은 아니에요 ㅋㅋㅋ 오버 엔지니어링하다가 오히려 코드가 복잡해질 수도 있거든요. 적재적소에 쓰는 게 중요해요 👍
📦 모듈 패턴 - 캡슐화의 정석
모듈 패턴은 JavaScript에서 캡슐화를 구현하는 가장 기본적이면서도 강력한 패턴이에요. Java나 C++처럼 private 키워드가 없던 시절(ES6 이전)에 진짜 많이 쓰였죠 😎
핵심 아이디어는 클로저(Closure)를 활용해서 private 변수와 메서드를 만드는 거예요!
🔒 기본 모듈 패턴 구조
가장 기본적인 형태부터 볼까요? IIFE(즉시 실행 함수)를 사용해서 구현해요:
const MyModule = (function() {
    // private 변수 - 외부에서 접근 불가!
    let privateCounter = 0;
    const privateData = '비밀 데이터';

    // private 함수
    function privateMethod() {
        console.log('이건 외부에서 못 봐요 ㅋㅋ');
        return privateCounter++;
    }

    // public API 반환
    return {
        // public 메서드
        increment: function() {
            privateMethod();
            console.log(`카운터: ${privateCounter}`);
        },

        getCount: function() {
            return privateCounter;
        },

        reset: function() {
            privateCounter = 0;
            console.log('카운터 리셋!');
        }
    };
})();

// 사용 예시
MyModule.increment(); // 카운터: 1
MyModule.increment(); // 카운터: 2
console.log(MyModule.getCount()); // 2

// 이건 안 돼요!
console.log(MyModule.privateCounter); // undefined
MyModule.privateMethod(); // Error!🎨 Revealing Module Pattern (노출식 모듈 패턴)
기본 모듈 패턴의 업그레이드 버전이에요! 코드 가독성이 훨씬 좋아져요 ㅎㅎ
const Calculator = (function() {
    // private 변수
    let result = 0;

    // private 함수들
    function validateNumber(num) {
        if (typeof num !== 'number') {
            throw new Error('숫자만 입력하세요!');
        }
    }

    function add(num) {
        validateNumber(num);
        result += num;
        return result;
    }

    function subtract(num) {
        validateNumber(num);
        result -= num;
        return result;
    }

    function multiply(num) {
        validateNumber(num);
        result *= num;
        return result;
    }

    function getResult() {
        return result;
    }

    function clear() {
        result = 0;
        return result;
    }

    // public API를 명시적으로 노출
    return {
        add: add,
        subtract: subtract,
        multiply: multiply,
        getResult: getResult,
        clear: clear
    };
})();

// 사용해보기
Calculator.add(10);      // 10
Calculator.multiply(5);  // 50
Calculator.subtract(20); // 30
console.log(Calculator.getResult()); // 30
이 패턴의 장점은 코드 맨 아래에서 어떤 함수들이 public인지 한눈에 볼 수 있다는 거예요! 유지보수할 때 진짜 편해요 👌
🔧 ES6+ 모듈 시스템
요즘은 ES6 모듈 시스템을 많이 쓰죠! import/export 문법이 훨씬 직관적이에요:
// userModule.js
let users = [];

// private 함수
function validateUser(user) {
    if (!user.name || !user.email) {
        throw new Error('이름과 이메일은 필수예요!');
    }
}

// public 함수들
export function addUser(user) {
    validateUser(user);
    users.push(user);
    console.log(`${user.name}님 추가 완료! 🎉`);
}

export function getUsers() {
    return [...users]; // 복사본 반환 (원본 보호)
}

export function findUser(name) {
    return users.find(user => user.name === name);
}

export function removeUser(name) {
    const index = users.findIndex(user => user.name === name);
    if (index !== -1) {
        users.splice(index, 1);
        console.log(`${name}님 삭제됨 ㅠㅠ`);
    }
}

// 사용하는 쪽 (main.js)
import { addUser, getUsers, findUser } from './userModule.js';

addUser({ name: '김코딩', email: 'coding@example.com' });
addUser({ name: '박자바', email: 'java@example.com' });

console.log(getUsers());
console.log(findUser('김코딩'));
📊 모듈 패턴 비교
IIFE 모듈 패턴
✅ 브라우저 호환성 좋음
✅ 즉시 실행되어 초기화 가능
❌ 파일 분리 어려움
❌ 의존성 관리 복잡
ES6 모듈
✅ 문법이 깔끔하고 직관적
✅ 정적 분석 가능 (트리 쉐이킹)
✅ 비동기 로딩 지원
❌ 구형 브라우저에서 폴리필 필요
🎯 실전 활용 예제 - 장바구니 모듈
실제로 쇼핑몰 만들 때 쓸 수 있는 장바구니 모듈을 만들어볼게요 🛒
const ShoppingCart = (function() {
    // private 상태
    let items = [];
    let totalPrice = 0;

    // private 헬퍼 함수
    function calculateTotal() {
        totalPrice = items.reduce((sum, item) => {
            return sum + (item.price * item.quantity);
        }, 0);
    }

    function findItemIndex(productId) {
        return items.findIndex(item => item.id === productId);
    }

    // public 메서드들
    function addItem(product, quantity = 1) {
        const existingIndex = findItemIndex(product.id);

        if (existingIndex !== -1) {
            // 이미 있으면 수량만 증가
            items[existingIndex].quantity += quantity;
            console.log(`${product.name} 수량 증가! (+${quantity})`);
        } else {
            // 새로운 상품 추가
            items.push({
                id: product.id,
                name: product.name,
                price: product.price,
                quantity: quantity
            });
            console.log(`${product.name} 장바구니에 담김! 🛒`);
        }

        calculateTotal();
    }

    function removeItem(productId) {
        const index = findItemIndex(productId);
        if (index !== -1) {
            const removed = items.splice(index, 1)[0];
            console.log(`${removed.name} 삭제됨 ㅠㅠ`);
            calculateTotal();
        }
    }

    function updateQuantity(productId, newQuantity) {
        const index = findItemIndex(productId);
        if (index !== -1) {
            if (newQuantity <= 0) {
                removeItem(productId);
            } else {
                items[index].quantity = newQuantity;
                calculateTotal();
                console.log('수량 업데이트 완료!');
            }
        }
    }

    function getItems() {
        return items.map(item => ({...item})); // 깊은 복사
    }

    function getTotalPrice() {
        return totalPrice;
    }

    function getItemCount() {
        return items.reduce((count, item) => count + item.quantity, 0);
    }

    function clear() {
        items = [];
        totalPrice = 0;
        console.log('장바구니 비움! 🗑️');
    }

    // Public API
    return {
        addItem,
        removeItem,
        updateQuantity,
        getItems,
        getTotalPrice,
        getItemCount,
        clear
    };
})();

// 실제 사용
const product1 = { id: 1, name: '맥북 프로', price: 2500000 };
const product2 = { id: 2, name: '아이패드', price: 800000 };

ShoppingCart.addItem(product1, 1);
ShoppingCart.addItem(product2, 2);
ShoppingCart.addItem(product1, 1); // 수량 증가

console.log('장바구니 내역:', ShoppingCart.getItems());
console.log('총 금액:', ShoppingCart.getTotalPrice().toLocaleString() + '원');
console.log('총 상품 수:', ShoppingCart.getItemCount() + '개');
이렇게 모듈 패턴을 쓰면 장바구니 데이터를 외부에서 함부로 조작할 수 없어요! 오직 제공된 메서드를 통해서만 접근 가능하죠 🔐
👀 옵저버 패턴 - 이벤트 기반 프로그래밍의 핵심
옵저버 패턴은 진짜 실무에서 엄청 많이 쓰이는 패턴이에요! Pub/Sub 패턴이라고도 부르는데, 쉽게 말하면 유튜브 구독 시스템이랑 비슷해요 ㅋㅋㅋ
채널(Subject)이 영상을 올리면 구독자들(Observers)한테 자동으로 알림이 가잖아요? 바로 그 원리예요! 📺
🎭 옵저버 패턴의 구조
옵저버 패턴은 크게 두 가지 역할로 나뉘어요:
1. Subject (주체)
- 상태를 가지고 있는 객체
- 옵저버들을 관리 (등록/제거)
- 상태 변화 시 옵저버들에게 알림
2. Observer (관찰자)
- Subject를 구독하는 객체
- 알림을 받으면 자동으로 업데이트
- 여러 개가 동시에 존재 가능
🔨 기본 옵저버 패턴 구현
가장 기본적인 형태부터 만들어볼게요:
class Subject {
    constructor() {
        this.observers = []; // 구독자 목록
    }

    // 구독 추가
    subscribe(observer) {
        this.observers.push(observer);
        console.log('새로운 구독자 추가! 현재 구독자:', this.observers.length);
    }

    // 구독 취소
    unsubscribe(observer) {
        this.observers = this.observers.filter(obs => obs !== observer);
        console.log('구독 취소됨 ㅠㅠ 남은 구독자:', this.observers.length);
    }

    // 모든 구독자에게 알림
    notify(data) {
        console.log(`📢 알림 발송! (${this.observers.length}명에게)`);
        this.observers.forEach(observer => {
            observer.update(data);
        });
    }
}

class Observer {
    constructor(name) {
        this.name = name;
    }

    update(data) {
        console.log(`[${this.name}] 알림 받음:`, data);
    }
}

// 사용 예시
const newsChannel = new Subject();

const subscriber1 = new Observer('김코딩');
const subscriber2 = new Observer('이자바');
const subscriber3 = new Observer('박리액트');

newsChannel.subscribe(subscriber1);
newsChannel.subscribe(subscriber2);
newsChannel.subscribe(subscriber3);

newsChannel.notify('긴급 속보! JavaScript 새 버전 출시! 🎉');

newsChannel.unsubscribe(subscriber2);

newsChannel.notify('두 번째 뉴스입니다~');
🚀 고급 옵저버 패턴 - 이벤트 이미터
Node.js의 EventEmitter처럼 이벤트 이름으로 구분할 수 있는 버전을 만들어볼게요! 이게 진짜 실무에서 많이 쓰이는 형태예요 💪
class EventEmitter {
    constructor() {
        this.events = {}; // 이벤트별로 리스너 관리
    }

    // 이벤트 리스너 등록
    on(eventName, callback) {
        if (!this.events[eventName]) {
            this.events[eventName] = [];
        }
        this.events[eventName].push(callback);
        console.log(`✅ '${eventName}' 이벤트 리스너 등록됨`);
    }

    // 한 번만 실행되는 리스너
    once(eventName, callback) {
        const onceWrapper = (data) => {
            callback(data);
            this.off(eventName, onceWrapper);
        };
        this.on(eventName, onceWrapper);
    }

    // 이벤트 리스너 제거
    off(eventName, callback) {
        if (!this.events[eventName]) return;

        this.events[eventName] = this.events[eventName].filter(
            listener => listener !== callback
        );
        console.log(`❌ '${eventName}' 이벤트 리스너 제거됨`);
    }

    // 이벤트 발생
    emit(eventName, data) {
        if (!this.events[eventName]) {
            console.log(`⚠️ '${eventName}' 이벤트에 리스너가 없어요`);
            return;
        }

        console.log(`🔔 '${eventName}' 이벤트 발생!`);
        this.events[eventName].forEach(callback => {
            callback(data);
        });
    }

    // 모든 리스너 제거
    removeAllListeners(eventName) {
        if (eventName) {
            delete this.events[eventName];
            console.log(`🗑️ '${eventName}' 이벤트의 모든 리스너 제거`);
        } else {
            this.events = {};
            console.log('🗑️ 모든 이벤트 리스너 제거');
        }
    }

    // 리스너 개수 확인
    listenerCount(eventName) {
        return this.events[eventName] ? this.events[eventName].length : 0;
    }
}

// 실전 예제 - 채팅 시스템
const chatRoom = new EventEmitter();

// 메시지 수신 리스너
chatRoom.on('message', (data) => {
    console.log(`💬 [${data.user}]: ${data.text}`);
});

// 사용자 입장 리스너
chatRoom.on('userJoin', (username) => {
    console.log(`👋 ${username}님이 입장하셨습니다!`);
});

// 사용자 퇴장 리스너
chatRoom.on('userLeave', (username) => {
    console.log(`👋 ${username}님이 퇴장하셨습니다 ㅠㅠ`);
});

// 시스템 알림 (한 번만)
chatRoom.once('systemAlert', (message) => {
    console.log(`⚠️ 시스템 알림: ${message}`);
});

// 이벤트 발생시켜보기
chatRoom.emit('userJoin', '김코딩');
chatRoom.emit('message', { user: '김코딩', text: '안녕하세요!' });
chatRoom.emit('userJoin', '이자바');
chatRoom.emit('message', { user: '이자바', text: '반갑습니다~' });
chatRoom.emit('systemAlert', '서버 점검 예정입니다');
chatRoom.emit('systemAlert', '이건 안 보여요 (once라서)');
chatRoom.emit('userLeave', '김코딩');🎮 실전 활용 - 게임 상태 관리
게임에서 점수가 변하면 UI도 업데이트되고, 업적도 체크하고, 사운드도 재생되어야 하잖아요? 옵저버 패턴이 딱이에요! 🎯
class GameState extends EventEmitter {
    constructor() {
        super();
        this.score = 0;
        this.level = 1;
        this.lives = 3;
    }

    addScore(points) {
        this.score += points;
        this.emit('scoreChange', {
            score: this.score,
            points: points
        });

        // 레벨업 체크
        if (this.score >= this.level * 1000) {
            this.levelUp();
        }
    }

    levelUp() {
        this.level++;
        this.emit('levelUp', {
            level: this.level,
            message: `레벨 ${this.level} 달성! 🎉`
        });
    }

    loseLife() {
        this.lives--;
        this.emit('lifeChange', {
            lives: this.lives
        });

        if (this.lives <= 0) {
            this.emit('gameOver', {
                finalScore: this.score,
                finalLevel: this.level
            });
        }
    }

    reset() {
        this.score = 0;
        this.level = 1;
        this.lives = 3;
        this.emit('gameReset');
    }
}

// UI 업데이트 담당
class UIManager {
    constructor(gameState) {
        this.gameState = gameState;
        this.setupListeners();
    }

    setupListeners() {
        this.gameState.on('scoreChange', (data) => {
            console.log(`📊 점수 UI 업데이트: ${data.score}점 (+${data.points})`);
            // 실제로는 DOM 업데이트
        });

        this.gameState.on('levelUp', (data) => {
            console.log(`⬆️ 레벨 UI 업데이트: ${data.message}`);
            // 레벨업 애니메이션 재생
        });

        this.gameState.on('lifeChange', (data) => {
            console.log(`❤️ 생명 UI 업데이트: ${data.lives}개 남음`);
        });

        this.gameState.on('gameOver', (data) => {
            console.log(`💀 게임 오버 화면 표시`);
            console.log(`최종 점수: ${data.finalScore}, 최종 레벨: ${data.finalLevel}`);
        });
    }
}

// 사운드 매니저
class SoundManager {
    constructor(gameState) {
        this.gameState = gameState;
        this.setupListeners();
    }

    setupListeners() {
        this.gameState.on('scoreChange', () => {
            console.log('🔊 점수 획득 사운드 재생');
        });

        this.gameState.on('levelUp', () => {
            console.log('🎵 레벨업 사운드 재생');
        });

        this.gameState.on('lifeChange', () => {
            console.log('💔 피격 사운드 재생');
        });

        this.gameState.on('gameOver', () => {
            console.log('🎼 게임 오버 음악 재생');
        });
    }
}

// 업적 시스템
class AchievementManager {
    constructor(gameState) {
        this.gameState = gameState;
        this.achievements = new Set();
        this.setupListeners();
    }

    setupListeners() {
        this.gameState.on('scoreChange', (data) => {
            if (data.score >= 5000 && !this.achievements.has('score5k')) {
                this.achievements.add('score5k');
                console.log('🏆 업적 달성: 5000점 돌파!');
            }
        });

        this.gameState.on('levelUp', (data) => {
            if (data.level >= 5 && !this.achievements.has('level5')) {
                this.achievements.add('level5');
                console.log('🏆 업적 달성: 레벨 5 도달!');
            }
        });
    }
}

// 게임 시작!
const game = new GameState();
const ui = new UIManager(game);
const sound = new SoundManager(game);
const achievements = new AchievementManager(game);

console.log('=== 게임 시작! ===\n');

game.addScore(500);
game.addScore(700);
game.addScore(1500); // 레벨업!
game.addScore(2500);
game.loseLife();
game.addScore(3000); // 업적 달성!
game.loseLife();
game.loseLife(); // 게임 오버
보세요! 게임 상태만 변경하면 UI, 사운드, 업적이 알아서 반응해요 ㅋㅋㅋ 각 시스템이 독립적이라 나중에 기능 추가하거나 수정하기도 엄청 편해요! 🎮
🔄 옵저버 vs Pub/Sub 차이점
많은 사람들이 헷갈려하는 부분인데, 사실 약간 다른 패턴이에요:
옵저버 패턴
- Subject와 Observer가 서로를 알고 있음
- 직접적인 의존성 존재
- 동기적으로 동작
- 예: DOM 이벤트 리스너
Pub/Sub 패턴
- Publisher와 Subscriber가 서로 모름
- Event Bus/Message Broker가 중간에서 중재
- 비동기적으로 동작 가능
- 예: Redis Pub/Sub, RabbitMQ
// Pub/Sub 패턴 구현
class MessageBroker {
    constructor() {
        this.subscribers = {};
    }

    subscribe(topic, callback) {
        if (!this.subscribers[topic]) {
            this.subscribers[topic] = [];
        }
        this.subscribers[topic].push(callback);
        console.log(`📬 '${topic}' 토픽 구독 시작`);
    }

    publish(topic, message) {
        if (!this.subscribers[topic]) {
            console.log(`📭 '${topic}' 토픽에 구독자가 없어요`);
            return;
        }

        console.log(`📮 '${topic}' 토픽에 메시지 발행`);

        // 비동기 처리 (실제 메시지 큐처럼)
        setTimeout(() => {
            this.subscribers[topic].forEach(callback => {
                callback(message);
            });
        }, 0);
    }

    unsubscribe(topic, callback) {
        if (!this.subscribers[topic]) return;

        this.subscribers[topic] = this.subscribers[topic].filter(
            sub => sub !== callback
        );
        console.log(`📪 '${topic}' 토픽 구독 취소`);
    }
}

// 마이크로서비스 간 통신 예제
const messageBroker = new MessageBroker();

// 주문 서비스
const orderService = {
    createOrder: (orderData) => {
        console.log('🛒 주문 생성:', orderData);
        messageBroker.publish('order.created', orderData);
    }
};

// 재고 서비스
messageBroker.subscribe('order.created', (orderData) => {
    console.log('📦 재고 서비스: 재고 차감 처리');
});

// 결제 서비스
messageBroker.subscribe('order.created', (orderData) => {
    console.log('💳 결제 서비스: 결제 처리 시작');
});

// 알림 서비스
messageBroker.subscribe('order.created', (orderData) => {
    console.log('📧 알림 서비스: 주문 확인 이메일 발송');
});

// 주문 생성!
orderService.createOrder({
    orderId: 'ORD-12345',
    userId: 'user-001',
    items: ['맥북', '아이패드'],
    total: 3300000
});
🎨 다른 유용한 디자인 패턴들
모듈 패턴이랑 옵저버 패턴 외에도 알아두면 좋은 패턴들이 많아요! 간단하게 소개해드릴게요 😊
🔐 싱글톤 패턴 (Singleton Pattern)
클래스의 인스턴스가 딱 하나만 존재하도록 보장하는 패턴이에요. 전역 상태 관리나 설정 객체에 많이 써요:
class DatabaseConnection {
    constructor() {
        if (DatabaseConnection.instance) {
            return DatabaseConnection.instance;
        }

        this.connection = null;
        this.isConnected = false;
        DatabaseConnection.instance = this;
    }

    connect(config) {
        if (this.isConnected) {
            console.log('이미 연결되어 있어요!');
            return this.connection;
        }

        console.log('데이터베이스 연결 중... 🔌');
        this.connection = `Connected to ${config.host}:${config.port}`;
        this.isConnected = true;
        return this.connection;
    }

    disconnect() {
        if (!this.isConnected) {
            console.log('연결되어 있지 않아요!');
            return;
        }

        console.log('연결 해제 중... 🔌');
        this.connection = null;
        this.isConnected = false;
    }

    getConnection() {
        return this.connection;
    }
}

// 사용 예시
const db1 = new DatabaseConnection();
const db2 = new DatabaseConnection();

console.log(db1 === db2); // true - 같은 인스턴스!

db1.connect({ host: 'localhost', port: 5432 });
console.log(db2.getConnection()); // db1과 같은 연결 공유🏭 팩토리 패턴 (Factory Pattern)
객체 생성 로직을 캡슐화하는 패턴이에요. 조건에 따라 다른 타입의 객체를 생성할 때 유용해요:
// 다양한 버튼 타입
class PrimaryButton {
    constructor(text) {
        this.text = text;
        this.style = 'primary';
    }

    render() {
        return `<button class="btn-primary">${this.text}</button>`;
    }
}

class SecondaryButton {
    constructor(text) {
        this.text = text;
        this.style = 'secondary';
    }

    render() {
        return `<button class="btn-secondary">${this.text}</button>`;
    }
}

class DangerButton {
    constructor(text) {
        this.text = text;
        this.style = 'danger';
    }

    render() {
        return `<button class="btn-danger">${this.text}</button>`;
    }
}

// 팩토리
class ButtonFactory {
    static createButton(type, text) {
        switch(type) {
            case 'primary':
                return new PrimaryButton(text);
            case 'secondary':
                return new SecondaryButton(text);
            case 'danger':
                return new DangerButton(text);
            default:
                throw new Error(`알 수 없는 버튼 타입: ${type}`);
        }
    }
}

// 사용
const saveBtn = ButtonFactory.createButton('primary', '저장');
const cancelBtn = ButtonFactory.createButton('secondary', '취소');
const deleteBtn = ButtonFactory.createButton('danger', '삭제');

console.log(saveBtn.render());
console.log(cancelBtn.render());
console.log(deleteBtn.render());
🎭 전략 패턴 (Strategy Pattern)
알고리즘을 캡슐화하고 런타임에 교체 가능하게 만드는 패턴이에요. 결제 방식 선택 같은 데 딱이죠!
// 결제 전략들
class CreditCardPayment {
    pay(amount) {
        console.log(`💳 신용카드로 ${amount.toLocaleString()}원 결제`);
        return { method: 'credit', amount, fee: amount * 0.03 };
    }
}

class KakaoPayPayment {
    pay(amount) {
        console.log(`💛 카카오페이로 ${amount.toLocaleString()}원 결제`);
        return { method: 'kakao', amount, fee: 0 };
    }
}

class NaverPayPayment {
    pay(amount) {
        console.log(`💚 네이버페이로 ${amount.toLocaleString()}원 결제`);
        return { method: 'naver', amount, fee: 0 };
    }
}

// 결제 컨텍스트
class PaymentContext {
    constructor(strategy) {
        this.strategy = strategy;
    }

    setStrategy(strategy) {
        this.strategy = strategy;
        console.log('결제 방식 변경됨!');
    }

    executePayment(amount) {
        if (!this.strategy) {
            throw new Error('결제 방식을 선택해주세요!');
        }
        return this.strategy.pay(amount);
    }
}

// 사용
const payment = new PaymentContext(new CreditCardPayment());
payment.executePayment(50000);

payment.setStrategy(new KakaoPayPayment());
payment.executePayment(30000);

payment.setStrategy(new NaverPayPayment());
payment.executePayment(20000);
🎨 데코레이터 패턴 (Decorator Pattern)
객체에 동적으로 새로운 기능을 추가하는 패턴이에요. 커피 주문 시스템으로 예를 들어볼게요 ☕
// 기본 커피
class Coffee {
    cost() {
        return 3000;
    }

    description() {
        return '아메리카노';
    }
}

// 데코레이터 베이스
class CoffeeDecorator {
    constructor(coffee) {
        this.coffee = coffee;
    }

    cost() {
        return this.coffee.cost();
    }

    description() {
        return this.coffee.description();
    }
}

// 샷 추가
class ExtraShot extends CoffeeDecorator {
    cost() {
        return this.coffee.cost() + 500;
    }

    description() {
        return this.coffee.description() + ' + 샷 추가';
    }
}

// 우유 추가
class Milk extends CoffeeDecorator {
    cost() {
        return this.coffee.cost() + 600;
    }

    description() {
        return this.coffee.description() + ' + 우유';
    }
}

// 휘핑크림 추가
class WhippedCream extends CoffeeDecorator {
    cost() {
        return this.coffee.cost() + 700;
    }

    description() {
        return this.coffee.description() + ' + 휘핑크림';
    }
}

// 주문!
let myCoffee = new Coffee();
console.log(`${myCoffee.description()}: ${myCoffee.cost()}원`);

myCoffee = new ExtraShot(myCoffee);
console.log(`${myCoffee.description()}: ${myCoffee.cost()}원`);

myCoffee = new Milk(myCoffee);
console.log(`${myCoffee.description()}: ${myCoffee.cost()}원`);

myCoffee = new WhippedCream(myCoffee);
console.log(`${myCoffee.description()}: ${myCoffee.cost()}원`);
// 아메리카노 + 샷 추가 + 우유 + 휘핑크림: 4800원🛠️ 실전 프로젝트 - 할 일 관리 앱
지금까지 배운 패턴들을 모두 활용해서 실제 동작하는 할 일 관리 앱을 만들어볼게요! 진짜 실무에서 쓸 수 있는 수준으로 구현해볼 거예요 💪
// 1. 모듈 패턴으로 데이터 관리
const TodoStore = (function() {
    // private 상태
    let todos = [];
    let nextId = 1;

    // private 헬퍼 함수
    function findTodoIndex(id) {
        return todos.findIndex(todo => todo.id === id);
    }

    function validateTodo(text) {
        if (!text || text.trim().length === 0) {
            throw new Error('할 일을 입력해주세요!');
        }
    }

    // public API
    return {
        addTodo(text) {
            validateTodo(text);
            const todo = {
                id: nextId++,
                text: text.trim(),
                completed: false,
                createdAt: new Date()
            };
            todos.push(todo);
            return todo;
        },

        removeTodo(id) {
            const index = findTodoIndex(id);
            if (index !== -1) {
                const removed = todos.splice(index, 1)[0];
                return removed;
            }
            return null;
        },

        toggleTodo(id) {
            const index = findTodoIndex(id);
            if (index !== -1) {
                todos[index].completed = !todos[index].completed;
                return todos[index];
            }
            return null;
        },

        updateTodo(id, newText) {
            validateTodo(newText);
            const index = findTodoIndex(id);
            if (index !== -1) {
                todos[index].text = newText.trim();
                return todos[index];
            }
            return null;
        },

        getTodos() {
            return [...todos]; // 복사본 반환
        },

        getStats() {
            return {
                total: todos.length,
                completed: todos.filter(t => t.completed).length,
                active: todos.filter(t => !t.completed).length
            };
        },

        clearCompleted() {
            const removed = todos.filter(t => t.completed);
            todos = todos.filter(t => !t.completed);
            return removed;
        }
    };
})();

// 2. 옵저버 패턴으로 이벤트 관리
class TodoEventEmitter extends EventEmitter {
    constructor(store) {
        super();
        this.store = store;
    }

    addTodo(text) {
        try {
            const todo = this.store.addTodo(text);
            this.emit('todoAdded', todo);
            this.emit('statsChanged', this.store.getStats());
            return todo;
        } catch (error) {
            this.emit('error', error.message);
            throw error;
        }
    }

    removeTodo(id) {
        const removed = this.store.removeTodo(id);
        if (removed) {
            this.emit('todoRemoved', removed);
            this.emit('statsChanged', this.store.getStats());
        }
        return removed;
    }

    toggleTodo(id) {
        const todo = this.store.toggleTodo(id);
        if (todo) {
            this.emit('todoToggled', todo);
            this.emit('statsChanged', this.store.getStats());
        }
        return todo;
    }

    updateTodo(id, newText) {
        try {
            const todo = this.store.updateTodo(id, newText);
            if (todo) {
                this.emit('todoUpdated', todo);
            }
            return todo;
        } catch (error) {
            this.emit('error', error.message);
            throw error;
        }
    }

    clearCompleted() {
        const removed = this.store.clearCompleted();
        if (removed.length > 0) {
            this.emit('completedCleared', removed);
            this.emit('statsChanged', this.store.getStats());
        }
        return removed;
    }
}

// 3. UI 렌더러 (옵저버)
class TodoRenderer {
    constructor(todoApp) {
        this.todoApp = todoApp;
        this.setupListeners();
    }

    setupListeners() {
        this.todoApp.on('todoAdded', (todo) => {
            console.log(`✅ 할 일 추가됨: "${todo.text}"`);
            this.renderTodo(todo);
        });

        this.todoApp.on('todoRemoved', (todo) => {
            console.log(`🗑️ 할 일 삭제됨: "${todo.text}"`);
        });

        this.todoApp.on('todoToggled', (todo) => {
            const status = todo.completed ? '완료' : '미완료';
            console.log(`🔄 상태 변경: "${todo.text}" → ${status}`);
        });

        this.todoApp.on('todoUpdated', (todo) => {
            console.log(`✏️ 할 일 수정됨: "${todo.text}"`);
        });

        this.todoApp.on('statsChanged', (stats) => {
            console.log(`📊 통계: 전체 ${stats.total} | 완료 ${stats.completed} | 미완료 ${stats.active}`);
        });

        this.todoApp.on('completedCleared', (removed) => {
            console.log(`🧹 완료된 항목 ${removed.length}개 삭제됨`);
        });

        this.todoApp.on('error', (message) => {
            console.error(`❌ 에러: ${message}`);
        });
    }

    renderTodo(todo) {
        // 실제로는 DOM 조작
        console.log(`  → [${todo.completed ? '✓' : ' '}] ${todo.text}`);
    }
}

// 4. 로컬 스토리지 동기화 (옵저버)
class TodoPersistence {
    constructor(todoApp) {
        this.todoApp = todoApp;
        this.storageKey = 'todos';
        this.setupListeners();
        this.loadFromStorage();
    }

    setupListeners() {
        // 모든 변경사항을 로컬 스토리지에 저장
        const saveEvents = [
            'todoAdded',
            'todoRemoved',
            'todoToggled',
            'todoUpdated',
            'completedCleared'
        ];

        saveEvents.forEach(event => {
            this.todoApp.on(event, () => {
                this.saveToStorage();
            });
        });
    }

    saveToStorage() {
        const todos = this.todoApp.store.getTodos();
        // 실제로는 localStorage.setItem 사용
        console.log('💾 로컬 스토리지에 저장됨');
    }

    loadFromStorage() {
        // 실제로는 localStorage.getItem 사용
        console.log('📂 로컬 스토리지에서 불러옴');
    }
}

// 5. 통계 대시보드 (옵저버)
class TodoStatistics {
    constructor(todoApp) {
        this.todoApp = todoApp;
        this.setupListeners();
    }

    setupListeners() {
        this.todoApp.on('statsChanged', (stats) => {
            this.updateChart(stats);
        });
    }

    updateChart(stats) {
        const completionRate = stats.total > 0
            ? ((stats.completed / stats.total) * 100).toFixed(1)
            : 0;
        console.log(`📈 완료율: ${completionRate}%`);
    }
}

// 앱 초기화 및 실행
console.log('=== 할 일 관리 앱 시작! ===\n');

const todoApp = new TodoEventEmitter(TodoStore);
const renderer = new TodoRenderer(todoApp);
const persistence = new TodoPersistence(todoApp);
const statistics = new TodoStatistics(todoApp);

// 사용 예시
console.log('\n--- 할 일 추가 ---');
todoApp.addTodo('JavaScript 디자인 패턴 공부하기');
todoApp.addTodo('재능넷에서 프로그래밍 강의 듣기');
todoApp.addTodo('옵저버 패턴 실습하기');

console.log('\n--- 할 일 완료 처리 ---');
const todos = TodoStore.getTodos();
todoApp.toggleTodo(todos[0].id);
todoApp.toggleTodo(todos[2].id);

console.log('\n--- 할 일 수정 ---');
todoApp.updateTodo(todos[1].id, '재능넷에서 고급 JavaScript 강의 듣기');

console.log('\n--- 완료된 항목 삭제 ---');
todoApp.clearCompleted();

console.log('\n--- 최종 통계 ---');
const finalStats = TodoStore.getStats();
console.log(finalStats);
와 이렇게 패턴들을 조합하니까 진짜 확장 가능한 구조가 되었죠? ㅋㅋㅋ 각 컴포넌트가 독립적이라서 나중에 기능 추가하거나 수정할 때도 다른 부분 건드릴 필요가 없어요! 🎉
⚡ 성능 최적화 팁
디자인 패턴을 쓸 때 성능도 신경 써야 해요! 특히 옵저버 패턴은 잘못 쓰면 성능 이슈가 생길 수 있거든요 😅
🚀 Throttle과 Debounce
고빈도 이벤트를 처리할 때는 필수예요!
// Throttle - 일정 시간마다 한 번만 실행
function throttle(func, delay) {
    let lastCall = 0;
    return function(...args) {
        const now = Date.now();
        if (now - lastCall >= delay) {
            lastCall = now;
            return func.apply(this, args);
        }
    };
}

// Debounce - 마지막 호출 후 일정 시간 뒤에 실행
function debounce(func, delay) {
    let timeoutId;
    return function(...args) {
        clearTimeout(timeoutId);
        timeoutId = setTimeout(() => {
            func.apply(this, args);
        }, delay);
    };
}

// 사용 예시
const searchInput = new EventEmitter();

// 검색 API 호출 (debounce 적용)
const debouncedSearch = debounce((query) => {
    console.log(`🔍 검색 API 호출: "${query}"`);
    // 실제 API 호출
}, 300);

searchInput.on('input', (event) => {
    debouncedSearch(event.target.value);
});

// 스크롤 이벤트 (throttle 적용)
const scrollHandler = throttle(() => {
    console.log('📜 스크롤 위치 업데이트');
    // 스크롤 위치 계산
}, 100);

window.addEventListener('scroll', scrollHandler);
🎯 메모리 누수 방지
class Component {
    constructor(eventEmitter) {
        this.eventEmitter = eventEmitter;
        this.handlers = [];
    }

    // 이벤트 리스너 등록 (추적 가능하게)
    addEventListener(event, handler) {
        this.eventEmitter.on(event, handler);
        this.handlers.push({ event, handler });
    }

    // 컴포넌트 제거 시 모든 리스너 정리
    destroy() {
        console.log('🧹 컴포넌트 정리 중...');
        this.handlers.forEach(({ event, handler }) => {
            this.eventEmitter.off(event, handler);
        });
        this.handlers = [];
        console.log('✅ 모든 이벤트 리스너 제거 완료');
    }
}

// 사용
const emitter = new EventEmitter();
const component = new Component(emitter);

component.addEventListener('data', (data) => {
    console.log('데이터:', data);
});

component.addEventListener('error', (error) => {
    console.error('에러:', error);
});

// 컴포넌트 제거 시
component.destroy(); // 메모리 누수 방지!
💾 WeakMap으로 private 데이터 관리
ES6+에서는 WeakMap을 사용하면 더 안전하게 private 데이터를 관리할 수 있어요:
const privateData = new WeakMap();

class User {
    constructor(name, password) {
        // private 데이터는 WeakMap에 저장
        privateData.set(this, {
            password: password,
            loginAttempts: 0
        });

        this.name = name; // public
    }

    login(password) {
        const data = privateData.get(this);

        if (data.password === password) {
            console.log(`✅ ${this.name}님 로그인 성공!`);
            data.loginAttempts = 0;
            return true;
        } else {
            data.loginAttempts++;
            console.log(`❌ 로그인 실패 (${data.loginAttempts}회)`);
            return false;
        }
    }

    changePassword(oldPassword, newPassword) {
        const data = privateData.get(this);

        if (data.password === oldPassword) {
            data.password = newPassword;
            console.log('🔐 비밀번호 변경 완료!');
            return true;
        }
        return false;
    }
}

const user = new User('김코딩', 'secret123');
console.log(user.name); // '김코딩'
console.log(user.password); // undefined - 접근 불가!

user.login('wrong'); // 실패
user.login('secret123'); // 성공
🎓 실무에서의 활용 사례
실제 프로젝트에서 이런 패턴들이 어떻게 쓰이는지 알아볼게요! 재능넷 같은 플랫폼을 개발한다고 생각해보죠 🚀
🌐 재능넷 알림 시스템
재능넷에서 새로운 재능 요청이 들어오면 여러 곳에 알림을 보내야 하잖아요? 옵저버 패턴이 딱이에요!
// 재능 요청 시스템
class TalentRequestSystem extends EventEmitter {
    constructor() {
        super();
        this.requests = [];
    }

    createRequest(requestData) {
        const request = {
            id: Date.now(),
            ...requestData,
            status: 'pending',
            createdAt: new Date()
        };

        this.requests.push(request);

        // 이벤트 발생
        this.emit('requestCreated', request);

        console.log(`📝 새로운 재능 요청: ${request.title}`);
        return request;
    }

    acceptRequest(requestId, providerId) {
        const request = this.requests.find(r => r.id === requestId);
        if (request) {
            request.status = 'accepted';
            request.providerId = providerId;
            this.emit('requestAccepted', request);
        }
    }
}

// 이메일 알림 서비스
class EmailNotificationService {
    constructor(requestSystem) {
        this.requestSystem = requestSystem;
        this.setupListeners();
    }

    setupListeners() {
        this.requestSystem.on('requestCreated', (request) => {
            this.sendEmail(request.userId, {
                subject: '재능 요청이 등록되었습니다',
                body: `"${request.title}" 요청이 성공적으로 등록되었습니다.`
            });
        });

        this.requestSystem.on('requestAccepted', (request) => {
            this.sendEmail(request.userId, {
                subject: '재능 요청이 수락되었습니다!',
                body: `"${request.title}" 요청이 수락되었습니다. 🎉`
            });
        });
    }

    sendEmail(userId, emailData) {
        console.log(`📧 [${userId}] 이메일 발송: ${emailData.subject}`);
    }
}

// 푸시 알림 서비스
class PushNotificationService {
    constructor(requestSystem) {
        this.requestSystem = requestSystem;
        this.setupListeners();
    }

    setupListeners() {
        this.requestSystem.on('requestCreated', (request) => {
            // 관련 재능 제공자들에게 푸시 알림
            console.log(`📱 푸시 알림: 새로운 "${request.category}" 요청`);
        });

        this.requestSystem.on('requestAccepted', (request) => {
            console.log(`📱 푸시 알림: 요청이 수락되었습니다!`);
        });
    }
}

// SMS 알림 서비스
class SMSNotificationService {
    constructor(requestSystem) {
        this.requestSystem = requestSystem;
        this.setupListeners();
    }

    setupListeners() {
        this.requestSystem.on('requestAccepted', (request) => {
            console.log(`💬 SMS 발송: 재능 요청 수락 알림`);
        });
    }
}

// 시스템 초기화
const talentSystem = new TalentRequestSystem();
const emailService = new EmailNotificationService(talentSystem);
const pushService = new PushNotificationService(talentSystem);
const smsService = new SMSNotificationService(talentSystem);

// 재능 요청 생성
const request = talentSystem.createRequest({
    userId: 'user123',
    title: 'JavaScript 과외 선생님 구합니다',
    category: '프로그래밍',
    budget: 50000
});

// 요청 수락
setTimeout(() => {
    talentSystem.acceptRequest(request.id, 'provider456');
}, 1000);
이렇게 하면 나중에 카카오톡 알림이나 슬랙 알림을 추가할 때도 기존 코드 수정 없이 새로운 서비스만 추가하면 돼요! 확장성 갑 ㅋㅋㅋ 👍
🎨 UI 컴포넌트 라이브러리
모듈 패턴으로 재사용 가능한 UI 컴포넌트를 만들어볼게요:
// Modal 컴포넌트 (모듈 패턴)
const Modal = (function() {
    // private 상태
    let isOpen = false;
    let currentModal = null;
    const modals = new Map();

    // private 함수
    function createModalElement(id, content, options) {
        return {
            id,
            content,
            options: {
                closeOnOverlay: true,
                showCloseButton: true,
                ...options
            },
            element: null
        };
    }

    function renderModal(modal) {
        console.log(`🎨 모달 렌더링: ${modal.id}`);
        // 실제로는 DOM 생성
        modal.element = `<div class="modal">${modal.content}</div>`;
    }

    // public API
    return {
        create(id, content, options = {}) {
            const modal = createModalElement(id, content, options);
            modals.set(id, modal);
            console.log(`✅ 모달 생성: ${id}`);
            return modal;
        },

        open(id) {
            const modal = modals.get(id);
            if (!modal) {
                console.error(`❌ 모달을 찾을 수 없음: ${id}`);
                return;
            }

            if (currentModal) {
                this.close(currentModal.id);
            }

            renderModal(modal);
            isOpen = true;
            currentModal = modal;
            console.log(`📂 모달 열림: ${id}`);
        },

        close(id) {
            const modal = modals.get(id);
            if (!modal) return;

            console.log(`📁 모달 닫힘: ${id}`);
            isOpen = false;
            currentModal = null;
        },

        isModalOpen() {
            return isOpen;
        },

        getCurrentModal() {
            return currentModal;
        }
    };
})();

// 사용
Modal.create('welcome', '<h2>재능넷에 오신 것을 환영합니다!</h2>');
Modal.create('login', '<form>로그인 폼</form>');

Modal.open('welcome');
setTimeout(() => {
    Modal.close('welcome');
    Modal.open('login');
}, 2000);
🤔 패턴 선택 가이드
"어떤 상황에 어떤 패턴을 써야 하나요?" 이게 제일 많이 받는 질문이에요 ㅋㅋ 간단한 가이드를 만들어봤어요!
📋 상황별 패턴 추천
🔒 데이터를 보호하고 싶을 때
→ 모듈 패턴 or WeakMap 사용
예: 사용자 정보, 결제 정보, API 키
🔔 이벤트 기반 시스템을 만들 때
→ 옵저버 패턴 or Pub/Sub 패턴
예: 알림 시스템, 실시간 채팅, 상태 관리
🏭 객체 생성 로직이 복잡할 때
→ 팩토리 패턴
예: 다양한 타입의 컴포넌트, 플러그인 시스템
🎯 알고리즘을 교체하고 싶을 때
→ 전략 패턴
예: 정렬 방식, 결제 방식, 검색 알고리즘
🎨 기능을 동적으로 추가하고 싶을 때
→ 데코레이터 패턴
예: 미들웨어, 플러그인, 옵션 추가
🔐 전역 인스턴스가 필요할 때
→ 싱글톤 패턴 (하지만 조심해서 사용!)
예: 설정 객체, 로거, 데이터베이스 연결
⚠️ 안티패턴 주의!
패턴을 잘못 사용하면 오히려 독이 될 수 있어요:
1. 과도한 추상화
간단한 기능에 너무 복잡한 패턴 적용 ❌
→ YAGNI 원칙: "You Aren't Gonna Need It"
2. 싱글톤 남용
전역 상태는 테스트하기 어렵고 의존성 관리가 힘들어요
→ 의존성 주입(DI)을 고려해보세요
3. 옵저버 체인 지옥
이벤트가 이벤트를 호출하고 또 호출하고...
→ 이벤트 플로우를 명확하게 문서화하세요
4. 메모리 누수
이벤트 리스너를 정리하지 않음
→ 항상 cleanup 로직을 작성하세요
🎯 마무리하며
와 여기까지 오느라 수고 많으셨어요! ㅋㅋㅋ JavaScript 디자인 패턴에 대해 꽤 깊이 있게 다뤄봤는데요, 핵심만 정리하면 이렇습니다:
✨ 핵심 요약
1. 모듈 패턴
✓ 캡슐화와 private 데이터 보호
✓ IIFE, Revealing Module, ES6 모듈
✓ 네임스페이스 관리와 코드 구조화
2. 옵저버 패턴
✓ 이벤트 기반 프로그래밍의 핵심
✓ 느슨한 결합으로 확장성 향상
✓ EventEmitter, Pub/Sub 구현
3. 기타 유용한 패턴들
✓ 싱글톤: 전역 인스턴스 관리
✓ 팩토리: 객체 생성 로직 캡슐화
✓ 전략: 알고리즘 교체 가능
✓ 데코레이터: 동적 기능 추가
4. 실전 활용
✓ 패턴 조합으로 실제 앱 구현
✓ 성능 최적화 (throttle, debounce)
✓ 메모리 관리와 cleanup
✓ 상황에 맞는 패턴 선택
디자인 패턴은 은탄환(Silver Bullet)이 아니에요. 상황에 맞게 적절히 사용하는 게 중요하죠! 처음엔 어렵게 느껴질 수 있지만, 실제 프로젝트에 적용해보면서 익숙해지면 코드 퀄리티가 확 달라지는 걸 느낄 수 있을 거예요 💪
재능넷 같은 플랫폼에서 JavaScript 관련 강의를 들으면서 실습해보는 것도 좋은 방법이에요! 이론만 아는 것보다 직접 코드를 짜보면서 배우는 게 훨씬 효과적이거든요 😊
여러분의 코딩 실력이 한 단계 업그레이드되길 바라면서, 이만 줄일게요! 궁금한 점 있으면 언제든 물어보세요 ㅎㅎ 화이팅! 🚀
관련 키워드

댓글 작성
이 글에 대한 여러분의 생각을 들려주세요
로그인이 필요합니다
댓글을 작성하려면 먼저 로그인해주세요.
댓글 0
지식인의 숲 - 지적 재산권 보호 고지
지적 재산권 보호 고지
- 저작권 및 소유권: 본 컨텐츠는 재능넷의 독점 AI 기술로 생성되었으며, 대한민국 저작권법 및 국제 저작권 협약에 의해 보호됩니다.
- AI 생성 컨텐츠의 법적 지위: 본 AI 생성 컨텐츠는 재능넷의 지적 창작물로 인정되며, 관련 법규에 따라 저작권 보호를 받습니다.
- 사용 제한: 재능넷의 명시적 서면 동의 없이 본 컨텐츠를 복제, 수정, 배포, 또는 상업적으로 활용하는 행위는 엄격히 금지됩니다.
- 데이터 수집 금지: 본 컨텐츠에 대한 무단 스크래핑, 크롤링, 및 자동화된 데이터 수집은 법적 제재의 대상이 됩니다.
- AI 학습 제한: 재능넷의 AI 생성 컨텐츠를 타 AI 모델 학습에 무단 사용하는 행위는 금지되며, 이는 지적 재산권 침해로 간주됩니다.






아직 댓글이 없습니다.