
Ver3.0 ☁️ 클라우드 기반 응용프로그래밍: AWS, Azure, GCP 서비스 연동 완벽 가이드
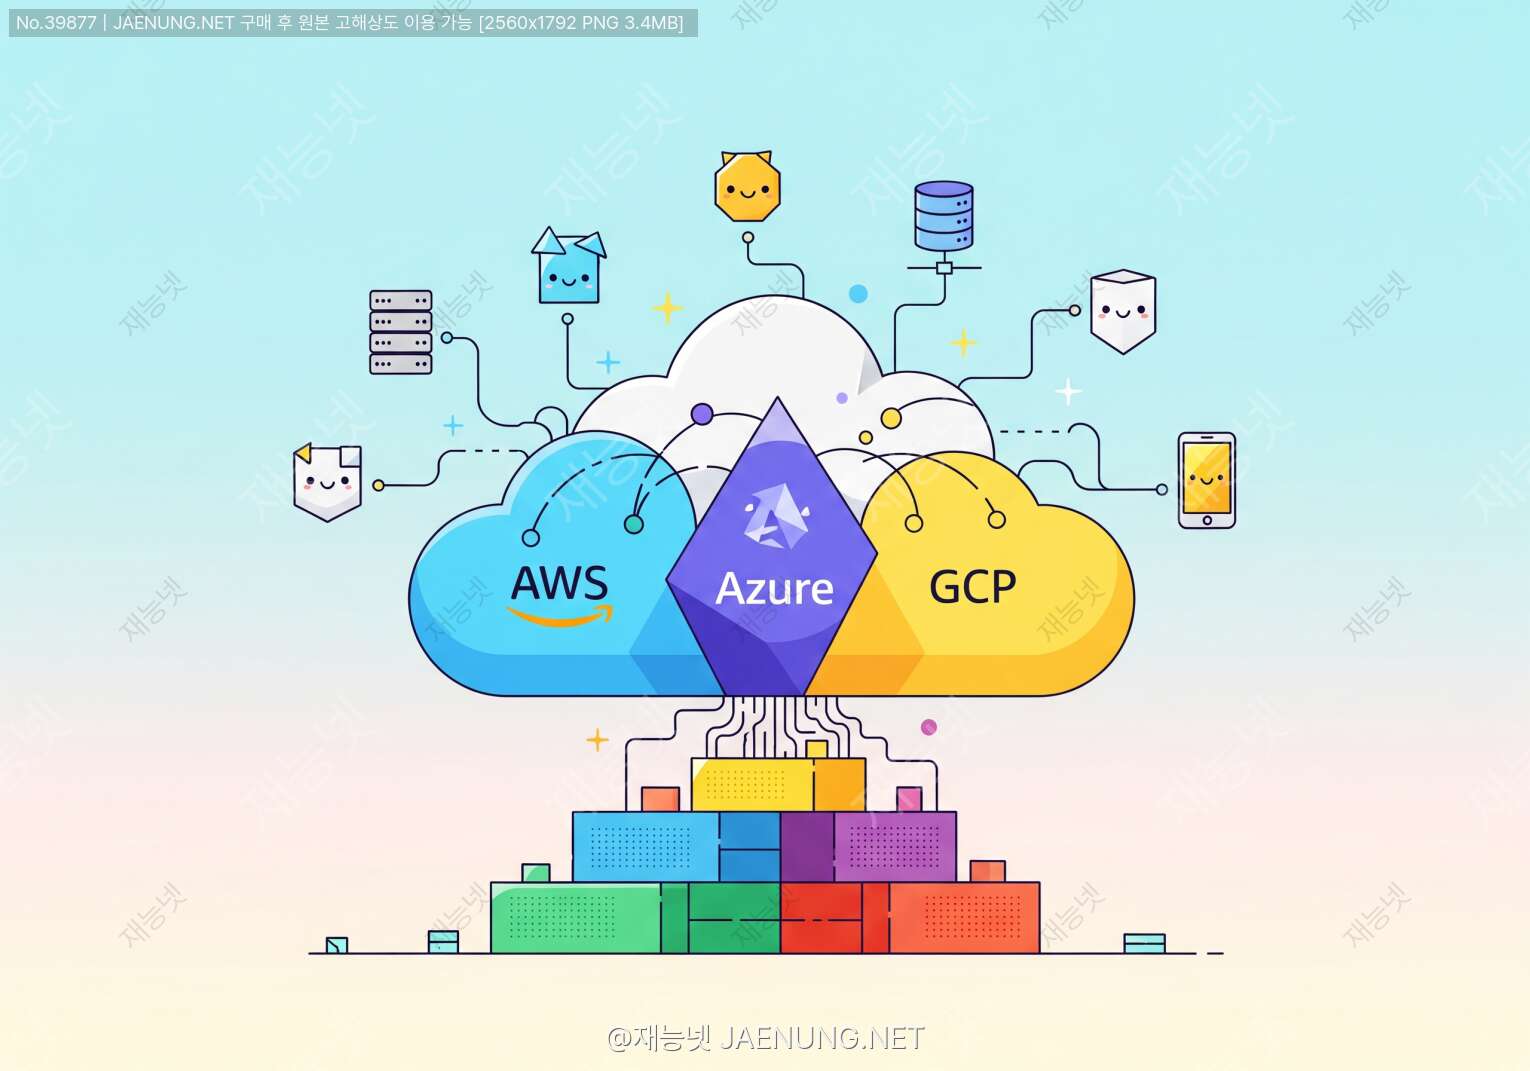
☁️ 클라우드 기반 응용프로그래밍: AWS, Azure, GCP 서비스 연동 완벽 가이드
세 거인의 클라우드 플랫폼을 자유자재로 다루는 실전 노하우
안녕! 👋 오늘은 개발자라면 누구나 한 번쯤 고민하게 되는 주제를 가지고 왔어. 바로 클라우드 기반 응용프로그래밍이야. AWS, Azure, GCP... 이름만 들어도 뭔가 거창하고 어려워 보이지? 하지만 걱정 마! 친구한테 설명하듯이 쉽고 재미있게 풀어볼게. 🚀
요즘 개발 트렌드를 보면 온프레미스(On-Premise) 환경에서 클라우드로 이동하는 게 대세야. 왜냐고? 서버 관리 걱정 없이, 필요할 때 필요한 만큼만 쓰고, 전 세계 어디서든 접근 가능하니까! 마치 넷플릭스처럼 말이야. 📺
이 글에서는 세 가지 주요 클라우드 플랫폼(AWS, Azure, GCP)의 핵심 서비스들을 어떻게 연동하고 활용하는지 실전 중심으로 알아볼 거야. 재능넷에서 프로그래밍 재능을 공유하거나 배우고 싶은 사람들에게도 딱 맞는 내용이니 끝까지 집중! 💪
🌐 클라우드 3대장, 누가 누구야?
본격적으로 들어가기 전에, 우리가 다룰 세 가지 클라우드 플랫폼에 대해 간단히 소개할게. 각자의 특징과 강점이 확실히 다르거든! 🎯
🔶 AWS (Amazon Web Services)
클라우드 시장의 절대 강자야. 2006년에 시작해서 가장 오래됐고, 서비스 종류도 가장 많아. 200개가 넘는 서비스를 제공하고 있어! 😲
주요 특징:
• 가장 넓은 글로벌 인프라 (전 세계 31개 리전)
• 방대한 서비스 라인업과 성숙한 생태계
• 스타트업부터 대기업까지 폭넓은 고객층
• 넷플릭스, 에어비앤비 같은 글로벌 기업들이 사용
대표 서비스:
• EC2 (가상 서버)
• S3 (스토리지)
• Lambda (서버리스 컴퓨팅)
• RDS (관계형 데이터베이스)
• DynamoDB (NoSQL 데이터베이스)
🔷 Azure (Microsoft Azure)
마이크로소프트가 만든 클라우드 플랫폼으로, 엔터프라이즈 시장에서 특히 강해! 윈도우 서버나 .NET 환경과의 궁합이 환상적이야. 💼
주요 특징:
• 하이브리드 클라우드 지원이 탁월함
• 마이크로소프트 제품군과의 완벽한 통합
• 기업용 솔루션에 최적화
• Active Directory, Office 365와 자연스러운 연동
대표 서비스:
• Virtual Machines (가상 머신)
• Blob Storage (객체 스토리지)
• Azure Functions (서버리스)
• SQL Database (관계형 DB)
• Cosmos DB (글로벌 분산 DB)
🔵 GCP (Google Cloud Platform)
구글의 클라우드 서비스로, 데이터 분석과 머신러닝 분야에서 독보적이야. 구글이 자체적으로 사용하던 인프라를 공개한 거라 성능이 검증됐지! 🧠
주요 특징:
• 빅데이터와 AI/ML 서비스가 강력함
• 네트워크 성능이 우수함 (구글의 글로벌 네트워크 활용)
• 쿠버네티스(Kubernetes) 원조 (GKE가 최고!)
• 깔끔하고 직관적인 UI/UX
대표 서비스:
• Compute Engine (가상 머신)
• Cloud Storage (객체 스토리지)
• Cloud Functions (서버리스)
• Cloud SQL (관계형 DB)
• BigQuery (데이터 웨어하우스)
• AWS: 가장 많은 레퍼런스와 커뮤니티 지원이 필요할 때
• Azure: 기존에 마이크로소프트 생태계를 사용 중일 때
• GCP: 데이터 분석이나 머신러닝 프로젝트를 진행할 때
사실 정답은 없어! 프로젝트 요구사항과 팀의 경험에 따라 달라지지. 😊
🔧 클라우드 서비스 연동의 기본 개념
자, 이제 본격적으로 서비스 연동에 대해 알아볼까? 클라우드 서비스를 연동한다는 건 쉽게 말해서 레고 블록을 조립하는 것과 비슷해. 각각의 서비스가 하나의 블록이고, 이걸 잘 조합하면 멋진 애플리케이션이 완성되는 거지! 🧱
📡 API 기반 통신의 이해
클라우드 서비스들은 대부분 REST API나 SDK를 통해 통신해. 이게 무슨 말이냐면:
REST API: HTTP 프로토콜을 사용해서 서비스에 요청을 보내고 응답을 받는 방식이야. 마치 식당에서 주문하는 것처럼!
• GET: 데이터 조회 (메뉴판 보기)
• POST: 데이터 생성 (주문하기)
• PUT/PATCH: 데이터 수정 (주문 변경)
• DELETE: 데이터 삭제 (주문 취소)
SDK (Software Development Kit): 각 클라우드 제공사가 만든 프로그래밍 라이브러리야. Python, Java, JavaScript 등 다양한 언어를 지원하지.
예를 들어, AWS SDK for Python (Boto3)을 사용하면 이렇게 간단하게 S3에 파일을 업로드할 수 있어:
import boto3

# S3 클라이언트 생성
s3 = boto3.client('s3')

# 파일 업로드
s3.upload_file('local_file.txt', 'my-bucket', 'remote_file.txt')

print("파일 업로드 완료! 🎉")
간단하지? 이렇게 SDK를 사용하면 복잡한 HTTP 요청을 직접 작성할 필요 없이 함수 호출만으로 클라우드 서비스를 제어할 수 있어! 👍
🔐 인증과 권한 관리
클라우드 서비스를 사용하려면 누가 접근하는지 확인하고, 무엇을 할 수 있는지 제어해야 해. 이게 바로 인증(Authentication)과 권한(Authorization)이야!
AWS의 경우:
• IAM (Identity and Access Management) 사용
• Access Key와 Secret Key로 인증
• IAM Role을 통한 세밀한 권한 제어
• 정책(Policy)을 JSON 형식으로 정의
Azure의 경우:
• Azure Active Directory (AAD) 사용
• Service Principal로 애플리케이션 인증
• RBAC (Role-Based Access Control)로 권한 관리
• Managed Identity로 안전한 인증
GCP의 경우:
• Service Account 사용
• JSON 키 파일로 인증
• IAM으로 세밀한 권한 제어
• Workload Identity로 쿠버네티스 통합
🚀 AWS 서비스 연동 실전
이제 실전으로 들어가볼까? AWS는 서비스가 워낙 많아서 다 다루긴 어렵고, 가장 많이 사용되는 핵심 서비스들의 연동 방법을 알아볼게! 💪
📦 S3 + Lambda: 이벤트 기반 처리
S3(Simple Storage Service)는 파일 저장소고, Lambda는 서버 없이 코드를 실행하는 서비스야. 이 둘을 연동하면 파일이 업로드되면 자동으로 처리하는 시스템을 만들 수 있어!
실전 시나리오: 사용자가 이미지를 업로드하면 자동으로 썸네일을 생성하는 시스템 🖼️
구현 단계:
1️⃣ S3 버킷 생성
2️⃣ Lambda 함수 작성 (이미지 리사이징 코드)
3️⃣ S3 이벤트 트리거 설정
4️⃣ Lambda에 S3 접근 권한 부여
Lambda 함수 예제 (Python):
import boto3
from PIL import Image
import io

s3 = boto3.client('s3')

def lambda_handler(event, context):
    # S3 이벤트에서 버킷과 파일명 추출
    bucket = event['Records'][0]['s3']['bucket']['name']
    key = event['Records'][0]['s3']['object']['key']

    # 원본 이미지 다운로드
    response = s3.get_object(Bucket=bucket, Key=key)
    image_data = response['Body'].read()

    # 이미지 리사이징
    image = Image.open(io.BytesIO(image_data))
    image.thumbnail((200, 200))

    # 썸네일 저장
    buffer = io.BytesIO()
    image.save(buffer, 'JPEG')
    buffer.seek(0)

    # S3에 업로드
    thumbnail_key = f"thumbnails/{key}"
    s3.put_object(Bucket=bucket, Key=thumbnail_key, Body=buffer)

    return {
        'statusCode': 200,
        'body': f'썸네일 생성 완료: {thumbnail_key}'
    }
이렇게 하면 이미지가 업로드될 때마다 자동으로 Lambda가 실행되어 썸네일을 만들어줘! 서버 관리 걱정 없이 말이야. 😎
🗄️ API Gateway + Lambda + DynamoDB: 서버리스 API
이 조합은 완전한 서버리스 백엔드를 만들 수 있어. 서버 없이 REST API를 구축하는 거지!
아키텍처 흐름:
클라이언트 → API Gateway → Lambda → DynamoDB
장점:
• 서버 관리 불필요
• 자동 스케일링
• 사용한 만큼만 비용 지불
• 높은 가용성
실전 예제: 간단한 TODO 앱 API 만들기 📝
import boto3
import json
from datetime import datetime

dynamodb = boto3.resource('dynamodb')
table = dynamodb.Table('TodoItems')

def lambda_handler(event, context):
    http_method = event['httpMethod']

    # POST: 새 TODO 생성
    if http_method == 'POST':
        body = json.loads(event['body'])
        item = {
            'id': str(datetime.now().timestamp()),
            'title': body['title'],
            'completed': False,
            'created_at': datetime.now().isoformat()
        }
        table.put_item(Item=item)
        return {
            'statusCode': 201,
            'body': json.dumps(item),
            'headers': {'Content-Type': 'application/json'}
        }

    # GET: TODO 목록 조회
    elif http_method == 'GET':
        response = table.scan()
        return {
            'statusCode': 200,
            'body': json.dumps(response['Items']),
            'headers': {'Content-Type': 'application/json'}
        }

    return {
        'statusCode': 400,
        'body': json.dumps({'error': 'Unsupported method'})
    }
API Gateway에서 이 Lambda를 연결하면, 바로 사용 가능한 REST API가 완성돼! 정말 간단하지? 🎯
📨 SQS + Lambda: 비동기 메시지 처리
SQS(Simple Queue Service)는 메시지 큐 서비스야. Lambda와 연동하면 대량의 작업을 안정적으로 처리할 수 있어!
사용 사례:
• 이메일 발송 대기열
• 주문 처리 시스템
• 데이터 처리 파이프라인
• 마이크로서비스 간 통신
왜 큐를 사용할까?
만약 1000명의 사용자가 동시에 주문을 하면? 서버가 터질 수 있어. 하지만 큐를 사용하면 주문을 차례대로 안전하게 처리할 수 있지! 🛡️
import boto3
import json

sqs = boto3.client('sqs')
QUEUE_URL = 'https://sqs.us-east-1.amazonaws.com/123456789/my-queue'

# 메시지 전송
def send_message(order_data):
    response = sqs.send_message(
        QueueUrl=QUEUE_URL,
        MessageBody=json.dumps(order_data),
        MessageAttributes={
            'OrderType': {
                'StringValue': 'Premium',
                'DataType': 'String'
            }
        }
    )
    return response['MessageId']

# Lambda에서 메시지 처리
def lambda_handler(event, context):
    for record in event['Records']:
        # 메시지 내용 추출
        body = json.loads(record['body'])

        # 주문 처리 로직
        process_order(body)

        print(f"주문 처리 완료: {body['order_id']}")

    return {'statusCode': 200}

def process_order(order):
    # 실제 주문 처리 로직
    print(f"주문 처리 중: {order}")
    # 재고 확인, 결제 처리, 배송 준비 등...
• X-Ray를 사용하면 서비스 간 호출 추적이 가능해
• EventBridge로 여러 서비스를 이벤트 기반으로 연결할 수 있어
• Step Functions로 복잡한 워크플로우를 시각적으로 관리하자
• 재능넷에서 AWS 전문가를 찾아 멘토링을 받는 것도 좋은 방법이야! 🎓
☁️ Azure 서비스 연동 실전
이제 Azure로 넘어가볼까? Azure는 마이크로소프트 생태계와의 통합이 강점이야. 특히 엔터프라이즈 환경에서 많이 사용되지! 💼
⚡ Azure Functions + Blob Storage
Azure Functions는 AWS Lambda와 비슷한 서버리스 컴퓨팅 서비스야. Blob Storage와 연동하면 파일 처리 자동화가 가능해!
실전 시나리오: CSV 파일이 업로드되면 자동으로 데이터베이스에 저장 📊
Azure Functions 예제 (C#):
using System.IO;
using Microsoft.Azure.WebJobs;
using Microsoft.Extensions.Logging;
using Azure.Storage.Blobs;

public static class BlobTriggerFunction
{
    [FunctionName("ProcessCsvFile")]
    public static void Run(
        [BlobTrigger("uploads/{name}", Connection = "AzureWebJobsStorage")]
        Stream myBlob,
        string name,
        ILogger log)
    {
        log.LogInformation($"C# Blob trigger function Processed blob\n Name:{name} \n Size: {myBlob.Length} Bytes");

        // CSV 파일 읽기
        using (var reader = new StreamReader(myBlob))
        {
            string line;
            while ((line = reader.ReadLine()) != null)
            {
                // 각 라인 처리
                ProcessCsvLine(line);
            }
        }

        log.LogInformation("CSV 처리 완료! ✅");
    }

    private static void ProcessCsvLine(string line)
    {
        // 데이터베이스에 저장하는 로직
        // ...
    }
}
Python으로도 가능해:
import logging
import azure.functions as func
import csv
from io import StringIO

def main(myblob: func.InputStream):
    logging.info(f"Python blob trigger function processed blob \n"
                 f"Name: {myblob.name}\n"
                 f"Blob Size: {myblob.length} bytes")

    # Blob 내용 읽기
    blob_content = myblob.read().decode('utf-8')
    csv_reader = csv.DictReader(StringIO(blob_content))

    # 각 행 처리
    for row in csv_reader:
        process_row(row)

    logging.info("CSV 처리 완료! 🎉")

def process_row(row):
    # 데이터 처리 로직
    print(f"Processing: {row}")
🔄 Logic Apps: 노코드 워크플로우
Logic Apps는 Azure의 노코드/로우코드 통합 플랫폼이야. 코드 없이 드래그 앤 드롭으로 서비스를 연결할 수 있어! 🖱️
활용 예시:
• 이메일 도착 → 첨부파일 추출 → Blob Storage 저장
• Dynamics 365에서 새 고객 등록 → Teams 알림 발송
• SQL Database 변경 → Slack 메시지 전송
• Twitter 멘션 → Sentiment 분석 → 결과 저장
Logic Apps의 장점:
• 400개 이상의 커넥터 제공
• 시각적 디자이너로 쉬운 개발
• 엔터프라이즈급 통합 패턴 지원
• 자동 스케일링과 고가용성
예를 들어, "새 이메일이 오면 첨부파일을 OneDrive에 저장하고 Teams로 알림"을 보내는 워크플로우를 5분 안에 만들 수 있어! 정말 편리하지? 😊
🗃️ Cosmos DB + Azure Functions: 글로벌 데이터베이스
Cosmos DB는 전 세계에 분산된 NoSQL 데이터베이스야. 99.999%의 가용성을 보장하고, 밀리초 단위의 응답 속도를 제공해!
Change Feed 기능:
Cosmos DB의 데이터가 변경되면 자동으로 Azure Functions를 트리거할 수 있어. 실시간 데이터 처리에 완벽하지! ⚡
import logging
import azure.functions as func

def main(documents: func.DocumentList) -> str:
    if documents:
        logging.info(f'Document id: {documents[0]["id"]}')

        for doc in documents:
            # 변경된 문서 처리
            process_document(doc)

            # 예: 사용자 활동 로그 분석
            if doc.get('event_type') == 'purchase':
                send_recommendation(doc['user_id'])

    return 'OK'

def process_document(doc):
    logging.info(f"Processing document: {doc}")
    # 비즈니스 로직 실행

def send_recommendation(user_id):
    # 추천 시스템 트리거
    logging.info(f"Sending recommendations to user: {user_id}")
이렇게 하면 사용자가 구매를 하는 즉시 추천 시스템이 작동하는 실시간 서비스를 만들 수 있어! 🚀
🔐 Azure Key Vault: 비밀 관리
애플리케이션에서 사용하는 비밀번호, API 키, 인증서를 안전하게 관리하는 서비스야. 절대 코드에 하드코딩하지 말고 Key Vault를 사용하자! 🔒
Python에서 Key Vault 사용하기:
from azure.identity import DefaultAzureCredential
from azure.keyvault.secrets import SecretClient

# Key Vault 클라이언트 생성
credential = DefaultAzureCredential()
vault_url = "https://my-key-vault.vault.azure.net/"
client = SecretClient(vault_url=vault_url, credential=credential)

# 비밀 값 가져오기
database_password = client.get_secret("DatabasePassword").value
api_key = client.get_secret("ThirdPartyApiKey").value

# 이제 안전하게 사용!
connect_to_database(password=database_password)
call_external_api(api_key=api_key)
Managed Identity를 사용하면 코드에 인증 정보를 전혀 넣지 않아도 돼. Azure가 자동으로 인증을 처리해주거든! 👍
• Azure DevOps로 CI/CD 파이프라인을 구축하면 배포가 자동화돼
• Azure Monitor로 모든 리소스를 통합 모니터링할 수 있어
• Managed Identity를 적극 활용하면 보안이 강화돼
• 재능넷에서 Azure 전문가와 상담하면 더 빠르게 배울 수 있어! 🎓
🔵 GCP 서비스 연동 실전
마지막으로 GCP를 알아볼까? 구글의 클라우드는 특히 데이터 분석과 머신러닝 분야에서 강력해! 🧠
⚡ Cloud Functions + Cloud Storage
GCP의 Cloud Functions도 서버리스 컴퓨팅 서비스야. Cloud Storage와 연동하면 파일 처리를 자동화할 수 있어!
실전 예제: 이미지 업로드 시 Vision API로 자동 태깅 🏷️
from google.cloud import vision
from google.cloud import storage
import json

def process_image(event, context):
    """Cloud Storage 트리거 함수"""

    file_name = event['name']
    bucket_name = event['bucket']

    print(f'Processing file: {file_name}')

    # Vision API 클라이언트 생성
    vision_client = vision.ImageAnnotatorClient()
    storage_client = storage.Client()

    # 이미지 분석
    bucket = storage_client.bucket(bucket_name)
    blob = bucket.blob(file_name)

    image = vision.Image()
    image.source.image_uri = f'gs://{bucket_name}/{file_name}'

    # 라벨 감지
    response = vision_client.label_detection(image=image)
    labels = response.label_annotations

    # 결과 저장
    tags = [label.description for label in labels]
    result = {
        'file': file_name,
        'tags': tags,
        'confidence': [label.score for label in labels]
    }

    # 메타데이터로 저장
    result_blob = bucket.blob(f'results/{file_name}.json')
    result_blob.upload_from_string(json.dumps(result))

    print(f'Tags detected: {tags}')
    return 'OK'
이렇게 하면 사용자가 이미지를 업로드하는 즉시 AI가 자동으로 태그를 붙여줘! 정말 똑똑하지? 🤖
📊 BigQuery + Cloud Functions: 실시간 데이터 분석
BigQuery는 페타바이트급 데이터를 초고속으로 분석하는 데이터 웨어하우스야. Cloud Functions와 연동하면 실시간 분석 파이프라인을 만들 수 있어!
사용 사례:
• 실시간 로그 분석
• 사용자 행동 분석
• 매출 대시보드 자동 업데이트
• 이상 거래 탐지
실전 예제: Pub/Sub 메시지를 받아서 BigQuery에 저장
from google.cloud import bigquery
import base64
import json

def process_pubsub(event, context):
    """Pub/Sub 트리거 함수"""

    # Pub/Sub 메시지 디코딩
    pubsub_message = base64.b64decode(event['data']).decode('utf-8')
    message_data = json.loads(pubsub_message)

    # BigQuery 클라이언트 생성
    client = bigquery.Client()
    table_id = "my-project.my_dataset.events"

    # 데이터 삽입
    rows_to_insert = [
        {
            "event_id": message_data['id'],
            "user_id": message_data['user_id'],
            "event_type": message_data['type'],
            "timestamp": message_data['timestamp'],
            "properties": json.dumps(message_data.get('properties', {}))
        }
    ]

    errors = client.insert_rows_json(table_id, rows_to_insert)

    if errors:
        print(f"Errors occurred: {errors}")
    else:
        print(f"Event {message_data['id']} inserted successfully!")

    return 'OK'
이제 BigQuery에서 SQL로 실시간 분석을 할 수 있어:
-- 최근 1시간 동안의 이벤트 통계
SELECT
    event_type,
    COUNT(*) as event_count,
    COUNT(DISTINCT user_id) as unique_users
FROM `my-project.my_dataset.events`
WHERE timestamp >= TIMESTAMP_SUB(CURRENT_TIMESTAMP(), INTERVAL 1 HOUR)
GROUP BY event_type
ORDER BY event_count DESC;
BigQuery는 수십억 건의 데이터도 몇 초 만에 분석해! 정말 빠르지? ⚡
🤖 Cloud Run + AI Platform: 머신러닝 서비스 배포
Cloud Run은 컨테이너를 서버리스로 실행하는 서비스야. 머신러닝 모델을 API로 배포하기에 완벽해!
실전 시나리오: 텍스트 감정 분석 API 만들기 😊😢😡
from flask import Flask, request, jsonify
from google.cloud import language_v1
import os

app = Flask(__name__)

# Natural Language API 클라이언트
client = language_v1.LanguageServiceClient()

@app.route('/analyze', methods=['POST'])
def analyze_sentiment():
    """텍스트 감정 분석 엔드포인트"""

    data = request.get_json()
    text = data.get('text', '')

    if not text:
        return jsonify({'error': 'No text provided'}), 400

    # 감정 분석 수행
    document = language_v1.Document(
        content=text,
        type_=language_v1.Document.Type.PLAIN_TEXT
    )

    sentiment = client.analyze_sentiment(
        request={'document': document}
    ).document_sentiment

    # 결과 반환
    result = {
        'text': text,
        'score': sentiment.score,  # -1.0 (부정) ~ 1.0 (긍정)
        'magnitude': sentiment.magnitude,
        'sentiment': get_sentiment_label(sentiment.score)
    }

    return jsonify(result)

def get_sentiment_label(score):
    """감정 점수를 라벨로 변환"""
    if score > 0.25:
        return 'positive 😊'
    elif score < -0.25:
        return 'negative 😢'
    else:
        return 'neutral 😐'

if __name__ == '__main__':
    port = int(os.environ.get('PORT', 8080))
    app.run(host='0.0.0.0', port=port)
Dockerfile:
FROM python:3.9-slim

WORKDIR /app

COPY requirements.txt .
RUN pip install -r requirements.txt

COPY . .

CMD exec gunicorn --bind :$PORT --workers 1 --threads 8 app:app
배포 명령어:
# 컨테이너 빌드 및 배포
gcloud run deploy sentiment-api \
  --source . \
  --platform managed \
  --region us-central1 \
  --allow-unauthenticated

# 배포 완료! URL이 자동으로 생성돼
# https://sentiment-api-xxxxx-uc.a.run.app
이제 전 세계 어디서든 이 API를 호출할 수 있어! 자동 스케일링도 되고, 사용한 만큼만 비용을 내면 돼. 완벽하지? 🎯
🔄 Pub/Sub: 이벤트 기반 아키텍처
Pub/Sub은 메시지 큐 서비스로, 마이크로서비스 간 통신에 최적화되어 있어. AWS의 SQS/SNS와 비슷하지만 더 강력해!
Pub/Sub의 특징:
• 초당 수백만 건의 메시지 처리
• 전 세계 분산 처리
• 최소 한 번 전달 보장
• 메시지 순서 보장 옵션
실전 예제: 주문 처리 시스템
from google.cloud import pubsub_v1
import json

# Publisher 설정
publisher = pubsub_v1.PublisherClient()
topic_path = publisher.topic_path('my-project', 'orders')

def publish_order(order_data):
    """주문 메시지 발행"""

    message_json = json.dumps(order_data)
    message_bytes = message_json.encode('utf-8')

    # 메시지 속성 추가
    future = publisher.publish(
        topic_path,
        message_bytes,
        order_type=order_data['type'],
        priority=str(order_data.get('priority', 'normal'))
    )

    message_id = future.result()
    print(f'Published message ID: {message_id}')
    return message_id

# Subscriber 설정
subscriber = pubsub_v1.SubscriberClient()
subscription_path = subscriber.subscription_path('my-project', 'orders-sub')

def callback(message):
    """메시지 처리 콜백"""

    order_data = json.loads(message.data.decode('utf-8'))

    try:
        # 주문 처리
        process_order(order_data)

        # 처리 성공 시 ACK
        message.ack()
        print(f'Order {order_data["id"]} processed successfully!')

    except Exception as e:
        # 처리 실패 시 NACK (재시도)
        message.nack()
        print(f'Error processing order: {e}')

def process_order(order):
    """실제 주문 처리 로직"""
    print(f'Processing order: {order}')
    # 재고 확인, 결제 처리, 배송 준비 등...

# 구독 시작
streaming_pull_future = subscriber.subscribe(subscription_path, callback=callback)
print(f'Listening for messages on {subscription_path}...')

try:
    streaming_pull_future.result()
except KeyboardInterrupt:
    streaming_pull_future.cancel()
• Cloud Scheduler로 정기적인 작업 스케줄링
• Cloud Tasks로 비동기 작업 큐 관리
• Vertex AI로 머신러닝 파이프라인 구축
• Firestore로 실시간 데이터베이스 구현
• GKE (Google Kubernetes Engine)로 컨테이너 오케스트레이션
• 재능넷에서 GCP 전문가를 찾아 실전 프로젝트 경험을 쌓아보자! 🚀
🔗 멀티 클라우드 전략과 서비스 간 연동
이제 정말 고급 주제로 들어가볼까? 실제 프로덕션 환경에서는 여러 클라우드를 동시에 사용하는 경우가 많아. 이걸 멀티 클라우드 전략이라고 해! 🌐
🤔 왜 멀티 클라우드를 사용할까?
1. 벤더 종속성 회피 (Vendor Lock-in 방지)
한 클라우드에만 의존하면 가격 인상이나 서비스 중단 시 대응이 어려워. 여러 클라우드를 사용하면 리스크를 분산할 수 있지! 🛡️
2. 각 클라우드의 강점 활용
• AWS: 가장 많은 서비스와 레퍼런스
• Azure: 엔터프라이즈 통합과 하이브리드 클라우드
• GCP: 데이터 분석과 머신러닝
3. 지역별 최적화
특정 지역에서는 특정 클라우드가 더 빠르거나 저렴할 수 있어. 예를 들어 중국에서는 Alibaba Cloud, 한국에서는 Naver Cloud도 고려할 수 있지!
4. 재해 복구 (Disaster Recovery)
한 클라우드에 문제가 생겨도 다른 클라우드로 즉시 전환할 수 있어. 비즈니스 연속성이 보장되는 거지! 💪
🔄 멀티 클라우드 연동 패턴
패턴 1: API Gateway를 통한 통합
각 클라우드의 서비스를 API로 노출하고, 중앙 API Gateway에서 라우팅하는 방식이야.
# Kong, Apigee, AWS API Gateway 등을 사용한 통합 예시
# Python Flask 기반 통합 API

from flask import Flask, request, jsonify
import boto3  # AWS
from azure.storage.blob import BlobServiceClient  # Azure
from google.cloud import storage  # GCP

app = Flask(__name__)

# 각 클라우드 클라이언트 초기화
aws_s3 = boto3.client('s3')
azure_blob = BlobServiceClient.from_connection_string("connection_string")
gcp_storage = storage.Client()

@app.route('/upload', methods=['POST'])
def upload_file():
    """파일을 모든 클라우드에 동시 업로드"""

    file = request.files['file']
    filename = file.filename

    results = {}

    # AWS S3에 업로드
    try:
        aws_s3.upload_fileobj(file, 'my-bucket', filename)
        results['aws'] = 'success'
    except Exception as e:
        results['aws'] = f'error: {str(e)}'

    # Azure Blob에 업로드
    try:
        blob_client = azure_blob.get_blob_client(
            container='my-container',
            blob=filename
        )
        file.seek(0)  # 파일 포인터 리셋
        blob_client.upload_blob(file)
        results['azure'] = 'success'
    except Exception as e:
        results['azure'] = f'error: {str(e)}'

    # GCP Storage에 업로드
    try:
        bucket = gcp_storage.bucket('my-bucket')
        blob = bucket.blob(filename)
        file.seek(0)  # 파일 포인터 리셋
        blob.upload_from_file(file)
        results['gcp'] = 'success'
    except Exception as e:
        results['gcp'] = f'error: {str(e)}'

    return jsonify(results)

@app.route('/download/<cloud>/<filename>')
def download_file(cloud, filename):
    """특정 클라우드에서 파일 다운로드"""

    if cloud == 'aws':
        obj = aws_s3.get_object(Bucket='my-bucket', Key=filename)
        return obj['Body'].read()

    elif cloud == 'azure':
        blob_client = azure_blob.get_blob_client(
            container='my-container',
            blob=filename
        )
        return blob_client.download_blob().readall()

    elif cloud == 'gcp':
        bucket = gcp_storage.bucket('my-bucket')
        blob = bucket.blob(filename)
        return blob.download_as_bytes()

    return jsonify({'error': 'Invalid cloud provider'}), 400
패턴 2: 메시지 큐를 통한 비동기 통합
각 클라우드의 이벤트를 중앙 메시지 큐(Kafka, RabbitMQ 등)로 모으고, 다른 클라우드에서 소비하는 방식이야.
# Apache Kafka를 사용한 멀티 클라우드 이벤트 통합
from kafka import KafkaProducer, KafkaConsumer
import json

# Producer: AWS Lambda에서 이벤트 발행
def aws_lambda_handler(event, context):
    producer = KafkaProducer(
        bootstrap_servers=['kafka-broker:9092'],
        value_serializer=lambda v: json.dumps(v).encode('utf-8')
    )

    event_data = {
        'source': 'aws',
        'type': 'user_signup',
        'data': event
    }

    producer.send('multi-cloud-events', event_data)
    producer.flush()

    return {'statusCode': 200}

# Consumer: GCP Cloud Function에서 이벤트 소비
def gcp_event_consumer(request):
    consumer = KafkaConsumer(
        'multi-cloud-events',
        bootstrap_servers=['kafka-broker:9092'],
        value_deserializer=lambda m: json.loads(m.decode('utf-8'))
    )

    for message in consumer:
        event = message.value

        if event['source'] == 'aws' and event['type'] == 'user_signup':
            # GCP에서 처리
            process_user_signup(event['data'])

    return 'OK'
패턴 3: 데이터 동기화
각 클라우드의 데이터베이스를 실시간으로 동기화하는 방식이야. Change Data Capture (CDC)를 사용하면 효율적이야!
# Debezium을 사용한 데이터베이스 동기화 예시
# AWS RDS → Kafka → Azure Cosmos DB

import pymongo
from kafka import KafkaConsumer
import json

# Kafka에서 변경 이벤트 수신
consumer = KafkaConsumer(
    'dbserver1.inventory.customers',
    bootstrap_servers=['kafka:9092'],
    value_deserializer=lambda m: json.loads(m.decode('utf-8'))
)

# Azure Cosmos DB 클라이언트
cosmos_client = pymongo.MongoClient("mongodb://cosmos-connection-string")
cosmos_db = cosmos_client['inventory']
cosmos_collection = cosmos_db['customers']

for message in consumer:
    change_event = message.value

    if change_event['op'] == 'c':  # Create
        cosmos_collection.insert_one(change_event['after'])

    elif change_event['op'] == 'u':  # Update
        cosmos_collection.update_one(
            {'id': change_event['after']['id']},
            {'$set': change_event['after']}
        )

    elif change_event['op'] == 'd':  # Delete
        cosmos_collection.delete_one({'id': change_event['before']['id']})

    print(f"Synced change: {change_event['op']}")
🛠️ 멀티 클라우드 관리 도구
여러 클라우드를 동시에 관리하려면 적절한 도구가 필요해! 다음은 실무에서 많이 사용되는 도구들이야:
1. Terraform (Infrastructure as Code)
코드로 인프라를 정의하고 관리하는 도구야. 모든 주요 클라우드를 지원해! 🏗️
# Terraform으로 멀티 클라우드 인프라 정의
# main.tf

# AWS Provider
provider "aws" {
  region = "us-east-1"
}

# Azure Provider
provider "azurerm" {
  features {}
}

# GCP Provider
provider "google" {
  project = "my-project"
  region  = "us-central1"
}

# AWS S3 버킷 생성
resource "aws_s3_bucket" "data_bucket" {
  bucket = "my-multi-cloud-bucket-aws"

  tags = {
    Environment = "Production"
    ManagedBy   = "Terraform"
  }
}

# Azure Storage Account 생성
resource "azurerm_storage_account" "data_storage" {
  name                     = "mymulticloudstorage"
  resource_group_name      = azurerm_resource_group.main.name
  location                 = "eastus"
  account_tier             = "Standard"
  account_replication_type = "LRS"
}

# GCP Storage Bucket 생성
resource "google_storage_bucket" "data_bucket" {
  name     = "my-multi-cloud-bucket-gcp"
  location = "US"

  uniform_bucket_level_access = true
}

# 출력
output "aws_bucket_name" {
  value = aws_s3_bucket.data_bucket.id
}

output "azure_storage_name" {
  value = azurerm_storage_account.data_storage.name
}

output "gcp_bucket_name" {
  value = google_storage_bucket.data_bucket.name
}
2. Kubernetes (컨테이너 오케스트레이션)
컨테이너 기반 애플리케이션을 어떤 클라우드에서든 동일하게 실행할 수 있어! 진정한 클라우드 중립성이지. ☸️
3. Prometheus + Grafana (모니터링)
모든 클라우드의 메트릭을 한 곳에서 모니터링할 수 있어. 통합 대시보드를 만들 수 있지!
4. HashiCorp Vault (비밀 관리)
모든 클라우드의 인증 정보를 중앙에서 안전하게 관리할 수 있어. 🔐
• 비용 관리 어려움: 각 클라우드의 과금 체계가 달라
• 네트워크 레이턴시: 클라우드 간 데이터 전송 시 지연 발생
• 보안 정책 통합: 각 클라우드의 보안 모델이 달라
• 전문 인력 필요: 여러 클라우드를 다룰 수 있는 인재가 필요해
하지만 걱정 마! 재능넷에서 멀티 클라우드 전문가를 찾아 컨설팅을 받으면 이런 문제들을 해결할 수 있어! 💡
🎯 실전 프로젝트: 멀티 클라우드 이미지 처리 시스템
이론만 배우면 재미없지? 실제로 동작하는 멀티 클라우드 시스템을 만들어보자! 🚀
프로젝트 목표: 사용자가 이미지를 업로드하면 세 클라우드에서 각각 다른 처리를 하는 시스템
• AWS: 이미지 저장 및 썸네일 생성
• Azure: 얼굴 인식 및 감정 분석
• GCP: 객체 감지 및 라벨링
📐 시스템 아키텍처
흐름:
1. 사용자가 웹 앱에 이미지 업로드
2. API Gateway가 요청을 받아 세 클라우드로 분산
3. 각 클라우드에서 병렬로 처리
4. 결과를 중앙 데이터베이스에 저장
5. 웹소켓으로 실시간 결과 전송
사용 기술:
• Frontend: React
• Backend: Node.js + Express
• Message Queue: Redis
• Database: MongoDB Atlas
• Monitoring: Datadog
💻 코드 구현
1. API Gateway (Node.js)
// server.js
const express = require('express');
const multer = require('multer');
const AWS = require('aws-sdk');
const { BlobServiceClient } = require('@azure/storage-blob');
const { Storage } = require('@google-cloud/storage');
const Redis = require('ioredis');
const { v4: uuidv4 } = require('uuid');

const app = express();
const upload = multer({ storage: multer.memoryStorage() });
const redis = new Redis();

// 클라우드 클라이언트 초기화
const s3 = new AWS.S3();
const azureBlob = BlobServiceClient.fromConnectionString(process.env.AZURE_CONNECTION);
const gcsStorage = new Storage();

app.post('/upload', upload.single('image'), async (req, res) => {
  const imageId = uuidv4();
  const file = req.file;

  console.log(`Processing image: ${imageId}`);

  try {
    // 1. AWS S3에 원본 저장
    const s3Params = {
      Bucket: 'my-images-bucket',
      Key: `originals/${imageId}.jpg`,
      Body: file.buffer,
      ContentType: file.mimetype
    };
    await s3.upload(s3Params).promise();
    console.log('✅ Uploaded to AWS S3');

    // 2. Azure Blob에 업로드 (얼굴 인식용)
    const azureContainer = azureBlob.getContainerClient('images');
    const azureBlob = azureContainer.getBlockBlobClient(`${imageId}.jpg`);
    await azureBlob.upload(file.buffer, file.buffer.length);
    console.log('✅ Uploaded to Azure Blob');

    // 3. GCP Storage에 업로드 (객체 감지용)
    const gcsBucket = gcsStorage.bucket('my-images-bucket');
    const gcsFile = gcsBucket.file(`${imageId}.jpg`);
    await gcsFile.save(file.buffer);
    console.log('✅ Uploaded to GCP Storage');

    // 4. 처리 작업을 큐에 추가
    await redis.lpush('image-processing-queue', JSON.stringify({
      imageId,
      timestamp: new Date().toISOString()
    }));

    res.json({
      success: true,
      imageId,
      message: '이미지 업로드 완료! 처리 중입니다... ⏳'
    });

  } catch (error) {
    console.error('Error:', error);
    res.status(500).json({ error: error.message });
  }
});

// 처리 상태 조회
app.get('/status/:imageId', async (req, res) => {
  const { imageId } = req.params;

  const status = await redis.hgetall(`image:${imageId}:status`);

  res.json({
    imageId,
    status: {
      aws: status.aws || 'pending',
      azure: status.azure || 'pending',
      gcp: status.gcp || 'pending'
    },
    results: {
      thumbnail: status.thumbnail_url,
      faces: JSON.parse(status.faces || '[]'),
      labels: JSON.parse(status.labels || '[]')
    }
  });
});

app.listen(3000, () => {
  console.log('🚀 Server running on port 3000');
});
2. AWS Lambda - 썸네일 생성
// aws-thumbnail-lambda.js
const AWS = require('aws-sdk');
const sharp = require('sharp');

const s3 = new AWS.S3();

exports.handler = async (event) => {
  const bucket = event.Records[0].s3.bucket.name;
  const key = event.Records[0].s3.object.key;

  console.log(`Processing: ${key}`);

  // 원본 이미지 다운로드
  const originalImage = await s3.getObject({
    Bucket: bucket,
    Key: key
  }).promise();

  // 썸네일 생성 (300x300)
  const thumbnail = await sharp(originalImage.Body)
    .resize(300, 300, { fit: 'cover' })
    .jpeg({ quality: 80 })
    .toBuffer();

  // 썸네일 업로드
  const thumbnailKey = key.replace('originals/', 'thumbnails/');
  await s3.putObject({
    Bucket: bucket,
    Key: thumbnailKey,
    Body: thumbnail,
    ContentType: 'image/jpeg'
  }).promise();

  console.log(`✅ Thumbnail created: ${thumbnailKey}`);

  // Redis에 상태 업데이트
  const imageId = key.split('/')[1].replace('.jpg', '');
  await updateStatus(imageId, 'aws', 'completed', {
    thumbnail_url: `https://${bucket}.s3.amazonaws.com/${thumbnailKey}`
  });

  return { statusCode: 200 };
};
3. Azure Function - 얼굴 인식
# azure-face-function.py
import logging
import json
import os
from azure.cognitiveservices.vision.face import FaceClient
from msrest.authentication import CognitiveServicesCredentials
import redis

# Face API 클라이언트
face_client = FaceClient(
    os.environ['FACE_ENDPOINT'],
    CognitiveServicesCredentials(os.environ['FACE_KEY'])
)

# Redis 클라이언트
redis_client = redis.Redis(
    host=os.environ['REDIS_HOST'],
    port=6379,
    decode_responses=True
)

def main(myblob: func.InputStream):
    logging.info(f"Processing blob: {myblob.name}")

    # 이미지 URL 생성
    image_url = f"https://{os.environ['STORAGE_ACCOUNT']}.blob.core.windows.net/images/{myblob.name}"

    # 얼굴 감지 및 감정 분석
    detected_faces = face_client.face.detect_with_url(
        url=image_url,
        return_face_attributes=['emotion', 'age', 'gender']
    )

    # 결과 처리
    faces_data = []
    for face in detected_faces:
        faces_data.append({
            'age': face.face_attributes.age,
            'gender': face.face_attributes.gender,
            'emotions': {
                'happiness': face.face_attributes.emotion.happiness,
                'sadness': face.face_attributes.emotion.sadness,
                'anger': face.face_attributes.emotion.anger,
                'surprise': face.face_attributes.emotion.surprise
            }
        })

    logging.info(f"✅ Detected {len(faces_data)} faces")

    # Redis에 결과 저장
    image_id = myblob.name.replace('.jpg', '')
    redis_client.hset(
        f"image:{image_id}:status",
        mapping={
            'azure': 'completed',
            'faces': json.dumps(faces_data)
        }
    )

    return f"Processed {len(faces_data)} faces"
4. GCP Cloud Function - 객체 감지
# gcp-vision-function.py
from google.cloud import vision
from google.cloud import storage
import redis
import json
import os

# Vision API 클라이언트
vision_client = vision.ImageAnnotatorClient()

# Redis 클라이언트
redis_client = redis.Redis(
    host=os.environ['REDIS_HOST'],
    port=6379,
    decode_responses=True
)

def process_image(event, context):
    """Cloud Storage 트리거 함수"""

    file_name = event['name']
    bucket_name = event['bucket']

    print(f'Processing file: {file_name}')

    # 이미지 분석
    image = vision.Image()
    image.source.image_uri = f'gs://{bucket_name}/{file_name}'

    # 라벨 감지
    label_response = vision_client.label_detection(image=image)
    labels = [
        {
            'description': label.description,
            'score': label.score,
            'confidence': f'{label.score * 100:.1f}%'
        }
        for label in label_response.label_annotations
    ]

    # 객체 감지
    object_response = vision_client.object_localization(image=image)
    objects = [
        {
            'name': obj.name,
            'score': obj.score
        }
        for obj in object_response.localized_object_annotations
    ]

    print(f'✅ Detected {len(labels)} labels and {len(objects)} objects')

    # Redis에 결과 저장
    image_id = file_name.replace('.jpg', '')
    redis_client.hset(
        f'image:{image_id}:status',
        mapping={
            'gcp': 'completed',
            'labels': json.dumps(labels),
            'objects': json.dumps(objects)
        }
    )

    return 'OK'
🎨 프론트엔드 (React)
// ImageUploader.jsx
import React, { useState } from 'react';
import axios from 'axios';

function ImageUploader() {
  const [file, setFile] = useState(null);
  const [imageId, setImageId] = useState(null);
  const [status, setStatus] = useState(null);
  const [loading, setLoading] = useState(false);

  const handleUpload = async () => {
    if (!file) return;

    setLoading(true);
    const formData = new FormData();
    formData.append('image', file);

    try {
      // 이미지 업로드
      const uploadRes = await axios.post('/upload', formData);
      const { imageId } = uploadRes.data;
      setImageId(imageId);

      // 처리 상태 폴링
      const interval = setInterval(async () => {
        const statusRes = await axios.get(`/status/${imageId}`);
        setStatus(statusRes.data);

        // 모든 처리 완료 확인
        const { aws, azure, gcp } = statusRes.data.status;
        if (aws === 'completed' && azure === 'completed' && gcp === 'completed') {
          clearInterval(interval);
          setLoading(false);
        }
      }, 2000);

    } catch (error) {
      console.error('Error:', error);
      setLoading(false);
    }
  };

  return (
    <div className="image-uploader">
      <h2>🖼️ 멀티 클라우드 이미지 분석</h2>

      <input
        type="file"
        accept="image/*"
        onChange={(e) => setFile(e.target.files[0])}
      />

      <button onClick={handleUpload} disabled={!file || loading}>
        {loading ? '처리 중... ⏳' : '업로드 및 분석 🚀'}
      </button>

      {status && (
        <div className="results">
          <h3>처리 상태</h3>
          <div className="status-grid">
            <div className={`status-card ${status.status.aws}`}>
              <h4>AWS</h4>
              <p>썸네일 생성: {status.status.aws}</p>
              {status.results.thumbnail && (
                <img src={status.results.thumbnail} alt="Thumbnail" />
              )}
            </div>

            <div className={`status-card ${status.status.azure}`}>
              <h4>Azure</h4>
              <p>얼굴 인식: {status.status.azure}</p>
              {status.results.faces && status.results.faces.length > 0 && (
                <ul>
                  {status.results.faces.map((face, i) => (
                    <li key={i}>
                      {face.gender}, {face.age}세
                      <br />
                      행복: {(face.emotions.happiness * 100).toFixed(1)}%
                    </li>
                  ))}
                </ul>
              )}
            </div>

            <div className={`status-card ${status.status.gcp}`}>
              <h4>GCP</h4>
              <p>객체 감지: {status.status.gcp}</p>
              {status.results.labels && (
                <ul>
                  {status.results.labels.slice(0, 5).map((label, i) => (
                    <li key={i}>
                      {label.description} ({label.confidence})
                    </li>
                  ))}
                </ul>
              )}
            </div>
          </div>
        </div>
      )}
    </div>
  );
}

export default ImageUploader;
• 처리 결과를 PDF 리포트로 생성
• 여러 이미지 일괄 처리 기능
• 처리 히스토리 및 통계 대시보드
• 사용자별 처리 횟수 제한 및 과금 시스템
• 이런 프로젝트를 재능넷에서 포트폴리오로 공유하면 좋은 평가를 받을 수 있어! 🌟
🔒 보안과 비용 최적화
클라우드를 사용할 때 가장 중요한 두 가지! 바로 보안과 비용이야. 이 부분을 소홀히 하면 큰일 나! 😱
🛡️ 보안 베스트 프랙티스
1. 최소 권한 원칙 (Principle of Least Privilege)
각 서비스와 사용자에게 필요한 최소한의 권한만 부여해야 해.
AWS IAM 정책 예시:
{
  "Version": "2012-10-17",
  "Statement": [
    {
      "Effect": "Allow",
      "Action": [
        "s3:GetObject",
        "s3:PutObject"
      ],
      "Resource": "arn:aws:s3:::my-bucket/uploads/*"
    },
    {
      "Effect": "Allow",
      "Action": [
        "dynamodb:GetItem",
        "dynamodb:PutItem"
      ],
      "Resource": "arn:aws:dynamodb:us-east-1:123456789:table/MyTable"
    }
  ]
}
2. 비밀 정보 관리
절대로 코드에 하드코딩하지 말고, 비밀 관리 서비스를 사용하자!
• AWS: Secrets Manager, Parameter Store
• Azure: Key Vault
• GCP: Secret Manager
Python에서 AWS Secrets Manager 사용:
import boto3
import json

def get_secret(secret_name):
    """AWS Secrets Manager에서 비밀 가져오기"""

    client = boto3.client('secretsmanager', region_name='us-east-1')

    try:
        response = client.get_secret_value(SecretId=secret_name)
        secret = json.loads(response['SecretString'])
        return secret
    except Exception as e:
        print(f"Error retrieving secret: {e}")
        raise

# 사용 예시
db_credentials = get_secret('prod/database/credentials')
db_host = db_credentials['host']
db_password = db_credentials['password']

# 이제 안전하게 데이터베이스 연결!
3. 네트워크 보안
• VPC (Virtual Private Cloud)로 네트워크 격리
• Security Group으로 방화벽 규칙 설정
• Private Subnet에 민감한 리소스 배치
• VPN이나 Direct Connect로 안전한 연결
4. 암호화
• 전송 중 암호화: HTTPS/TLS 사용
• 저장 시 암호화: S3, RDS 등에서 암호화 활성화
• 키 관리: KMS (Key Management Service) 사용
5. 로깅과 모니터링
• CloudTrail (AWS), Activity Log (Azure), Cloud Audit Logs (GCP)로 모든 활동 기록
• 이상 행동 탐지 시스템 구축
• 정기적인 보안 감사
💰 비용 최적화 전략
클라우드는 편리하지만 방심하면 청구서 폭탄을 맞을 수 있어! 💣
1. 리소스 크기 최적화
• 과도하게 큰 인스턴스 사용하지 않기
• Auto Scaling으로 필요한 만큼만 사용
• Reserved Instances나 Savings Plans로 장기 할인
2. 서버리스 활용
• Lambda, Cloud Functions 등은 실행 시간만큼만 과금
• 트래픽이 적은 서비스는 서버리스가 훨씬 저렴
3. 스토리지 최적화
• 자주 접근하지 않는 데이터는 저렴한 스토리지 클래스로 이동
• S3 Lifecycle Policy로 자동 이동 설정
• 불필요한 데이터 정기적으로 삭제
S3 Lifecycle Policy 예시:
{
  "Rules": [
    {
      "Id": "MoveToGlacier",
      "Status": "Enabled",
      "Transitions": [
        {
          "Days": 30,
          "StorageClass": "STANDARD_IA"
        },
        {
          "Days": 90,
          "StorageClass": "GLACIER"
        }
      ],
      "Expiration": {
        "Days": 365
      }
    }
  ]
}
4. 네트워크 비용 절감
• 같은 리전 내에서 통신 (리전 간 전송은 비용 발생)
• CloudFront, CDN 활용으로 전송 비용 절감
• NAT Gateway 대신 NAT Instance 고려
5. 비용 모니터링
• AWS Cost Explorer, Azure Cost Management 활용
• 예산 알림 설정
• 태그를 활용한 비용 추적
Python으로 AWS 비용 모니터링:
import boto3
from datetime import datetime, timedelta

def get_cost_report():
    """지난 30일간 비용 조회"""

    client = boto3.client('ce')  # Cost Explorer

    end_date = datetime.now().date()
    start_date = end_date - timedelta(days=30)

    response = client.get_cost_and_usage(
        TimePeriod={
            'Start': start_date.strftime('%Y-%m-%d'),
            'End': end_date.strftime('%Y-%m-%d')
        },
        Granularity='DAILY',
        Metrics=['UnblendedCost'],
        GroupBy=[
            {
                'Type': 'SERVICE',
                'Key': 'SERVICE'
            }
        ]
    )

    # 서비스별 비용 집계
    service_costs = {}
    for result in response['ResultsByTime']:
        for group in result['Groups']:
            service = group['Keys'][0]
            cost = float(group['Metrics']['UnblendedCost']['Amount'])

            if service in service_costs:
                service_costs[service] += cost
            else:
                service_costs[service] = cost

    # 비용 높은 순으로 정렬
    sorted_costs = sorted(
        service_costs.items(),
        key=lambda x: x[1],
        reverse=True
    )

    print("📊 서비스별 비용 (지난 30일)")
    print("-" * 50)
    for service, cost in sorted_costs[:10]:
        print(f"{service:30s} ${cost:10.2f}")

    total_cost = sum(service_costs.values())
    print("-" * 50)
    print(f"{'총 비용':30s} ${total_cost:10.2f}")

    return service_costs

# 실행
get_cost_report()
6. 개발 환경 최적화
• 개발/테스트 환경은 업무 시간에만 실행
• Spot Instances (AWS), Low-priority VMs (Azure) 활용
• 프리 티어 최대한 활용
또 다른 회사는 S3에 로그 파일을 무한정 쌓아서 스토리지 비용이 폭발했지.
항상 비용 알림을 설정하고, 정기적으로 리소스를 점검하자! 💡
📚 학습 로드맵과 리소스
클라우드 개발자가 되고 싶다면? 이 로드맵을 따라가보자! 🗺️
🎓 단계별 학습 가이드
레벨 1: 기초 (1-2개월)
• 클라우드 컴퓨팅 개념 이해
• 리눅스 기본 명령어
• 네트워킹 기초 (IP, DNS, HTTP)
• 하나의 클라우드 플랫폼 선택 (AWS 추천)
• 프리 티어로 실습
추천 리소스:
• AWS Cloud Practitioner 자격증 준비
• Udemy, Coursera의 입문 강의
• 공식 문서 읽기
레벨 2: 중급 (3-6개월)
• 주요 서비스 깊이 있게 학습 (EC2, S3, Lambda, RDS 등)
• Infrastructure as Code (Terraform, CloudFormation)
• CI/CD 파이프라인 구축
• 컨테이너와 Docker
• 간단한 프로젝트 구현
추천 리소스:
• AWS Solutions Architect Associate 자격증
• A Cloud Guru, Linux Academy
• 재능넷에서 멘토 찾기 🎯
레벨 3: 고급 (6-12개월)
• 멀티 클라우드 아키텍처
• Kubernetes와 마이크로서비스
• 서버리스 아키텍처 설계
• 보안과 컴플라이언스
• 비용 최적화 전략
• 대규모 시스템 설계
추천 리소스:
• AWS Solutions Architect Professional
• Google Cloud Professional Architect
• Azure Solutions Architect Expert
• 실제 프로덕션 프로젝트 경험
레벨 4: 전문가 (1년 이상)
• 특정 분야 전문화 (데이터, ML, IoT, 보안 등)
• 아키텍처 설계 및 컨설팅
• 오픈소스 기여
• 컨퍼런스 발표
• 재능넷에서 전문가로 활동 💼
📖 추천 학습 자료
공식 문서:
• AWS Documentation: https://docs.aws.amazon.com/
• Azure Documentation: https://docs.microsoft.com/azure/
• GCP Documentation: https://cloud.google.com/docs
온라인 강의:
• A Cloud Guru
• Udemy (Stephane Maarek의 AWS 강의 추천)
• Coursera (Google Cloud 강의)
• Pluralsight
책:
• "AWS Certified Solutions Architect Study Guide"
• "Kubernetes in Action"
• "Terraform: Up & Running"
• "The Phoenix Project" (DevOps 문화 이해)
커뮤니티:
• AWS Korea User Group
• Azure Korea User Group
• GCP Korea User Group
• Stack Overflow
• Reddit (r/aws, r/azure, r/googlecloud)
• 재능넷 커뮤니티 🌟
실습 플랫폼:
• Qwiklabs (GCP 실습)
• AWS Skill Builder
• Microsoft Learn
• Katacoda (인터랙티브 실습)
🏆 자격증 로드맵
자격증이 전부는 아니지만, 체계적인 학습에 도움이 돼!
AWS:
1. Cloud Practitioner (입문)
2. Solutions Architect Associate (중급)
3. Developer Associate 또는 SysOps Administrator Associate
4. Solutions Architect Professional (고급)
5. 전문 분야 (Security, Machine Learning, Database 등)
Azure:
1. Azure Fundamentals (AZ-900)
2. Azure Administrator Associate (AZ-104)
3. Azure Developer Associate (AZ-204)
4. Azure Solutions Architect Expert (AZ-305)
GCP:
1. Cloud Digital Leader (입문)
2. Associate Cloud Engineer
3. Professional Cloud Architect
4. Professional Data Engineer 또는 Professional Cloud Developer
• 작은 프로젝트부터 시작해서 점점 복잡한 시스템을 만들어보자.
• 블로그나 GitHub에 학습 내용을 정리하면 복습도 되고 포트폴리오도 돼!
• 스터디 그룹이나 커뮤니티에 참여하면 동기부여가 돼.
• 재능넷에서 멘토를 찾거나, 자신이 배운 걸 다른 사람에게 가르쳐보자. 가르치면서 더 깊이 이해하게 돼! 🎓
• 실패를 두려워하지 마! 클라우드는 실수해도 쉽게 복구할 수 있어. 과감하게 시도해보자! 💪
🚀 미래 전망과 트렌드
클라우드 기술은 계속 진화하고 있어. 앞으로 어떤 트렌드가 올까? 🔮
🌟 주목해야 할 트렌드
1. 서버리스의 확산
서버 관리 없이 코드만 작성하는 시대가 오고 있어. Lambda, Cloud Functions뿐만 아니라 서버리스 데이터베이스, 서버리스 컨테이너까지!
2. 엣지 컴퓨팅
데이터를 클라우드로 보내지 않고 사용자 가까이에서 처리하는 기술. AWS Wavelength, Azure Edge Zones, Google Distributed Cloud 등이 발전 중이야.
3. AI/ML의 민주화
복잡한 머신러닝 모델을 쉽게 사용할 수 있는 서비스들이 계속 나오고 있어. AWS SageMaker, Azure Machine Learning, Vertex AI 등.
4. 멀티 클라우드와 하이브리드 클라우드
한 클라우드에 종속되지 않고 여러 클라우드를 유연하게 사용하는 게 표준이 될 거야. Anthos, Azure Arc 같은 통합 플랫폼이 중요해지고 있어.
5. 컨테이너와 쿠버네티스
컨테이너 기반 개발이 표준이 되고 있어. Kubernetes는 이미 사실상의 표준이고, 서비스 메시, GitOps 같은 고급 패턴들이 발전 중이야.
6. 보안 자동화
DevSecOps가 중요해지면서 보안을 코드로 관리하고 자동화하는 게 필수가 되고 있어. Infrastructure as Code와 함께 Security as Code도!
7. 지속 가능성 (Sustainability)
클라우드 업체들이 탄소 중립을 목표로 하고 있어. 친환경적인 클라우드 사용이 중요한 선택 기준이 될 거야. 🌱
💼 커리어 전망
클라우드 개발자의 미래는 밝아! ☀️
수요:
• 모든 기업이 클라우드로 이동 중
• 클라우드 전문가 부족 현상
• 높은 연봉과 좋은 근무 조건
커리어 경로:
• Cloud Developer → Senior Developer → Tech Lead
• Cloud Engineer → DevOps Engineer → SRE (Site Reliability Engineer)
• Solutions Architect → Principal Architect → CTO
• 프리랜서 컨설턴트
• 재능넷에서 전문가로 활동하며 부수입 창출 💰
평균 연봉 (한국 기준, 2024):
• 주니어 (1-3년): 4,000만원 ~ 6,000만원
• 미드레벨 (3-7년): 6,000만원 ~ 9,000만원
• 시니어 (7년 이상): 9,000만원 ~ 1억 5,000만원
• 아키텍트/전문가: 1억 원 이상
물론 실력과 경험에 따라 차이가 크지만, 클라우드 전문성은 확실히 프리미엄이 붙어! 📈
• 문제 해결 능력 (구글링 스킬 포함 😄)
• 비즈니스 이해도 (기술만 아는 게 아니라 왜 필요한지 이해)
• 커뮤니케이션 능력 (팀워크가 중요해)
• 비용 의식 (클라우드는 돈이야!)
• 보안 마인드 (보안은 선택이 아니라 필수)
• 자동화 사고방식 (반복 작업은 자동화하자)
• 재능넷 같은 플랫폼에서 지식을 공유하고 네트워킹하는 적극성! 🤝
🎬 마무리하며
와! 여기까지 읽었다면 정말 대단해! 👏
우리는 AWS, Azure, GCP 세 가지 주요 클라우드 플랫폼의 핵심 서비스들을 살펴봤어. 각 클라우드의 특징부터 실전 연동 방법, 멀티 클라우드 전략, 보안과 비용 최적화, 그리고 학습 로드맵까지 정말 많은 내용을 다뤘지!
핵심 요약:
1. 클라우드 선택
• AWS: 가장 많은 서비스와 레퍼런스
• Azure: 엔터프라이즈와 MS 생태계 통합
• GCP: 데이터 분석과 머신러닝
2. 서비스 연동
• API/SDK를 통한 프로그래밍 방식 연동
• 이벤트 기반 아키텍처 (Lambda, Functions 등)
• 메시지 큐를 통한 비동기 처리
• 서버리스로 관리 부담 최소화
3. 멀티 클라우드
• 각 클라우드의 강점을 활용
• 벤더 종속성 회피
• Terraform, Kubernetes 같은 통합 도구 활용
4. 보안과 비용
• 최소 권한 원칙
• 비밀 정보는 전용 서비스로 관리
• 비용 모니터링과 최적화 필수
• 자동화로 실수 방지
5. 학습과 성장
• 이론과 실습의 균형
• 작은 프로젝트부터 시작
• 커뮤니티 참여와 지식 공유
• 재능넷에서 멘토링과 네트워킹 🌟
클라우드 기술은 계속 진화하고 있어. 오늘 배운 내용도 1년 후면 업데이트될 수 있지. 하지만 기본 원리와 개념은 변하지 않아. 탄탄한 기초 위에 새로운 기술을 계속 쌓아가면 돼!
마지막 조언:
• 완벽하게 준비될 때까지 기다리지 마. 지금 바로 시작하자! 🚀
• 실패를 두려워하지 마. 클라우드는 실험하기 좋은 환경이야.
• 혼자 고민하지 말고 커뮤니티에 질문하자. 재능넷에도 많은 전문가들이 있어!
• 배운 걸 다른 사람에게 가르쳐보자. 가르치면서 더 깊이 이해하게 돼.
• 즐기면서 하자! 클라우드는 정말 재미있는 분야야. 😊
이 글이 클라우드 개발 여정에 도움이 되었으면 좋겠어. 궁금한 점이 있다면 재능넷 커뮤니티에서 언제든 질문하고, 전문가들과 소통해봐!
자, 이제 컴퓨터 앞에 앉아서 AWS, Azure, 또는 GCP 콘솔을 열어보자. 첫 번째 클라우드 리소스를 만들어보는 거야. 그게 바로 클라우드 개발자로 가는 첫걸음이 될 거야! 💪
행운을 빌어! 클라우드에서 만나자! ☁️✨
🌟 이 글이 도움이 되었다면 재능넷에서 더 많은 지식을 공유하고 배워보세요! 🌟
www.jaenung.net

댓글 작성
이 글에 대한 여러분의 생각을 들려주세요
로그인이 필요합니다
댓글을 작성하려면 먼저 로그인해주세요.
댓글 0
지식인의 숲 - 지적 재산권 보호 고지
지적 재산권 보호 고지
- 저작권 및 소유권: 본 컨텐츠는 재능넷의 독점 AI 기술로 생성되었으며, 대한민국 저작권법 및 국제 저작권 협약에 의해 보호됩니다.
- AI 생성 컨텐츠의 법적 지위: 본 AI 생성 컨텐츠는 재능넷의 지적 창작물로 인정되며, 관련 법규에 따라 저작권 보호를 받습니다.
- 사용 제한: 재능넷의 명시적 서면 동의 없이 본 컨텐츠를 복제, 수정, 배포, 또는 상업적으로 활용하는 행위는 엄격히 금지됩니다.
- 데이터 수집 금지: 본 컨텐츠에 대한 무단 스크래핑, 크롤링, 및 자동화된 데이터 수집은 법적 제재의 대상이 됩니다.
- AI 학습 제한: 재능넷의 AI 생성 컨텐츠를 타 AI 모델 학습에 무단 사용하는 행위는 금지되며, 이는 지적 재산권 침해로 간주됩니다.



아직 댓글이 없습니다.