

Ver3.0 ⚡ PyTorch Lightning으로 모델 학습 파이프라인 구성
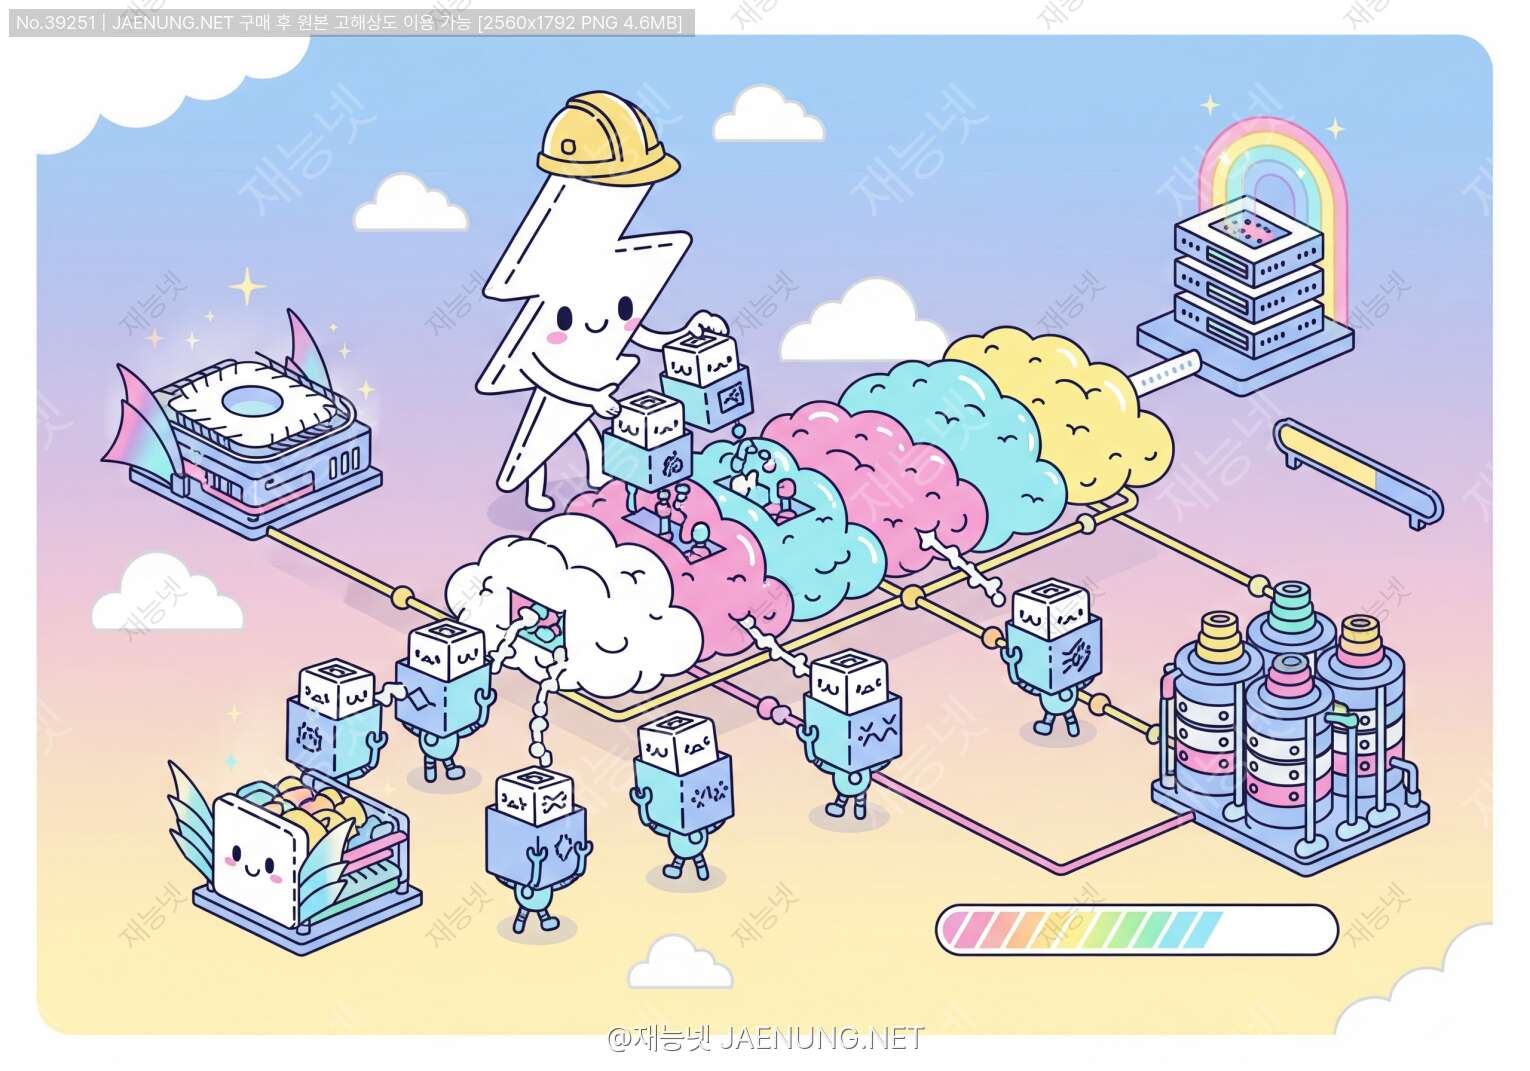
⚡ PyTorch Lightning으로 모델 학습 파이프라인 구성
딥러닝 코드, 이제 깔끔하게 정리해볼까요? 🚀
🎯 PyTorch Lightning, 왜 필요한 걸까?
딥러닝 모델을 만들다 보면 정말 골치 아픈 순간들이 있어. 학습 루프 작성하고, GPU 설정하고, 체크포인트 저장하고, 로깅 설정하고... 😫 코드가 점점 스파게티처럼 엉켜가는 걸 느낄 때가 있지 않아?
바로 이럴 때 PyTorch Lightning이 등장해! PyTorch의 유연성은 그대로 유지하면서, 반복적인 보일러플레이트 코드를 확 줄여주는 고마운 프레임워크야. 마치 요리할 때 미리 손질된 재료를 쓰는 것처럼, 핵심 로직에만 집중할 수 있게 해주지. 🎨
실제로 재능넷 같은 플랫폼에서 AI 관련 프로젝트를 진행하는 개발자들도 PyTorch Lightning을 활용해서 더 빠르고 효율적으로 작업하고 있어. 코드 품질이 올라가니까 협업도 훨씬 수월해지거든!
• 연구 코드와 엔지니어링 코드의 분리: 모델 로직과 학습 인프라를 명확히 구분
• 재사용성: 한 번 작성한 코드를 다양한 환경에서 재활용
• 확장성: 단일 GPU부터 멀티 노드 클러스터까지 코드 변경 없이 확장
• 가독성: 누가 봐도 이해하기 쉬운 구조화된 코드
🏗️ LightningModule: 모델의 핵심 구조
PyTorch Lightning의 가장 중요한 개념이 바로 LightningModule이야. 이건 기존 PyTorch의 nn.Module을 상속받아서 확장한 거라서, 기존에 작성한 PyTorch 코드를 거의 그대로 사용할 수 있어. 😊
LightningModule은 크게 5가지 핵심 메서드로 구성돼:
1️⃣ __init__: 모델 아키텍처 정의
2️⃣ forward: 순전파 로직
3️⃣ training_step: 학습 단계에서 실행될 코드
4️⃣ validation_step: 검증 단계에서 실행될 코드
5️⃣ configure_optimizers: 옵티마이저와 스케줄러 설정
실제 코드로 보면 훨씬 이해가 쉬워. 간단한 이미지 분류 모델을 만들어볼게! 🖼️
import torch
import torch.nn as nn
import torch.nn.functional as F
import pytorch_lightning as pl
from torchmetrics import Accuracy

class ImageClassifier(pl.LightningModule):
    def __init__(self, num_classes=10, learning_rate=1e-3):
        super().__init__()
        # 하이퍼파라미터 자동 저장
        self.save_hyperparameters()

        # 모델 아키텍처 정의
        self.conv1 = nn.Conv2d(3, 32, 3, padding=1)
        self.conv2 = nn.Conv2d(32, 64, 3, padding=1)
        self.conv3 = nn.Conv2d(64, 128, 3, padding=1)
        self.pool = nn.MaxPool2d(2, 2)
        self.fc1 = nn.Linear(128 * 4 * 4, 512)
        self.fc2 = nn.Linear(512, num_classes)
        self.dropout = nn.Dropout(0.5)

        # 메트릭 정의
        self.train_accuracy = Accuracy(task='multiclass', num_classes=num_classes)
        self.val_accuracy = Accuracy(task='multiclass', num_classes=num_classes)

    def forward(self, x):
        # 순전파 로직
        x = self.pool(F.relu(self.conv1(x)))
        x = self.pool(F.relu(self.conv2(x)))
        x = self.pool(F.relu(self.conv3(x)))
        x = x.view(-1, 128 * 4 * 4)
        x = F.relu(self.fc1(x))
        x = self.dropout(x)
        x = self.fc2(x)
        return x

    def training_step(self, batch, batch_idx):
        # 학습 단계
        x, y = batch
        logits = self(x)
        loss = F.cross_entropy(logits, y)
        preds = torch.argmax(logits, dim=1)

        # 메트릭 계산
        self.train_accuracy(preds, y)

        # 로깅 (자동으로 TensorBoard 등에 기록됨)
        self.log('train_loss', loss, prog_bar=True)
        self.log('train_acc', self.train_accuracy, prog_bar=True)

        return loss

    def validation_step(self, batch, batch_idx):
        # 검증 단계
        x, y = batch
        logits = self(x)
        loss = F.cross_entropy(logits, y)
        preds = torch.argmax(logits, dim=1)

        self.val_accuracy(preds, y)

        self.log('val_loss', loss, prog_bar=True)
        self.log('val_acc', self.val_accuracy, prog_bar=True)

        return loss

    def configure_optimizers(self):
        # 옵티마이저와 스케줄러 설정
        optimizer = torch.optim.Adam(self.parameters(), lr=self.hparams.learning_rate)
        scheduler = torch.optim.lr_scheduler.ReduceLROnPlateau(
            optimizer,
            mode='min',
            factor=0.5,
            patience=5
        )
        return {
            'optimizer': optimizer,
            'lr_scheduler': {
                'scheduler': scheduler,
                'monitor': 'val_loss'
            }
        }
self.save_hyperparameters()를 사용하면 모델의 모든 하이퍼파라미터가 자동으로 저장돼. 나중에 체크포인트에서 모델을 불러올 때 정확히 같은 설정으로 복원할 수 있어서 정말 편리해! 🎯
위 코드를 보면 알겠지만, 학습 루프를 직접 작성할 필요가 없어. training_step과 validation_step만 정의하면 Lightning이 알아서 에폭을 돌리고, 배치를 처리하고, GPU로 데이터를 옮기고, 그래디언트를 계산해줘. 마법 같지? ✨
🎮 Trainer: 학습의 지휘자
Trainer는 PyTorch Lightning의 핵심 엔진이야. 모든 학습 과정을 자동화하고 관리하는 역할을 하지. GPU 설정부터 분산 학습, 체크포인트 저장까지 모든 걸 처리해줘. 🎪
Trainer의 가장 큰 장점은 설정만 바꾸면 코드 수정 없이 다양한 환경에서 실행할 수 있다는 거야. 노트북에서 개발하다가 서버로 옮길 때도, 단일 GPU에서 멀티 GPU로 확장할 때도 코드를 거의 건드리지 않아도 돼!
from pytorch_lightning import Trainer
from pytorch_lightning.callbacks import ModelCheckpoint, EarlyStopping, LearningRateMonitor

# 콜백 설정
checkpoint_callback = ModelCheckpoint(
    dirpath='checkpoints/',
    filename='model-{epoch:02d}-{val_loss:.2f}',
    save_top_k=3,  # 상위 3개 모델만 저장
    monitor='val_loss',
    mode='min'
)

early_stop_callback = EarlyStopping(
    monitor='val_loss',
    patience=10,
    mode='min',
    verbose=True
)

lr_monitor = LearningRateMonitor(logging_interval='epoch')

# Trainer 초기화
trainer = Trainer(
    max_epochs=100,
    accelerator='gpu',  # 'cpu', 'gpu', 'tpu' 등 선택 가능
    devices=1,  # 사용할 GPU 개수
    precision=16,  # Mixed Precision Training (16-bit)
    callbacks=[checkpoint_callback, early_stop_callback, lr_monitor],
    log_every_n_steps=10,
    gradient_clip_val=1.0,  # 그래디언트 클리핑
    deterministic=True,  # 재현 가능한 결과
    enable_progress_bar=True
)

# 모델 초기화
model = ImageClassifier(num_classes=10, learning_rate=1e-3)

# 학습 시작 (이게 전부!)
trainer.fit(model, train_dataloader, val_dataloader)
accelerator: 하드웨어 선택 ('cpu', 'gpu', 'tpu', 'ipu')
devices: 사용할 디바이스 개수 또는 특정 디바이스 ID
precision: 연산 정밀도 (16, 32, 64 또는 'bf16')
strategy: 분산 학습 전략 ('ddp', 'ddp_spawn', 'deepspeed' 등)
max_epochs: 최대 에폭 수
gradient_clip_val: 그래디언트 클리핑 값
accumulate_grad_batches: 그래디언트 누적 배치 수
val_check_interval: 검증 실행 주기
특히 멀티 GPU 학습으로 확장하고 싶을 때는 정말 간단해:
# 단일 GPU
trainer = Trainer(accelerator='gpu', devices=1)

# 멀티 GPU (DDP)
trainer = Trainer(accelerator='gpu', devices=4, strategy='ddp')

# 특정 GPU 선택
trainer = Trainer(accelerator='gpu', devices=[0, 2, 3])

# TPU 사용
trainer = Trainer(accelerator='tpu', devices=8)
코드 한 줄만 바꾸면 되는 거야! 이게 바로 PyTorch Lightning의 진정한 파워지. 💪
DDP(Distributed Data Parallel) 전략을 사용할 때는 데이터 로더의 num_workers 설정에 주의해야 해. 각 GPU마다 별도의 프로세스가 생성되기 때문에, 너무 많은 워커를 설정하면 시스템 리소스가 부족해질 수 있어!
📊 DataModule: 데이터 관리의 정석
데이터 로딩 코드가 여기저기 흩어져 있으면 정말 관리하기 힘들어. LightningDataModule은 데이터 준비, 전처리, 로딩을 한 곳에 깔끔하게 정리할 수 있게 해줘. 🗂️
DataModule은 5가지 주요 단계로 구성돼:
| 메서드 | 역할 | 실행 시점 |
|---|---|---|
| prepare_data | 데이터 다운로드, 압축 해제 등 | 단일 프로세스에서 1회만 실행 |
| setup | 데이터셋 분할, 전처리 | 각 프로세스마다 실행 |
| train_dataloader | 학습 데이터 로더 반환 | 학습 시작 시 |
| val_dataloader | 검증 데이터 로더 반환 | 검증 시작 시 |
| test_dataloader | 테스트 데이터 로더 반환 | 테스트 시작 시 |
실제 예제를 보면 훨씬 명확해져:
import pytorch_lightning as pl
from torch.utils.data import DataLoader, random_split
from torchvision import datasets, transforms
import os

class CIFAR10DataModule(pl.LightningDataModule):
    def __init__(self, data_dir='./data', batch_size=32, num_workers=4):
        super().__init__()
        self.data_dir = data_dir
        self.batch_size = batch_size
        self.num_workers = num_workers

        # 데이터 증강 및 정규화
        self.transform_train = transforms.Compose([
            transforms.RandomCrop(32, padding=4),
            transforms.RandomHorizontalFlip(),
            transforms.ToTensor(),
            transforms.Normalize((0.4914, 0.4822, 0.4465),
                               (0.2023, 0.1994, 0.2010))
        ])

        self.transform_test = transforms.Compose([
            transforms.ToTensor(),
            transforms.Normalize((0.4914, 0.4822, 0.4465),
                               (0.2023, 0.1994, 0.2010))
        ])

    def prepare_data(self):
        # 데이터 다운로드 (단일 프로세스에서만 실행)
        datasets.CIFAR10(self.data_dir, train=True, download=True)
        datasets.CIFAR10(self.data_dir, train=False, download=True)

    def setup(self, stage=None):
        # 데이터셋 분할 (각 프로세스에서 실행)
        if stage == 'fit' or stage is None:
            cifar_full = datasets.CIFAR10(
                self.data_dir,
                train=True,
                transform=self.transform_train
            )
            # 학습/검증 분할 (45000/5000)
            self.cifar_train, self.cifar_val = random_split(
                cifar_full, [45000, 5000]
            )

        if stage == 'test' or stage is None:
            self.cifar_test = datasets.CIFAR10(
                self.data_dir,
                train=False,
                transform=self.transform_test
            )

    def train_dataloader(self):
        return DataLoader(
            self.cifar_train,
            batch_size=self.batch_size,
            shuffle=True,
            num_workers=self.num_workers,
            pin_memory=True,
            persistent_workers=True
        )

    def val_dataloader(self):
        return DataLoader(
            self.cifar_val,
            batch_size=self.batch_size,
            shuffle=False,
            num_workers=self.num_workers,
            pin_memory=True,
            persistent_workers=True
        )

    def test_dataloader(self):
        return DataLoader(
            self.cifar_test,
            batch_size=self.batch_size,
            shuffle=False,
            num_workers=self.num_workers,
            pin_memory=True
        )

# 사용법
data_module = CIFAR10DataModule(batch_size=128, num_workers=8)
model = ImageClassifier(num_classes=10)

trainer = Trainer(max_epochs=50, accelerator='gpu', devices=1)
trainer.fit(model, data_module)
trainer.test(model, data_module)
- ✅ 재사용성: 다른 프로젝트에서도 그대로 사용 가능
- ✅ 일관성: 학습/검증/테스트 데이터 처리가 일관되게 관리됨
- ✅ 분산 학습 호환: 멀티 GPU 환경에서도 자동으로 잘 작동
- ✅ 가독성: 데이터 관련 코드가 한 곳에 모여 있어 이해하기 쉬움
pin_memory=True와 persistent_workers=True 옵션은 GPU 학습 시 데이터 로딩 속도를 크게 향상시켜줘. 특히 persistent_workers는 에폭마다 워커를 재시작하지 않아서 오버헤드가 줄어들어! 🚄
🎨 Callbacks: 학습 과정 커스터마이징
Callbacks는 학습 과정의 특정 시점에 자동으로 실행되는 함수들이야. 체크포인트 저장, 조기 종료, 학습률 조정 등 다양한 기능을 모듈화해서 쉽게 추가할 수 있어. 🎯
PyTorch Lightning은 기본적으로 많은 유용한 콜백을 제공하고, 필요하면 직접 만들 수도 있어!
ModelCheckpoint: 모델 체크포인트 자동 저장
EarlyStopping: 성능 개선이 없을 때 학습 조기 종료
LearningRateMonitor: 학습률 변화 추적
GradientAccumulationScheduler: 동적 그래디언트 누적
StochasticWeightAveraging: 가중치 평균화로 일반화 성능 향상
RichProgressBar: 예쁜 진행 표시줄
DeviceStatsMonitor: GPU/CPU 사용량 모니터링
from pytorch_lightning.callbacks import (
    ModelCheckpoint,
    EarlyStopping,
    LearningRateMonitor,
    StochasticWeightAveraging,
    RichProgressBar,
    DeviceStatsMonitor
)

# 다양한 콜백 설정
callbacks = [
    # 최고 성능 모델 저장
    ModelCheckpoint(
        dirpath='checkpoints/',
        filename='best-{epoch:02d}-{val_acc:.3f}',
        monitor='val_acc',
        mode='max',
        save_top_k=1,
        save_last=True
    ),

    # 여러 메트릭 기준으로 저장
    ModelCheckpoint(
        dirpath='checkpoints/loss/',
        filename='loss-{epoch:02d}-{val_loss:.3f}',
        monitor='val_loss',
        mode='min',
        save_top_k=3
    ),

    # 조기 종료
    EarlyStopping(
        monitor='val_loss',
        patience=15,
        mode='min',
        verbose=True,
        min_delta=0.001  # 최소 개선 폭
    ),

    # 학습률 모니터링
    LearningRateMonitor(logging_interval='step'),

    # Stochastic Weight Averaging
    StochasticWeightAveraging(swa_lrs=1e-2),

    # 예쁜 진행 표시줄
    RichProgressBar(),

    # 디바이스 통계
    DeviceStatsMonitor()
]

trainer = Trainer(
    max_epochs=100,
    callbacks=callbacks,
    accelerator='gpu',
    devices=1
)
이제 커스텀 콜백을 만드는 방법을 알아볼게. 예를 들어, 특정 에폭마다 샘플 예측 결과를 이미지로 저장하는 콜백을 만들어보자! 📸
import pytorch_lightning as pl
from pytorch_lightning.callbacks import Callback
import matplotlib.pyplot as plt
import torch
import os

class VisualizationCallback(Callback):
    def __init__(self, save_dir='visualizations', num_samples=8):
        super().__init__()
        self.save_dir = save_dir
        self.num_samples = num_samples
        os.makedirs(save_dir, exist_ok=True)

    def on_validation_epoch_end(self, trainer, pl_module):
        # 검증 에폭이 끝날 때마다 실행
        if trainer.current_epoch % 5 != 0:  # 5 에폭마다만 실행
            return

        # 검증 데이터에서 샘플 가져오기
        val_dataloader = trainer.val_dataloaders[0]
        batch = next(iter(val_dataloader))
        images, labels = batch
        images = images[:self.num_samples].to(pl_module.device)
        labels = labels[:self.num_samples]

        # 예측
        pl_module.eval()
        with torch.no_grad():
            logits = pl_module(images)
            preds = torch.argmax(logits, dim=1)

        # 시각화
        fig, axes = plt.subplots(2, 4, figsize=(12, 6))
        for idx, ax in enumerate(axes.flat):
            img = images[idx].cpu().permute(1, 2, 0)
            # 정규화 해제
            img = img * torch.tensor([0.2023, 0.1994, 0.2010])
            img = img + torch.tensor([0.4914, 0.4822, 0.4465])
            img = torch.clamp(img, 0, 1)

            ax.imshow(img)
            ax.set_title(f'True: {labels[idx]}, Pred: {preds[idx].item()}')
            ax.axis('off')

        plt.tight_layout()
        plt.savefig(f'{self.save_dir}/epoch_{trainer.current_epoch}.png')
        plt.close()

        pl_module.train()

# 사용법
vis_callback = VisualizationCallback(save_dir='predictions', num_samples=8)
trainer = Trainer(callbacks=[vis_callback, ...])
콜백은 다음과 같은 다양한 시점에 실행될 수 있어:
• on_train_start/end: 전체 학습 시작/종료
• on_epoch_start/end: 에폭 시작/종료
• on_train_batch_start/end: 학습 배치 시작/종료
• on_validation_epoch_end: 검증 에폭 종료
• on_test_epoch_end: 테스트 에폭 종료
이런 훅(hook)들을 활용하면 학습 과정을 아주 세밀하게 제어할 수 있어!
실무에서 자주 사용하는 또 다른 커스텀 콜백 예제를 하나 더 보여줄게. 학습 중 메모리 사용량을 추적하는 콜백이야:
import torch
import psutil
from pytorch_lightning.callbacks import Callback

class MemoryMonitorCallback(Callback):
    def __init__(self):
        super().__init__()
        self.process = psutil.Process()

    def on_train_batch_end(self, trainer, pl_module, outputs, batch, batch_idx):
        # GPU 메모리
        if torch.cuda.is_available():
            gpu_memory = torch.cuda.memory_allocated() / 1024**3  # GB
            gpu_memory_cached = torch.cuda.memory_reserved() / 1024**3
            pl_module.log('gpu_memory_allocated_gb', gpu_memory)
            pl_module.log('gpu_memory_cached_gb', gpu_memory_cached)

        # CPU 메모리
        cpu_memory = self.process.memory_info().rss / 1024**3  # GB
        pl_module.log('cpu_memory_gb', cpu_memory)

    def on_train_epoch_end(self, trainer, pl_module):
        # 에폭 종료 시 GPU 캐시 정리
        if torch.cuda.is_available():
            torch.cuda.empty_cache()

# 사용
memory_callback = MemoryMonitorCallback()
trainer = Trainer(callbacks=[memory_callback])
이런 식으로 콜백을 활용하면 학습 과정을 모니터링하고 제어하는 게 정말 쉬워져. 재능넷에서 AI 프로젝트를 진행하는 개발자들도 이런 콜백들을 활용해서 더 안정적이고 효율적인 학습 파이프라인을 구축하고 있어! 🎓
⚡ Mixed Precision Training: 속도와 메모리 최적화
Mixed Precision Training은 16-bit 부동소수점 연산을 활용해서 학습 속도를 높이고 메모리 사용량을 줄이는 기법이야. PyTorch Lightning에서는 정말 간단하게 적용할 수 있어! 🚀
# 16-bit Mixed Precision
trainer = Trainer(
    precision=16,  # 또는 '16-mixed'
    accelerator='gpu',
    devices=1
)

# bfloat16 (더 안정적, Ampere 이상 GPU에서 지원)
trainer = Trainer(
    precision='bf16',
    accelerator='gpu',
    devices=1
)

# 32-bit (기본값)
trainer = Trainer(
    precision=32,
    accelerator='gpu',
    devices=1
)
- ✅ 속도 향상: 약 2~3배 빠른 학습 속도
- ✅ 메모리 절약: 약 50% 메모리 사용량 감소
- ✅ 배치 크기 증가: 더 큰 배치로 학습 가능
- ✅ 성능 유지: 대부분의 경우 정확도 손실 없음
하지만 주의할 점도 있어:
• 일부 연산에서 수치적 불안정성이 발생할 수 있어
• Loss scaling이 자동으로 적용되지만, 때로는 수동 조정이 필요해
• 매우 작은 그래디언트가 0으로 언더플로우될 수 있어
• 모든 GPU가 16-bit 연산을 효율적으로 지원하는 건 아니야 (Volta 이상 권장)
만약 수치적 불안정성 문제가 발생하면, 특정 레이어만 32-bit로 유지할 수 있어:
class MixedPrecisionModel(pl.LightningModule):
    def __init__(self):
        super().__init__()
        self.layer1 = nn.Linear(100, 50)
        self.layer2 = nn.Linear(50, 10)

        # 특정 레이어를 32-bit로 유지
        self.layer2.float()

    def forward(self, x):
        x = self.layer1(x)
        # 명시적으로 32-bit로 변환
        x = x.float()
        x = self.layer2(x)
        return x
🔄 Gradient Accumulation: 큰 배치 효과 내기
GPU 메모리가 부족해서 큰 배치 크기를 사용할 수 없을 때, Gradient Accumulation을 사용하면 작은 배치를 여러 번 누적해서 큰 배치와 동일한 효과를 낼 수 있어! 📊
# 배치 크기 32를 4번 누적 = 실질적으로 배치 크기 128
trainer = Trainer(
    accumulate_grad_batches=4,
    max_epochs=100
)

# 에폭에 따라 동적으로 변경
trainer = Trainer(
    accumulate_grad_batches={
        0: 1,   # 처음 5 에폭은 누적 없음
        5: 2,   # 5~10 에폭은 2배 누적
        10: 4   # 10 에폭 이후는 4배 누적
    }
)
Gradient Accumulation을 사용할 때는 학습률 조정이 필요할 수 있어. 실질적인 배치 크기가 커지니까 학습률도 그에 맞게 조정해야 해:
class MyModel(pl.LightningModule):
    def __init__(self, base_lr=1e-3, accumulate_batches=4):
        super().__init__()
        self.base_lr = base_lr
        self.accumulate_batches = accumulate_batches
        # ... 모델 정의 ...

    def configure_optimizers(self):
        # 누적 배치에 맞춰 학습률 조정
        adjusted_lr = self.base_lr * self.accumulate_batches
        optimizer = torch.optim.Adam(self.parameters(), lr=adjusted_lr)
        return optimizer
• GPU 메모리가 부족해서 큰 배치를 사용할 수 없을 때
• 큰 배치 크기가 성능 향상에 도움이 되는 경우
• 분산 학습 없이 큰 배치 효과를 내고 싶을 때
• Transformer 같은 메모리 집약적 모델을 학습할 때
🌐 분산 학습: 멀티 GPU/멀티 노드
PyTorch Lightning의 진정한 파워는 분산 학습에서 빛을 발해. 코드 한 줄만 바꾸면 단일 GPU에서 멀티 GPU, 심지어 멀티 노드 클러스터로 확장할 수 있어! 🌟
| 전략 | 설명 | 사용 시나리오 |
|---|---|---|
| ddp | Distributed Data Parallel | 가장 빠른 멀티 GPU 학습 |
| ddp_spawn | DDP with spawn | 디버깅이 쉬운 DDP |
| fsdp | Fully Sharded Data Parallel | 매우 큰 모델 학습 |
| deepspeed | DeepSpeed 통합 | 초대형 모델 (GPT 스케일) |
| ddp_notebook | Jupyter용 DDP | 노트북 환경에서 멀티 GPU |
# 단일 GPU
trainer = Trainer(accelerator='gpu', devices=1)

# 멀티 GPU - DDP (권장)
trainer = Trainer(
    accelerator='gpu',
    devices=4,
    strategy='ddp'
)

# 멀티 GPU - DDP Spawn (디버깅용)
trainer = Trainer(
    accelerator='gpu',
    devices=4,
    strategy='ddp_spawn'
)

# FSDP (매우 큰 모델)
trainer = Trainer(
    accelerator='gpu',
    devices=8,
    strategy='fsdp',
    precision=16
)

# DeepSpeed Stage 2
from pytorch_lightning.strategies import DeepSpeedStrategy

trainer = Trainer(
    accelerator='gpu',
    devices=8,
    strategy=DeepSpeedStrategy(stage=2),
    precision=16
)

# 멀티 노드
trainer = Trainer(
    accelerator='gpu',
    devices=8,
    num_nodes=4,  # 4개 노드
    strategy='ddp'
)
분산 학습을 사용할 때 주의해야 할 점들이 있어:
1️⃣ 배치 크기: 전체 배치 크기 = 단일 GPU 배치 × GPU 개수
2️⃣ 학습률: Linear Scaling Rule 적용 (배치 크기에 비례해서 증가)
3️⃣ Warmup: 큰 배치 사용 시 학습률 워밍업 필수
4️⃣ 동기화: 메트릭 계산 시 모든 GPU 간 동기화 필요
5️⃣ 난수 시드: 재현성을 위해 시드 고정
import pytorch_lightning as pl

class DistributedModel(pl.LightningModule):
    def __init__(self, base_lr=1e-3):
        super().__init__()
        self.base_lr = base_lr
        # ... 모델 정의 ...

    def configure_optimizers(self):
        # GPU 개수에 맞춰 학습률 조정
        num_gpus = self.trainer.num_devices
        adjusted_lr = self.base_lr * num_gpus

        optimizer = torch.optim.SGD(
            self.parameters(),
            lr=adjusted_lr,
            momentum=0.9,
            weight_decay=1e-4
        )

        # Warmup + Cosine Annealing
        scheduler = torch.optim.lr_scheduler.OneCycleLR(
            optimizer,
            max_lr=adjusted_lr,
            total_steps=self.trainer.estimated_stepping_batches,
            pct_start=0.1  # 10% warmup
        )

        return {
            'optimizer': optimizer,
            'lr_scheduler': {
                'scheduler': scheduler,
                'interval': 'step'
            }
        }

    def training_step(self, batch, batch_idx):
        x, y = batch
        logits = self(x)
        loss = F.cross_entropy(logits, y)

        # 모든 GPU에서 동기화된 메트릭
        self.log('train_loss', loss, sync_dist=True)

        return loss

# 사용
pl.seed_everything(42)  # 재현성을 위한 시드 고정

trainer = Trainer(
    accelerator='gpu',
    devices=4,
    strategy='ddp',
    precision=16,
    max_epochs=100
)
• prepare_data()는 단일 프로세스에서만 실행돼 (데이터 다운로드 중복 방지)
• setup()은 각 프로세스에서 실행돼
• 파일 저장/로드 시 rank 0 프로세스만 사용하도록 주의
• 디버깅이 어려울 수 있으니 개발 시에는 ddp_spawn 사용 권장
📈 로깅과 실험 추적
모델 학습 과정을 제대로 추적하고 분석하는 건 정말 중요해. PyTorch Lightning은 다양한 로깅 프레임워크와 쉽게 통합돼! 📊
• TensorBoard: PyTorch 기본 로거
• Weights & Biases (wandb): 클라우드 기반 실험 추적
• MLflow: 엔터프라이즈급 ML 플랫폼
• Neptune: 메타데이터 관리에 특화
• Comet: 협업 중심 플랫폼
• CSV Logger: 간단한 CSV 파일 로깅
from pytorch_lightning.loggers import TensorBoardLogger, WandbLogger, CSVLogger

# TensorBoard
tensorboard_logger = TensorBoardLogger(
    save_dir='logs/',
    name='my_model',
    version='v1'
)

# Weights & Biases
wandb_logger = WandbLogger(
    project='image-classification',
    name='resnet50-experiment',
    log_model=True  # 모델 체크포인트도 업로드
)

# CSV Logger
csv_logger = CSVLogger(
    save_dir='logs/',
    name='csv_logs'
)

# 여러 로거 동시 사용
trainer = Trainer(
    logger=[tensorboard_logger, wandb_logger, csv_logger],
    max_epochs=100
)
모델 내에서 다양한 방식으로 로깅할 수 있어:
class MyModel(pl.LightningModule):
    def training_step(self, batch, batch_idx):
        x, y = batch
        logits = self(x)
        loss = F.cross_entropy(logits, y)

        # 스칼라 로깅
        self.log('train_loss', loss)

        # 여러 메트릭 한 번에
        self.log_dict({
            'train_loss': loss,
            'train_acc': accuracy,
            'learning_rate': self.optimizers().param_groups[0]['lr']
        })

        # 진행 표시줄에 표시
        self.log('train_loss', loss, prog_bar=True)

        # 에폭 단위로 집계
        self.log('train_loss', loss, on_step=False, on_epoch=True)

        # 분산 학습 시 동기화
        self.log('train_loss', loss, sync_dist=True)

        return loss

    def validation_step(self, batch, batch_idx):
        x, y = batch
        logits = self(x)
        loss = F.cross_entropy(logits, y)

        # 이미지 로깅 (TensorBoard/Wandb)
        if batch_idx == 0:
            # 첫 배치의 이미지만 로깅
            self.logger.experiment.add_images(
                'val_images',
                x[:8],
                self.current_epoch
            )

        # 히스토그램 로깅
        for name, param in self.named_parameters():
            self.logger.experiment.add_histogram(
                name,
                param,
                self.current_epoch
            )

        return loss
Weights & Biases를 사용하면 더 풍부한 로깅이 가능해:
import wandb
from pytorch_lightning.loggers import WandbLogger

class AdvancedModel(pl.LightningModule):
    def __init__(self):
        super().__init__()
        # ... 모델 정의 ...

    def training_step(self, batch, batch_idx):
        x, y = batch
        logits = self(x)
        loss = F.cross_entropy(logits, y)

        # 기본 로깅
        self.log('train_loss', loss)

        # Confusion Matrix 로깅 (검증 시)
        if batch_idx % 100 == 0:
            preds = torch.argmax(logits, dim=1)
            self.logger.experiment.log({
                'confusion_matrix': wandb.plot.confusion_matrix(
                    probs=None,
                    y_true=y.cpu().numpy(),
                    preds=preds.cpu().numpy(),
                    class_names=['class_0', 'class_1', ...]
                )
            })

        return loss

    def on_train_epoch_end(self):
        # 에폭 종료 시 커스텀 차트
        self.logger.experiment.log({
            'custom_metric': wandb.plot.line_series(
                xs=range(len(self.train_losses)),
                ys=[self.train_losses, self.val_losses],
                keys=['train', 'val'],
                title='Loss Curves',
                xname='Step'
            )
        })

# 사용
wandb_logger = WandbLogger(
    project='my-project',
    config={
        'learning_rate': 1e-3,
        'batch_size': 32,
        'architecture': 'ResNet50'
    }
)

trainer = Trainer(logger=wandb_logger)
- ✅ 학습/검증 손실은 항상 로깅
- ✅ 학습률 변화 추적
- ✅ 주요 메트릭 (정확도, F1 등) 로깅
- ✅ 그래디언트 노름 모니터링 (폭발/소실 감지)
- ✅ 모델 가중치 히스토그램 (주기적으로)
- ✅ 샘플 예측 결과 시각화
- ✅ 하이퍼파라미터 기록
💾 체크포인트와 모델 저장
학습 중간에 모델을 저장하고, 나중에 이어서 학습하거나 추론에 사용하는 건 필수야. PyTorch Lightning은 이 과정을 정말 쉽게 만들어줘! 💪
from pytorch_lightning.callbacks import ModelCheckpoint

# 최고 성능 모델 저장
checkpoint_callback = ModelCheckpoint(
    dirpath='checkpoints/',
    filename='best-{epoch:02d}-{val_loss:.2f}',
    monitor='val_loss',
    mode='min',
    save_top_k=3,  # 상위 3개만 저장
    save_last=True,  # 마지막 체크포인트도 저장
    save_weights_only=False,  # 전체 상태 저장
    every_n_epochs=1  # 매 에폭마다 체크
)

trainer = Trainer(callbacks=[checkpoint_callback])
trainer.fit(model, datamodule)

# 저장된 체크포인트에서 모델 로드
model = MyModel.load_from_checkpoint('checkpoints/best-epoch=10-val_loss=0.25.ckpt')

# 학습 재개
trainer = Trainer(resume_from_checkpoint='checkpoints/last.ckpt')
trainer.fit(model, datamodule)
체크포인트에는 다음 정보들이 모두 저장돼:
• 모델 가중치 (state_dict)
• 옵티마이저 상태
• 학습률 스케줄러 상태
• 에폭 번호
• 글로벌 스텝
• 하이퍼파라미터
• 콜백 상태
• 난수 생성기 상태 (재현성)
커스텀 체크포인트 로직을 추가할 수도 있어:
class MyModel(pl.LightningModule):
    def on_save_checkpoint(self, checkpoint):
        # 체크포인트 저장 시 추가 정보 저장
        checkpoint['custom_data'] = {
            'best_metric': self.best_metric,
            'training_history': self.history,
            'special_config': self.config
        }

    def on_load_checkpoint(self, checkpoint):
        # 체크포인트 로드 시 추가 정보 복원
        if 'custom_data' in checkpoint:
            self.best_metric = checkpoint['custom_data']['best_metric']
            self.history = checkpoint['custom_data']['training_history']
            self.config = checkpoint['custom_data']['special_config']
프로덕션 환경에서는 모델을 더 가볍게 저장하고 싶을 수 있어:
# 가중치만 저장 (용량 절약)
checkpoint_callback = ModelCheckpoint(
    save_weights_only=True,
    dirpath='weights/',
    filename='model-weights'
)

# ONNX 형식으로 내보내기
model = MyModel.load_from_checkpoint('checkpoints/best.ckpt')
input_sample = torch.randn(1, 3, 224, 224)
model.to_onnx('model.onnx', input_sample, export_params=True)

# TorchScript로 변환
script = model.to_torchscript()
torch.jit.save(script, 'model.pt')
• 디스크 공간을 많이 차지할 수 있으니 save_top_k로 개수 제한
• 분산 학습 시 rank 0 프로세스만 저장하도록 자동 처리됨
• 클라우드 스토리지에 주기적으로 백업하는 게 좋아
• 버전 관리를 위해 파일명에 타임스탬프나 버전 정보 포함
🧪 하이퍼파라미터 튜닝
최적의 하이퍼파라미터를 찾는 건 정말 중요하지만 시간이 많이 걸려. PyTorch Lightning은 다양한 하이퍼파라미터 튜닝 도구와 통합돼 있어! 🎯
from pytorch_lightning.tuner import Tuner

# 자동 배치 크기 찾기
trainer = Trainer(auto_scale_batch_size='binsearch')
tuner = Tuner(trainer)

# 최적 배치 크기 찾기
tuner.scale_batch_size(model, datamodule=datamodule)

# 자동 학습률 찾기
trainer = Trainer(auto_lr_find=True)
tuner.lr_find(model, datamodule=datamodule)

# 결과 시각화
fig = tuner.lr_find(model, datamodule=datamodule).plot(suggest=True)
fig.show()
Optuna를 사용한 고급 하이퍼파라미터 튜닝:
import optuna
from optuna.integration import PyTorchLightningPruningCallback

def objective(trial):
    # 하이퍼파라미터 샘플링
    lr = trial.suggest_loguniform('lr', 1e-5, 1e-1)
    batch_size = trial.suggest_categorical('batch_size', [16, 32, 64, 128])
    dropout = trial.suggest_uniform('dropout', 0.1, 0.5)
    hidden_dim = trial.suggest_categorical('hidden_dim', [128, 256, 512])

    # 모델 생성
    model = MyModel(
        learning_rate=lr,
        dropout=dropout,
        hidden_dim=hidden_dim
    )

    # 데이터 모듈
    datamodule = MyDataModule(batch_size=batch_size)

    # Trainer 설정
    trainer = Trainer(
        max_epochs=30,
        accelerator='gpu',
        devices=1,
        callbacks=[
            PyTorchLightningPruningCallback(trial, monitor='val_loss')
        ],
        enable_progress_bar=False,
        logger=False
    )

    # 학습
    trainer.fit(model, datamodule)

    return trainer.callback_metrics['val_loss'].item()

# Optuna 스터디 실행
study = optuna.create_study(direction='minimize')
study.optimize(objective, n_trials=100, timeout=3600)

print('Best trial:')
print(f'  Value: {study.best_trial.value}')
print('  Params: ')
for key, value in study.best_trial.params.items():
    print(f'    {key}: {value}')
Ray Tune을 사용한 분산 하이퍼파라미터 튜닝:
from ray import tune
from ray.tune.integration.pytorch_lightning import TuneReportCallback

def train_model(config):
    model = MyModel(
        learning_rate=config['lr'],
        dropout=config['dropout']
    )

    datamodule = MyDataModule(batch_size=config['batch_size'])

    trainer = Trainer(
        max_epochs=30,
        callbacks=[
            TuneReportCallback(
                metrics=['val_loss', 'val_acc'],
                on='validation_end'
            )
        ]
    )

    trainer.fit(model, datamodule)

# 검색 공간 정의
config = {
    'lr': tune.loguniform(1e-5, 1e-1),
    'batch_size': tune.choice([16, 32, 64, 128]),
    'dropout': tune.uniform(0.1, 0.5)
}

# Ray Tune 실행
analysis = tune.run(
    train_model,
    config=config,
    num_samples=50,
    resources_per_trial={'gpu': 1},
    metric='val_loss',
    mode='min'
)

print('Best config:', analysis.best_config)
• 먼저 작은 데이터셋으로 빠르게 탐색
• 중요한 하이퍼파라미터부터 튜닝 (학습률, 배치 크기)
• Early Stopping과 Pruning 활용해서 시간 절약
• 로그 스케일로 학습률 탐색
• 여러 시드로 실험해서 안정성 확인
🎓 실전 예제: 완전한 학습 파이프라인
지금까지 배운 모든 내용을 종합해서 실전에서 바로 사용할 수 있는 완전한 파이프라인을 만들어볼게! 🚀
import torch
import torch.nn as nn
import torch.nn.functional as F
import pytorch_lightning as pl
from torch.utils.data import DataLoader, random_split
from torchvision import datasets, transforms, models
from torchmetrics import Accuracy, F1Score, ConfusionMatrix
from pytorch_lightning.callbacks import (
    ModelCheckpoint, EarlyStopping, LearningRateMonitor,
    RichProgressBar, DeviceStatsMonitor
)
from pytorch_lightning.loggers import WandbLogger
import wandb

# ==================== 데이터 모듈 ====================
class ImageDataModule(pl.LightningDataModule):
    def __init__(
        self,
        data_dir='./data',
        batch_size=32,
        num_workers=4,
        image_size=224
    ):
        super().__init__()
        self.data_dir = data_dir
        self.batch_size = batch_size
        self.num_workers = num_workers
        self.image_size = image_size

        # 데이터 증강
        self.train_transform = transforms.Compose([
            transforms.RandomResizedCrop(image_size),
            transforms.RandomHorizontalFlip(),
            transforms.RandomRotation(15),
            transforms.ColorJitter(brightness=0.2, contrast=0.2),
            transforms.ToTensor(),
            transforms.Normalize(
                mean=[0.485, 0.456, 0.406],
                std=[0.229, 0.224, 0.225]
            )
        ])

        self.val_transform = transforms.Compose([
            transforms.Resize(256),
            transforms.CenterCrop(image_size),
            transforms.ToTensor(),
            transforms.Normalize(
                mean=[0.485, 0.456, 0.406],
                std=[0.229, 0.224, 0.225]
            )
        ])

    def prepare_data(self):
        # 데이터 다운로드
        datasets.CIFAR10(self.data_dir, train=True, download=True)
        datasets.CIFAR10(self.data_dir, train=False, download=True)

    def setup(self, stage=None):
        if stage == 'fit' or stage is None:
            full_dataset = datasets.CIFAR10(
                self.data_dir,
                train=True,
                transform=self.train_transform
            )
            self.train_dataset, self.val_dataset = random_split(
                full_dataset, [45000, 5000]
            )

        if stage == 'test' or stage is None:
            self.test_dataset = datasets.CIFAR10(
                self.data_dir,
                train=False,
                transform=self.val_transform
            )

    def train_dataloader(self):
        return DataLoader(
            self.train_dataset,
            batch_size=self.batch_size,
            shuffle=True,
            num_workers=self.num_workers,
            pin_memory=True,
            persistent_workers=True
        )

    def val_dataloader(self):
        return DataLoader(
            self.val_dataset,
            batch_size=self.batch_size,
            shuffle=False,
            num_workers=self.num_workers,
            pin_memory=True,
            persistent_workers=True
        )

    def test_dataloader(self):
        return DataLoader(
            self.test_dataset,
            batch_size=self.batch_size,
            shuffle=False,
            num_workers=self.num_workers,
            pin_memory=True
        )

# ==================== 모델 ====================
class ImageClassifier(pl.LightningModule):
    def __init__(
        self,
        num_classes=10,
        learning_rate=1e-3,
        weight_decay=1e-4,
        pretrained=True
    ):
        super().__init__()
        self.save_hyperparameters()

        # ResNet50 백본
        self.backbone = models.resnet50(pretrained=pretrained)
        num_features = self.backbone.fc.in_features
        self.backbone.fc = nn.Linear(num_features, num_classes)

        # 메트릭
        self.train_acc = Accuracy(task='multiclass', num_classes=num_classes)
        self.val_acc = Accuracy(task='multiclass', num_classes=num_classes)
        self.test_acc = Accuracy(task='multiclass', num_classes=num_classes)
        self.val_f1 = F1Score(task='multiclass', num_classes=num_classes)

        # 학습 기록
        self.training_step_outputs = []
        self.validation_step_outputs = []

    def forward(self, x):
        return self.backbone(x)

    def training_step(self, batch, batch_idx):
        x, y = batch
        logits = self(x)
        loss = F.cross_entropy(logits, y)
        preds = torch.argmax(logits, dim=1)

        # 메트릭 계산
        self.train_acc(preds, y)

        # 로깅
        self.log('train_loss', loss, prog_bar=True, on_step=True, on_epoch=True)
        self.log('train_acc', self.train_acc, prog_bar=True, on_epoch=True)

        self.training_step_outputs.append(loss)
        return loss

    def validation_step(self, batch, batch_idx):
        x, y = batch
        logits = self(x)
        loss = F.cross_entropy(logits, y)
        preds = torch.argmax(logits, dim=1)

        # 메트릭 계산
        self.val_acc(preds, y)
        self.val_f1(preds, y)

        # 로깅
        self.log('val_loss', loss, prog_bar=True, sync_dist=True)
        self.log('val_acc', self.val_acc, prog_bar=True, sync_dist=True)
        self.log('val_f1', self.val_f1, sync_dist=True)

        self.validation_step_outputs.append({
            'loss': loss,
            'preds': preds,
            'targets': y
        })

        return loss

    def test_step(self, batch, batch_idx):
        x, y = batch
        logits = self(x)
        loss = F.cross_entropy(logits, y)
        preds = torch.argmax(logits, dim=1)

        self.test_acc(preds, y)
        self.log('test_loss', loss)
        self.log('test_acc', self.test_acc)

        return loss

    def on_train_epoch_end(self):
        # 에폭 종료 시 처리
        avg_loss = torch.stack(self.training_step_outputs).mean()
        self.log('train_loss_epoch', avg_loss)
        self.training_step_outputs.clear()

    def on_validation_epoch_end(self):
        # 검증 에폭 종료 시 처리
        avg_loss = torch.stack([x['loss'] for x in self.validation_step_outputs]).mean()
        self.log('val_loss_epoch', avg_loss)
        self.validation_step_outputs.clear()

    def configure_optimizers(self):
        # 옵티마이저
        optimizer = torch.optim.AdamW(
            self.parameters(),
            lr=self.hparams.learning_rate,
            weight_decay=self.hparams.weight_decay
        )

        # 스케줄러
        scheduler = torch.optim.lr_scheduler.OneCycleLR(
            optimizer,
            max_lr=self.hparams.learning_rate,
            total_steps=self.trainer.estimated_stepping_batches,
            pct_start=0.1,
            anneal_strategy='cos'
        )

        return {
            'optimizer': optimizer,
            'lr_scheduler': {
                'scheduler': scheduler,
                'interval': 'step'
            }
        }

# ==================== 학습 실행 ====================
def main():
    # 시드 고정
    pl.seed_everything(42, workers=True)

    # 데이터 모듈
    datamodule = ImageDataModule(
        batch_size=128,
        num_workers=8,
        image_size=224
    )

    # 모델
    model = ImageClassifier(
        num_classes=10,
        learning_rate=1e-3,
        pretrained=True
    )

    # 로거
    wandb_logger = WandbLogger(
        project='cifar10-classification',
        name='resnet50-experiment',
        log_model=True
    )

    # 콜백
    callbacks = [
        ModelCheckpoint(
            dirpath='checkpoints/',
            filename='best-{epoch:02d}-{val_acc:.3f}',
            monitor='val_acc',
            mode='max',
            save_top_k=3,
            save_last=True
        ),
        EarlyStopping(
            monitor='val_loss',
            patience=10,
            mode='min',
            verbose=True
        ),
        LearningRateMonitor(logging_interval='step'),
        RichProgressBar(),
        DeviceStatsMonitor()
    ]

    # Trainer
    trainer = pl.Trainer(
        max_epochs=100,
        accelerator='gpu',
        devices=2,  # 멀티 GPU
        strategy='ddp',
        precision=16,  # Mixed Precision
        callbacks=callbacks,
        logger=wandb_logger,
        gradient_clip_val=1.0,
        accumulate_grad_batches=2,
        deterministic=True,
        log_every_n_steps=10
    )

    # 학습
    trainer.fit(model, datamodule)

    # 테스트
    trainer.test(model, datamodule, ckpt_path='best')

    # 최종 모델 저장
    trainer.save_checkpoint('final_model.ckpt')

    # Wandb 종료
    wandb.finish()

if __name__ == '__main__':
    main()
이 코드는 실전에서 바로 사용할 수 있는 완전한 파이프라인이야. 데이터 로딩, 모델 정의, 학습, 검증, 테스트, 로깅, 체크포인트 저장까지 모든 게 포함되어 있어! 😊
- ✅ 모듈화된 구조로 재사용 가능
- ✅ 멀티 GPU 분산 학습 지원
- ✅ Mixed Precision Training으로 속도 향상
- ✅ 자동 체크포인트 저장 및 Early Stopping
- ✅ Wandb를 통한 실험 추적
- ✅ 다양한 메트릭 계산 및 로깅
- ✅ 재현 가능한 결과 (시드 고정)
- ✅ 그래디언트 클리핑 및 누적
🔧 디버깅과 문제 해결
실전에서 모델을 학습하다 보면 다양한 문제에 부딪히게 돼. PyTorch Lightning은 디버깅을 쉽게 만들어주는 여러 기능을 제공해! 🐛
# 빠른 개발 모드 (소량 데이터로 빠르게 테스트)
trainer = Trainer(
    fast_dev_run=True  # 각 단계를 1배치씩만 실행
)

# 오버피팅 테스트 (단일 배치로 오버피팅 확인)
trainer = Trainer(
    overfit_batches=1  # 1개 배치만 반복 학습
)

# 일부 데이터만 사용
trainer = Trainer(
    limit_train_batches=0.1,  # 학습 데이터의 10%만
    limit_val_batches=0.1,    # 검증 데이터의 10%만
    limit_test_batches=0.1    # 테스트 데이터의 10%만
)

# 검증 주기 조정
trainer = Trainer(
    val_check_interval=0.25,  # 에폭의 25%마다 검증
    # 또는
    val_check_interval=100    # 100 스텝마다 검증
)

# 그래디언트 추적
trainer = Trainer(
    track_grad_norm=2,  # L2 노름 추적
    log_every_n_steps=1  # 매 스텝마다 로깅
)

# 프로파일링
from pytorch_lightning.profilers import SimpleProfiler, AdvancedProfiler

trainer = Trainer(
    profiler=AdvancedProfiler(dirpath='profiler_logs', filename='profile')
)
1. Out of Memory (OOM)
• 배치 크기 줄이기
• Mixed Precision (16-bit) 사용
• Gradient Accumulation 활용
• 모델 크기 줄이기
2. 학습이 안 되는 경우
• 학습률 조정 (너무 크거나 작지 않은지)
• 그래디언트 폭발/소실 확인
• 데이터 정규화 확인
• Loss 함수 확인
3. 검증 손실이 증가하는 경우
• Overfitting - Dropout, Weight Decay 추가
• Early Stopping 사용
• 데이터 증강 강화
• 모델 복잡도 줄이기
4. 학습 속도가 느린 경우
• num_workers 증가
• pin_memory=True 설정
• Mixed Precision 사용
• 데이터 로딩 병목 확인
그래디언트 문제를 진단하는 유용한 콜백:
from pytorch_lightning.callbacks import Callback
import torch

class GradientMonitorCallback(Callback):
    def on_after_backward(self, trainer, pl_module):
        # 그래디언트 통계
        grad_norms = []
        for name, param in pl_module.named_parameters():
            if param.grad is not None:
                grad_norm = param.grad.norm().item()
                grad_norms.append(grad_norm)

                # 이상한 그래디언트 감지
                if torch.isnan(param.grad).any():
                    print(f'NaN gradient in {name}')
                if torch.isinf(param.grad).any():
                    print(f'Inf gradient in {name}')

        # 평균 그래디언트 노름
        if grad_norms:
            avg_grad_norm = sum(grad_norms) / len(grad_norms)
            pl_module.log('avg_grad_norm', avg_grad_norm)

# 사용
trainer = Trainer(callbacks=[GradientMonitorCallback()])
🎬 마무리하며
PyTorch Lightning으로 모델 학습 파이프라인을 구성하는 방법을 자세히 알아봤어! 처음에는 복잡해 보일 수 있지만, 한 번 익숙해지면 정말 강력한 도구가 돼. 🚀
핵심을 정리하자면:
1. LightningModule: 모델 로직을 깔끔하게 구조화
2. Trainer: 학습 과정을 자동화하고 다양한 환경으로 쉽게 확장
3. DataModule: 데이터 처리를 모듈화하고 재사용 가능하게
4. Callbacks: 학습 과정을 세밀하게 제어
5. 로깅: 실험을 체계적으로 추적하고 분석
6. 분산 학습: 코드 변경 없이 멀티 GPU/노드로 확장
7. 최적화: Mixed Precision, Gradient Accumulation 등으로 효율 향상
PyTorch Lightning을 사용하면 연구 코드와 프로덕션 코드 사이의 간극을 크게 줄일 수 있어. 실험 단계에서 작성한 코드를 거의 그대로 프로덕션에 배포할 수 있거든! 💪
특히 팀으로 작업할 때 진가를 발휘해. 코드가 표준화되어 있으니까 다른 사람의 코드를 이해하기도 쉽고, 협업도 훨씬 수월해져. 실제로 많은 AI 스타트업과 연구팀들이 PyTorch Lightning을 표준으로 채택하고 있어.
재능넷 같은 플랫폼에서 AI 프로젝트를 진행할 때도, PyTorch Lightning을 활용하면 더 전문적이고 체계적인 결과물을 만들 수 있어. 클라이언트에게 깔끔한 코드와 재현 가능한 결과를 제공할 수 있으니까 신뢰도도 높아지지! 🎓
이제 여러분도 PyTorch Lightning으로 멋진 딥러닝 프로젝트를 만들어보길 바라! 처음에는 조금 낯설 수 있지만, 계속 사용하다 보면 "이거 없이 어떻게 개발했지?"라는 생각이 들 거야. 화이팅! 🔥
✨ 이 글이 도움이 되었다면, 직접 프로젝트에 적용해보세요! ✨
Happy Coding! 🚀
관련 키워드
댓글 0
지식인의 숲 - 지적 재산권 보호 고지
지적 재산권 보호 고지
- 저작권 및 소유권: 본 컨텐츠는 재능넷의 독점 AI 기술로 생성되었으며, 대한민국 저작권법 및 국제 저작권 협약에 의해 보호됩니다.
- AI 생성 컨텐츠의 법적 지위: 본 AI 생성 컨텐츠는 재능넷의 지적 창작물로 인정되며, 관련 법규에 따라 저작권 보호를 받습니다.
- 사용 제한: 재능넷의 명시적 서면 동의 없이 본 컨텐츠를 복제, 수정, 배포, 또는 상업적으로 활용하는 행위는 엄격히 금지됩니다.
- 데이터 수집 금지: 본 컨텐츠에 대한 무단 스크래핑, 크롤링, 및 자동화된 데이터 수집은 법적 제재의 대상이 됩니다.
- AI 학습 제한: 재능넷의 AI 생성 컨텐츠를 타 AI 모델 학습에 무단 사용하는 행위는 금지되며, 이는 지적 재산권 침해로 간주됩니다.




댓글 작성
이 글에 대한 여러분의 생각을 들려주세요
로그인이 필요합니다
댓글을 작성하려면 먼저 로그인해주세요.