
Ver3.0 ⚡ Service Worker로 만드는 오프라인 마법 ✨
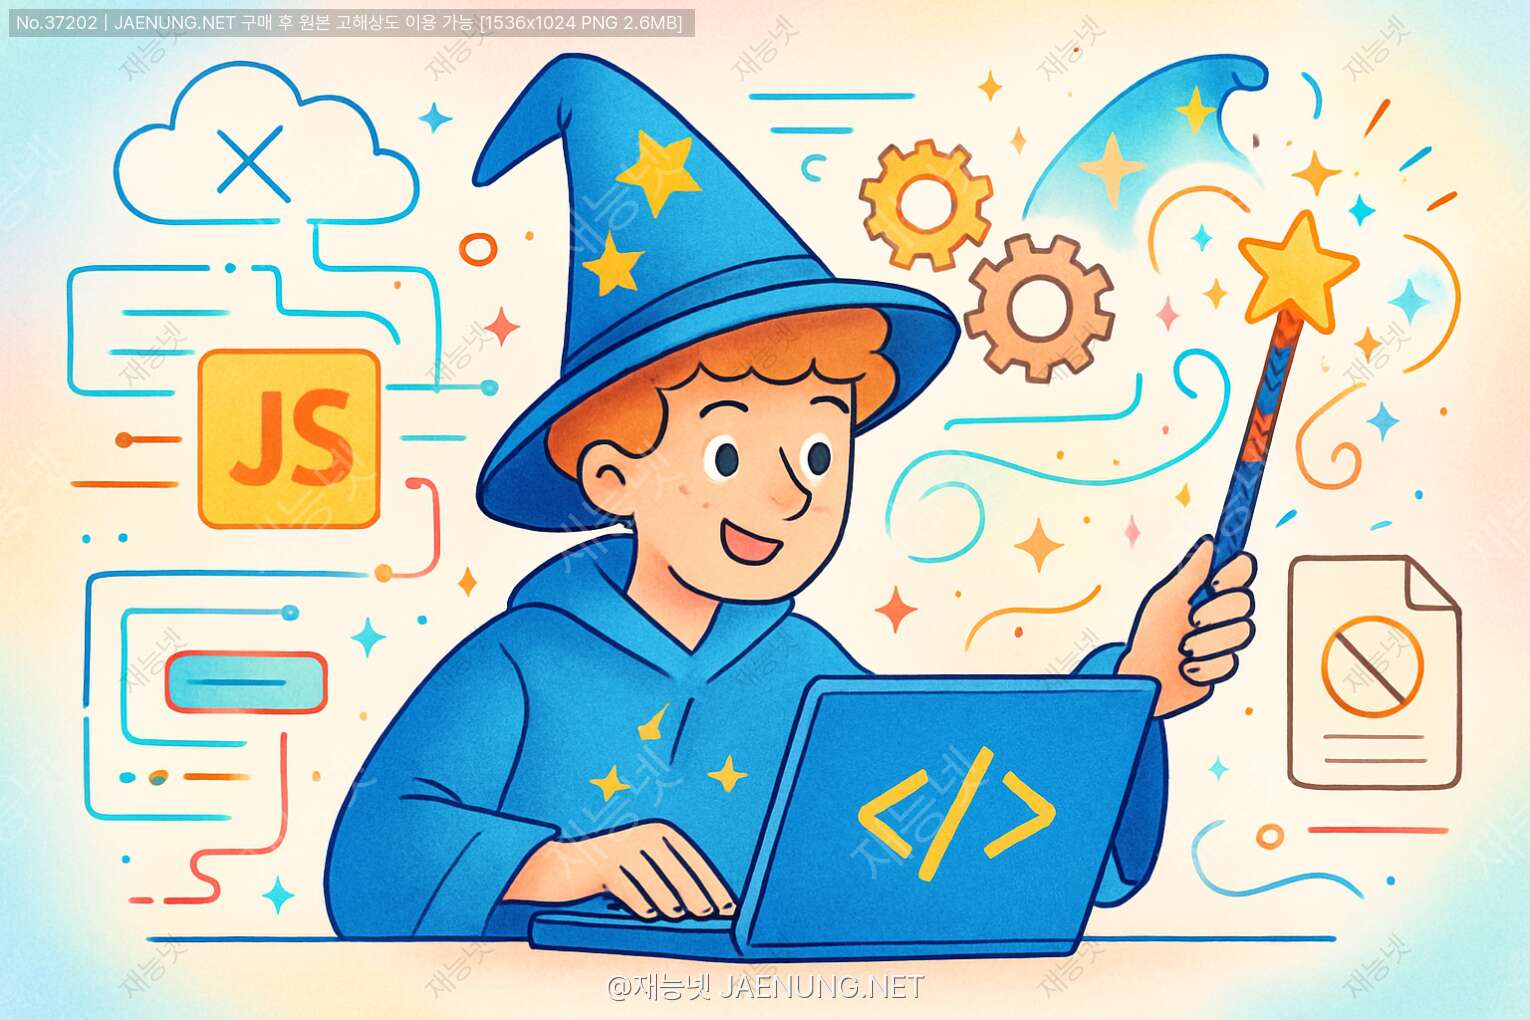
⚡ Service Worker로 만드는 오프라인 마법 ✨
안녕! 오늘은 정말 신나는 주제를 가지고 왔어. 🎉 바로 Service Worker와 오프라인 기능을 활용한 PWA(Progressive Web App) 개발이야. 혹시 지하철 타고 가다가 터널 들어가면 웹사이트가 안 열려서 답답했던 경험 있지? 아니면 비행기 모드에서 앱은 되는데 웹은 안 돼서 속상했던 적? 그런 문제들을 해결할 수 있는 게 바로 Service Worker란다! 😎
요즘은 웹과 앱의 경계가 점점 흐려지고 있어. 웹사이트인데 앱처럼 설치도 되고, 오프라인에서도 작동하고, 푸시 알림도 받을 수 있다니... 마법 같지 않아? 이 모든 걸 가능하게 해주는 핵심 기술이 바로 Service Worker야. 재능넷 같은 플랫폼에서도 이런 기술을 활용하면 사용자 경험을 엄청나게 향상시킬 수 있지! 🚀
🤔 Service Worker가 뭔데?
자, 일단 Service Worker가 뭔지부터 알아보자. 간단하게 말하면 브라우저와 네트워크 사이에서 작동하는 프록시 서버 같은 거야. 웹페이지와는 별개로 백그라운드에서 실행되는 JavaScript 파일이라고 생각하면 돼. 🎯
🎪 Service Worker의 특징
• 웹페이지와 별도의 스레드에서 실행돼
• DOM에 직접 접근할 수 없어
• 완전히 비동기적으로 작동해 (Promise 기반)
• HTTPS에서만 작동해 (보안상의 이유로)
• 네트워크 요청을 가로채서 제어할 수 있어
• 오프라인 상태에서도 작동 가능해
생각해봐. 일반적인 웹페이지는 네트워크가 끊기면 그냥 끝이잖아? 하얀 화면에 공룡 게임이나 나오고... 🦕 근데 Service Worker를 사용하면 미리 캐시해둔 리소스를 제공할 수 있어서 오프라인에서도 웹앱이 작동하는 거지!
💡 재미있는 비유
Service Worker를 집 앞 편의점 점원이라고 생각해봐. 너(웹페이지)가 "콜라 주세요!"라고 하면, 점원(Service Worker)이 먼저 냉장고(캐시)를 확인해. 있으면 바로 주고, 없으면 창고(네트워크)에서 가져와. 근데 창고 문이 잠겨있어도(오프라인) 냉장고에 있으면 줄 수 있는 거지! 🥤
🔄 Service Worker의 생명주기
Service Worker는 독특한 생명주기를 가지고 있어. 이걸 이해하는 게 정말 중요해! 마치 나비의 변태 과정처럼 여러 단계를 거치거든. 🦋
먼저 Service Worker를 등록해야 해. 이건 메인 JavaScript 파일에서 해주면 돼.
// main.js
if ('serviceWorker' in navigator) {
  window.addEventListener('load', () => {
    navigator.serviceWorker.register('/service-worker.js')
      .then(registration => {
        console.log('🎉 Service Worker 등록 성공!', registration.scope);
      })
      .catch(error => {
        console.log('😢 Service Worker 등록 실패:', error);
      });
  });
}
여기서 중요한 건 브라우저가 Service Worker를 지원하는지 먼저 확인한다는 거야. 'serviceWorker' in navigator로 체크하는 거지. 그리고 페이지가 완전히 로드된 후에 등록하는 게 좋아!
등록이 성공하면 브라우저가 Service Worker 파일을 다운로드하고 설치를 시도해. 이 단계에서 보통 필요한 리소스들을 캐시에 저장해두지.
// service-worker.js
const CACHE_NAME = 'my-pwa-cache-v1';
const urlsToCache = [
  '/',
  '/styles/main.css',
  '/scripts/main.js',
  '/images/logo.png'
];

self.addEventListener('install', event => {
  console.log('⚙️ Service Worker 설치 중...');

  event.waitUntil(
    caches.open(CACHE_NAME)
      .then(cache => {
        console.log('📦 캐시 오픈 완료!');
        return cache.addAll(urlsToCache);
      })
  );
});
여기서 event.waitUntil()이 중요해! 이건 브라우저에게 "야, 이 작업이 끝날 때까지 기다려!"라고 말하는 거야. 캐싱이 완료되기 전에 Service Worker가 종료되면 안 되니까! 🛑
설치가 완료되면 활성화 단계로 넘어가. 이 단계에서는 보통 오래된 캐시를 정리하는 작업을 해.
self.addEventListener('activate', event => {
  console.log('✅ Service Worker 활성화!');

  const cacheWhitelist = [CACHE_NAME];

  event.waitUntil(
    caches.keys().then(cacheNames => {
      return Promise.all(
        cacheNames.map(cacheName => {
          if (!cacheWhitelist.includes(cacheName)) {
            console.log('🗑️ 오래된 캐시 삭제:', cacheName);
            return caches.delete(cacheName);
          }
        })
      );
    })
  );
});
버전 관리가 중요한 이유가 여기 있어! CACHE_NAME에 버전을 붙여서 관리하면, 새 버전이 배포될 때 오래된 캐시를 깔끔하게 정리할 수 있거든. 🧹
⚠️ 주의사항
새로운 Service Worker가 설치되어도 기존 Service Worker가 제어하는 페이지가 모두 닫히기 전까지는 활성화되지 않아. 즉시 활성화하려면 self.skipWaiting()을 사용할 수 있지만, 조심해서 써야 해!
🎯 네트워크 요청 가로채기 (Fetch Event)
자, 이제 진짜 재미있는 부분이야! Service Worker의 가장 강력한 기능 중 하나가 바로 네트워크 요청을 가로채서 제어할 수 있다는 거야. 마치 중간에서 택배를 가로채는 것처럼! 📦
self.addEventListener('fetch', event => {
  event.respondWith(
    caches.match(event.request)
      .then(response => {
        // 캐시에 있으면 캐시에서 반환
        if (response) {
          console.log('💾 캐시에서 가져옴:', event.request.url);
          return response;
        }

        // 없으면 네트워크에서 가져옴
        console.log('🌐 네트워크에서 가져옴:', event.request.url);
        return fetch(event.request);
      })
  );
});
이 코드는 가장 기본적인 캐시 전략이야. "캐시 우선(Cache First)" 전략이라고 부르지. 캐시에 있으면 캐시에서 주고, 없으면 네트워크에서 가져오는 거야. 간단하지? 😊
근데 말이야, 상황에 따라 다른 전략이 필요할 수 있어. 몇 가지 대표적인 전략들을 알아보자!
| 전략 | 설명 | 적합한 경우 |
|---|---|---|
| Cache First | 캐시 우선, 없으면 네트워크 | 자주 바뀌지 않는 리소스 (이미지, CSS, JS) |
| Network First | 네트워크 우선, 실패하면 캐시 | 최신 데이터가 중요한 경우 (뉴스, SNS 피드) |
| Cache Only | 캐시에서만 가져옴 | 완전 오프라인 모드 |
| Network Only | 네트워크에서만 가져옴 | 캐싱하면 안 되는 민감한 데이터 |
| Stale While Revalidate | 캐시 반환 후 백그라운드에서 업데이트 | 빠른 응답과 최신 데이터 둘 다 중요한 경우 |
API 요청 같은 경우는 최신 데이터가 중요하잖아? 그럴 땐 Network First 전략을 써보자!
self.addEventListener('fetch', event => {
  // API 요청인 경우
  if (event.request.url.includes('/api/')) {
    event.respondWith(
      fetch(event.request)
        .then(response => {
          // 네트워크 응답을 캐시에 저장
          const responseClone = response.clone();
          caches.open(CACHE_NAME).then(cache => {
            cache.put(event.request, responseClone);
          });
          return response;
        })
        .catch(() => {
          // 네트워크 실패 시 캐시에서 가져옴
          return caches.match(event.request);
        })
    );
  } else {
    // 일반 리소스는 Cache First
    event.respondWith(
      caches.match(event.request)
        .then(response => response || fetch(event.request))
    );
  }
});
이렇게 하면 API는 항상 최신 데이터를 가져오려고 시도하고, 네트워크가 안 되면 캐시된 데이터를 보여줘. 오프라인에서도 뭔가 보여줄 수 있다는 게 엄청난 장점이지! 🎊
이건 정말 똑똑한 전략이야. 캐시된 데이터를 즉시 보여주면서, 동시에 백그라운드에서 새 데이터를 가져와서 캐시를 업데이트하는 거야!
self.addEventListener('fetch', event => {
  event.respondWith(
    caches.open(CACHE_NAME).then(cache => {
      return cache.match(event.request).then(cachedResponse => {
        const fetchPromise = fetch(event.request).then(networkResponse => {
          // 백그라운드에서 캐시 업데이트
          cache.put(event.request, networkResponse.clone());
          return networkResponse;
        });

        // 캐시가 있으면 즉시 반환, 동시에 업데이트
        return cachedResponse || fetchPromise;
      });
    })
  );
});
이 방식은 속도와 최신성을 동시에 잡을 수 있어서 많이 사용돼. 사용자는 빠른 응답을 받고, 다음번엔 업데이트된 데이터를 보게 되는 거지! 🚀
💾 캐시 관리 전략
캐시를 잘 관리하는 것도 정말 중요해. 무작정 다 캐시하면 용량도 문제고, 오래된 데이터만 보여줄 수도 있거든. 똑똑하게 관리해보자! 🧠
캐시가 너무 커지지 않도록 제한을 두는 게 좋아. 오래된 항목부터 삭제하는 방식으로 구현할 수 있어.
const MAX_CACHE_SIZE = 50; // 최대 50개 항목

function trimCache(cacheName, maxItems) {
  caches.open(cacheName).then(cache => {
    cache.keys().then(keys => {
      if (keys.length > maxItems) {
        // 가장 오래된 항목 삭제
        cache.delete(keys[0]).then(() => {
          trimCache(cacheName, maxItems);
        });
      }
    });
  });
}

// fetch 이벤트에서 캐시 추가 후 호출
self.addEventListener('fetch', event => {
  event.respondWith(
    caches.open(CACHE_NAME).then(cache => {
      return fetch(event.request).then(response => {
        cache.put(event.request, response.clone());
        trimCache(CACHE_NAME, MAX_CACHE_SIZE); // 크기 체크
        return response;
      });
    })
  );
});캐시에 타임스탬프를 저장해서 오래된 캐시는 자동으로 삭제되게 할 수도 있어.
const CACHE_DURATION = 7 * 24 * 60 * 60 * 1000; // 7일

function isCacheExpired(cachedResponse) {
  const cachedDate = new Date(cachedResponse.headers.get('sw-cache-date'));
  const now = new Date();
  return (now - cachedDate) > CACHE_DURATION;
}

self.addEventListener('fetch', event => {
  event.respondWith(
    caches.match(event.request).then(cachedResponse => {
      if (cachedResponse) {
        if (!isCacheExpired(cachedResponse)) {
          return cachedResponse;
        }
        // 만료된 캐시 삭제
        caches.delete(event.request);
      }

      return fetch(event.request).then(response => {
        const responseToCache = response.clone();
        const headers = new Headers(responseToCache.headers);
        headers.append('sw-cache-date', new Date().toISOString());

        const modifiedResponse = new Response(responseToCache.body, {
          status: responseToCache.status,
          statusText: responseToCache.statusText,
          headers: headers
        });

        caches.open(CACHE_NAME).then(cache => {
          cache.put(event.request, modifiedResponse);
        });

        return response;
      });
    })
  );
});
이렇게 하면 오래된 데이터가 계속 남아있는 걸 방지할 수 있어! 🎯
🎨 오프라인 페이지 만들기
네트워크가 완전히 끊겼을 때 사용자에게 뭔가 보여주는 게 좋겠지? 예쁜 오프라인 페이지를 만들어보자! 🌟
// service-worker.js
const OFFLINE_PAGE = '/offline.html';

// 설치 시 오프라인 페이지 캐시
self.addEventListener('install', event => {
  event.waitUntil(
    caches.open(CACHE_NAME).then(cache => {
      return cache.addAll([
        OFFLINE_PAGE,
        '/styles/offline.css',
        '/images/offline-dino.svg'
      ]);
    })
  );
});

// fetch 이벤트에서 오프라인 처리
self.addEventListener('fetch', event => {
  // HTML 페이지 요청인 경우만
  if (event.request.mode === 'navigate') {
    event.respondWith(
      fetch(event.request)
        .catch(() => {
          // 네트워크 실패 시 오프라인 페이지 반환
          return caches.match(OFFLINE_PAGE);
        })
    );
  } else {
    // 다른 리소스는 일반 캐시 전략
    event.respondWith(
      caches.match(event.request)
        .then(response => response || fetch(event.request))
    );
  }
});
그리고 offline.html 파일을 만들어서 재미있게 꾸며보자!
<!-- offline.html -->
<section style="text-align:center;padding:50px;">
  <h1>🦖 오프라인 모드</h1>
  <p>인터넷 연결이 끊어졌어요!</p>
  <p>하지만 걱정 마세요. 연결이 복구되면 자동으로 다시 시도할게요.</p>
  <button onclick="location.reload()">🔄 다시 시도</button>
</section>
이렇게 하면 사용자가 오프라인 상태에서도 당황하지 않고, 뭔가 안내를 받을 수 있어! 사용자 경험이 훨씬 좋아지지? 😊
🔔 백그라운드 동기화 (Background Sync)
이건 정말 멋진 기능이야! 사용자가 오프라인 상태에서 어떤 작업을 하면, 나중에 온라인이 되었을 때 자동으로 그 작업을 수행하는 거야. 예를 들어 메시지를 보내려고 했는데 오프라인이면, 나중에 자동으로 전송되는 거지! 📨
// main.js - 백그라운드 동기화 등록
function sendMessage(message) {
  // 먼저 IndexedDB에 저장
  saveToIndexedDB(message);

  // 백그라운드 동기화 등록
  if ('serviceWorker' in navigator && 'sync' in registration) {
    navigator.serviceWorker.ready.then(registration => {
      return registration.sync.register('send-messages');
    });
  } else {
    // 지원하지 않으면 바로 전송 시도
    sendMessageToServer(message);
  }
}

// service-worker.js - 동기화 이벤트 처리
self.addEventListener('sync', event => {
  if (event.tag === 'send-messages') {
    event.waitUntil(
      getMessagesFromIndexedDB().then(messages => {
        return Promise.all(
          messages.map(message => {
            return fetch('/api/messages', {
              method: 'POST',
              body: JSON.stringify(message),
              headers: {
                'Content-Type': 'application/json'
              }
            }).then(response => {
              if (response.ok) {
                // 성공하면 IndexedDB에서 삭제
                deleteFromIndexedDB(message.id);
              }
            });
          })
        );
      })
    );
  }
});
이 기능을 사용하면 재능넷 같은 플랫폼에서 사용자가 오프라인 상태에서도 재능 등록이나 메시지 작성을 할 수 있고, 나중에 자동으로 서버에 전송되는 거야! 정말 편리하지? 🎉
💡 실용적인 활용 예시
• 채팅 메시지 전송
• 폼 제출
• 좋아요/북마크 같은 간단한 액션
• 사진/파일 업로드
• 분석 데이터 전송
🔄 Service Worker 업데이트 전략
Service Worker를 업데이트하는 것도 신경 써야 할 부분이야. 잘못하면 사용자가 계속 오래된 버전을 사용하게 될 수 있거든! 😰
// service-worker.js
const VERSION = 'v2.0.0';
const CACHE_NAME = `pwa-cache-${VERSION}`;

self.addEventListener('install', event => {
  // 새 버전 즉시 활성화
  self.skipWaiting();

  event.waitUntil(
    caches.open(CACHE_NAME).then(cache => {
      return cache.addAll(urlsToCache);
    })
  );
});

self.addEventListener('activate', event => {
  // 모든 클라이언트 즉시 제어
  event.waitUntil(
    clients.claim().then(() => {
      // 오래된 캐시 삭제
      return caches.keys().then(cacheNames => {
        return Promise.all(
          cacheNames.map(cacheName => {
            if (cacheName !== CACHE_NAME) {
              console.log('🗑️ 오래된 캐시 삭제:', cacheName);
              return caches.delete(cacheName);
            }
          })
        );
      });
    })
  );
});새 버전이 있을 때 사용자에게 알려주고 새로고침을 유도하는 게 좋아!
// main.js
let refreshing = false;

navigator.serviceWorker.addEventListener('controllerchange', () => {
  if (refreshing) return;
  refreshing = true;
  window.location.reload();
});

navigator.serviceWorker.register('/service-worker.js')
  .then(registration => {
    registration.addEventListener('updatefound', () => {
      const newWorker = registration.installing;

      newWorker.addEventListener('statechange', () => {
        if (newWorker.state === 'installed' && navigator.serviceWorker.controller) {
          // 새 버전 사용 가능!
          showUpdateNotification();
        }
      });
    });
  });

function showUpdateNotification() {
  const notification = document.createElement('div');
  notification.innerHTML = `
    <div style="position:fixed;bottom:20px;left:50%;transform:translateX(-50%);
                background:#667eea;color:white;padding:15px 30px;border-radius:10px;
                box-shadow:0 5px 20px rgba(0,0,0,0.3);z-index:9999;">
      <p>🎉 새로운 버전이 있어요!</p>
      <button onclick="updateServiceWorker()"
              style="background:white;color:#667eea;border:none;padding:8px 20px;
                     border-radius:5px;cursor:pointer;font-weight:bold;">
        업데이트
      </button>
    </div>
  `;
  document.body.appendChild(notification);
}

function updateServiceWorker() {
  navigator.serviceWorker.getRegistration().then(registration => {
    if (registration && registration.waiting) {
      registration.waiting.postMessage({ type: 'SKIP_WAITING' });
    }
  });
}
그리고 Service Worker에서 메시지를 받아서 처리해줘야 해!
// service-worker.js
self.addEventListener('message', event => {
  if (event.data && event.data.type === 'SKIP_WAITING') {
    self.skipWaiting();
  }
});
이렇게 하면 사용자가 직접 업데이트를 선택할 수 있어서 더 좋은 경험을 제공할 수 있어! 🌟
🎯 PWA 매니페스트 파일 만들기
Service Worker만으로는 완전한 PWA가 아니야. manifest.json 파일도 필요해! 이 파일이 있어야 홈 화면에 추가하고 앱처럼 실행할 수 있거든. 📱
{
  "name": "나의 멋진 PWA",
  "short_name": "멋진PWA",
  "description": "Service Worker로 만든 오프라인 지원 웹앱",
  "start_url": "/",
  "display": "standalone",
  "background_color": "#ffffff",
  "theme_color": "#667eea",
  "orientation": "portrait-primary",
  "icons": [
    {
      "src": "/images/icon-72x72.png",
      "sizes": "72x72",
      "type": "image/png"
    },
    {
      "src": "/images/icon-96x96.png",
      "sizes": "96x96",
      "type": "image/png"
    },
    {
      "src": "/images/icon-128x128.png",
      "sizes": "128x128",
      "type": "image/png"
    },
    {
      "src": "/images/icon-144x144.png",
      "sizes": "144x144",
      "type": "image/png"
    },
    {
      "src": "/images/icon-152x152.png",
      "sizes": "152x152",
      "type": "image/png"
    },
    {
      "src": "/images/icon-192x192.png",
      "sizes": "192x192",
      "type": "image/png"
    },
    {
      "src": "/images/icon-384x384.png",
      "sizes": "384x384",
      "type": "image/png"
    },
    {
      "src": "/images/icon-512x512.png",
      "sizes": "512x512",
      "type": "image/png"
    }
  ]
}
그리고 HTML에서 이 파일을 연결해줘야 해!
<!-- index.html -->
<link rel="manifest" href="/manifest.json">
<meta name="theme-color" content="#667eea">

<!-- iOS 지원 -->
<meta name="apple-mobile-web-app-capable" content="yes">
<meta name="apple-mobile-web-app-status-bar-style" content="black-translucent">
<meta name="apple-mobile-web-app-title" content="멋진PWA">
<link rel="apple-touch-icon" href="/images/icon-152x152.png">
🎨 매니페스트 주요 속성 설명
display: 앱 실행 모드
• standalone: 브라우저 UI 없이 앱처럼
• fullscreen: 전체 화면
• minimal-ui: 최소한의 브라우저 UI
• browser: 일반 브라우저 탭
orientation: 화면 방향
• portrait: 세로 고정
• landscape: 가로 고정
• any: 자동 회전
🚀 실전 예제: 완전한 PWA 만들기
자, 이제 배운 걸 다 합쳐서 완전한 PWA를 만들어보자! 간단한 할 일 관리 앱을 예로 들어볼게. ✅
my-pwa/
├── index.html
├── manifest.json
├── service-worker.js
├── app.js
├── styles/
│   └── main.css
├── scripts/
│   ├── db.js
│   └── ui.js
└── images/
└── icons/<!DOCTYPE html>
<html lang="ko">
<head>
<meta charset="UTF-8">
<meta name="viewport" content="width=device-width, initial-scale=1.0">
<title>할 일 관리 PWA</title>
<link rel="manifest" href="/manifest.json">
<meta name="theme-color" content="#667eea">
<link rel="stylesheet" href="/styles/main.css">
</head>
<body>
<div class="app-container">
<header>
<h1>📝 할 일 관리</h1>
<div class="status">
<span id="online-status">🟢 온라인</span>
</div>
</header>
<main>
<form id="todo-form">
<input type="text" id="todo-input" placeholder="할 일을 입력하세요..." required>
<button type="submit">추가</button>
</form>
<div id="todo-list"></div>
</main>
</div>
<script src="/scripts/db.js"></script>
<script src="/scripts/ui.js"></script>
<script src="/app.js"></script>
</body>
</html>const VERSION = 'v1.0.0';
const CACHE_NAME = `todo-pwa-${VERSION}`;
const OFFLINE_PAGE = '/offline.html';
const STATIC_ASSETS = [
'/',
'/index.html',
'/offline.html',
'/styles/main.css',
'/scripts/db.js',
'/scripts/ui.js',
'/app.js',
'/manifest.json'
];
// 설치
self.addEventListener('install', event => {
console.log('⚙️ Service Worker 설치 중...');
self.skipWaiting();
event.waitUntil(
caches.open(CACHE_NAME).then(cache => {
console.log('📦 정적 리소스 캐싱...');
return cache.addAll(STATIC_ASSETS);
})
);
});
// 활성화
self.addEventListener('activate', event => {
console.log('✅ Service Worker 활성화!');
event.waitUntil(
clients.claim().then(() => {
return caches.keys().then(cacheNames => {
return Promise.all(
cacheNames.map(cacheName => {
if (cacheName !== CACHE_NAME) {
console.log('🗑️ 오래된 캐시 삭제:', cacheName);
return caches.delete(cacheName);
}
})
);
});
})
);
});
// Fetch 처리
self.addEventListener('fetch', event => {
const { request } = event;
const url = new URL(request.url);
// HTML 페이지 요청
if (request.mode === 'navigate') {
event.respondWith(
fetch(request)
.catch(() => caches.match(OFFLINE_PAGE))
);
return;
}
// API 요청 (Network First)
if (url.pathname.startsWith('/api/')) {
event.respondWith(
fetch(request)
.then(response => {
const responseClone = response.clone();
caches.open(CACHE_NAME).then(cache => {
cache.put(request, responseClone);
});
return response;
})
.catch(() => caches.match(request))
);
return;
}
// 정적 리소스 (Cache First)
event.respondWith(
caches.match(request)
.then(cachedResponse => {
if (cachedResponse) {
return cachedResponse;
}
return fetch(request).then(response => {
// 성공적인 응답만 캐시
if (response.status === 200) {
const responseClone = response.clone();
caches.open(CACHE_NAME).then(cache => {
cache.put(request, responseClone);
});
}
return response;
});
})
);
});
// 백그라운드 동기화
self.addEventListener('sync', event => {
if (event.tag === 'sync-todos') {
event.waitUntil(syncTodos());
}
});
async function syncTodos() {
// IndexedDB에서 동기화 대기 중인 항목 가져오기
const pendingTodos = await getPendingTodos();
for (const todo of pendingTodos) {
try {
const response = await fetch('/api/todos', {
method: 'POST',
headers: { 'Content-Type': 'application/json' },
body: JSON.stringify(todo)
});
if (response.ok) {
await markTodoAsSynced(todo.id);
}
} catch (error) {
console.error('동기화 실패:', error);
}
}
}
// 메시지 처리
self.addEventListener('message', event => {
if (event.data && event.data.type === 'SKIP_WAITING') {
self.skipWaiting();
}
});class TodoDB {
constructor() {
this.dbName = 'TodoPWA';
this.version = 1;
this.db = null;
}
async init() {
return new Promise((resolve, reject) => {
const request = indexedDB.open(this.dbName, this.version);
request.onerror = () => reject(request.error);
request.onsuccess = () => {
this.db = request.result;
resolve(this.db);
};
request.onupgradeneeded = (event) => {
const db = event.target.result;
if (!db.objectStoreNames.contains('todos')) {
const objectStore = db.createObjectStore('todos', {
keyPath: 'id',
autoIncrement: true
});
objectStore.createIndex('synced', 'synced', { unique: false });
objectStore.createIndex('createdAt', 'createdAt', { unique: false });
}
};
});
}
async addTodo(text) {
const transaction = this.db.transaction(['todos'], 'readwrite');
const store = transaction.objectStore('todos');
const todo = {
text,
completed: false,
synced: false,
createdAt: new Date().toISOString()
};
return new Promise((resolve, reject) => {
const request = store.add(todo);
request.onsuccess = () => resolve(request.result);
request.onerror = () => reject(request.error);
});
}
async getAllTodos() {
const transaction = this.db.transaction(['todos'], 'readonly');
const store = transaction.objectStore('todos');
return new Promise((resolve, reject) => {
const request = store.getAll();
request.onsuccess = () => resolve(request.result);
request.onerror = () => reject(request.error);
});
}
async updateTodo(id, updates) {
const transaction = this.db.transaction(['todos'], 'readwrite');
const store = transaction.objectStore('todos');
return new Promise((resolve, reject) => {
const getRequest = store.get(id);
getRequest.onsuccess = () => {
const todo = getRequest.result;
Object.assign(todo, updates);
const updateRequest = store.put(todo);
updateRequest.onsuccess = () => resolve(updateRequest.result);
updateRequest.onerror = () => reject(updateRequest.error);
};
getRequest.onerror = () => reject(getRequest.error);
});
}
async deleteTodo(id) {
const transaction = this.db.transaction(['todos'], 'readwrite');
const store = transaction.objectStore('todos');
return new Promise((resolve, reject) => {
const request = store.delete(id);
request.onsuccess = () => resolve();
request.onerror = () => reject(request.error);
});
}
}
const todoDB = new TodoDB();// Service Worker 등록
if ('serviceWorker' in navigator) {
window.addEventListener('load', async () => {
try {
const registration = await navigator.serviceWorker.register('/service-worker.js');
console.log('🎉 Service Worker 등록 성공!', registration.scope);
// 업데이트 확인
registration.addEventListener('updatefound', () => {
const newWorker = registration.installing;
newWorker.addEventListener('statechange', () => {
if (newWorker.state === 'installed' && navigator.serviceWorker.controller) {
showUpdateNotification();
}
});
});
} catch (error) {
console.error('😢 Service Worker 등록 실패:', error);
}
});
}
// 온라인/오프라인 상태 감지
window.addEventListener('online', () => {
updateOnlineStatus(true);
syncPendingTodos();
});
window.addEventListener('offline', () => {
updateOnlineStatus(false);
});
function updateOnlineStatus(isOnline) {
const statusElement = document.getElementById('online-status');
if (isOnline) {
statusElement.textContent = '🟢 온라인';
statusElement.style.color = '#00b894';
} else {
statusElement.textContent = '🔴 오프라인';
statusElement.style.color = '#d63031';
}
}
// 앱 초기화
async function initApp() {
await todoDB.init();
await renderTodos();
// 폼 제출 처리
document.getElementById('todo-form').addEventListener('submit', async (e) => {
e.preventDefault();
const input = document.getElementById('todo-input');
const text = input.value.trim();
if (text) {
await todoDB.addTodo(text);
input.value = '';
await renderTodos();
// 백그라운드 동기화 등록
if ('serviceWorker' in navigator && 'sync' in ServiceWorkerRegistration.prototype) {
const registration = await navigator.serviceWorker.ready;
await registration.sync.register('sync-todos');
}
}
});
// 초기 상태 설정
updateOnlineStatus(navigator.onLine);
}
async function renderTodos() {
const todos = await todoDB.getAllTodos();
const listElement = document.getElementById('todo-list');
if (todos.length === 0) {
listElement.innerHTML = '<p class="empty-state">할 일이 없어요! 🎉</p>';
return;
}
listElement.innerHTML = todos.map(todo => `
<div class="todo-item ${todo.completed ? 'completed' : ''}">
<input type="checkbox"
${todo.completed ? 'checked' : ''}
onchange="toggleTodo(${todo.id})">
<span>${todo.text}</span>
<button onclick="deleteTodo(${todo.id})">🗑️</button>
</div>
`).join('');
}
async function toggleTodo(id) {
const todos = await todoDB.getAllTodos();
const todo = todos.find(t => t.id === id);
await todoDB.updateTodo(id, { completed: !todo.completed });
await renderTodos();
}
async function deleteTodo(id) {
await todoDB.deleteTodo(id);
await renderTodos();
}
async function syncPendingTodos() {
if ('serviceWorker' in navigator && 'sync' in ServiceWorkerRegistration.prototype) {
const registration = await navigator.serviceWorker.ready;
await registration.sync.register('sync-todos');
}
}
function showUpdateNotification() {
const notification = document.createElement('div');
notification.className = 'update-notification';
notification.innerHTML = `
<p>🎉 새로운 버전이 있어요!</p>
<button onclick="updateApp()">업데이트</button>
`;
document.body.appendChild(notification);
}
async function updateApp() {
const registration = await navigator.serviceWorker.getRegistration();
if (registration && registration.waiting) {
registration.waiting.postMessage({ type: 'SKIP_WAITING' });
}
}
// 앱 시작
initApp();와! 이렇게 하면 완전히 작동하는 오프라인 지원 PWA가 완성돼! 🎊 네트워크가 끊겨도 할 일을 추가하고 관리할 수 있고, 나중에 온라인이 되면 자동으로 서버와 동기화되는 거야!
🔍 디버깅과 테스트
Service Worker를 개발하다 보면 디버깅이 정말 중요해. 일반 JavaScript와는 좀 다르게 작동하니까 말이야! 🐛
Chrome 개발자 도구에는 Service Worker 전용 패널이 있어!
📍 Application 탭에서 확인할 수 있는 것들
• Service Workers: 등록된 Service Worker 상태 확인
• Cache Storage: 캐시된 리소스 확인 및 삭제
• Clear storage: 모든 데이터 한 번에 삭제
• Offline 체크박스: 오프라인 모드 시뮬레이션
// Service Worker에서 디버깅 로그 남기기
self.addEventListener('fetch', event => {
  console.log('🌐 Fetch:', event.request.url);
  console.log('📝 Method:', event.request.method);
  console.log('🎯 Mode:', event.request.mode);

  // 캐시 히트/미스 확인
  event.respondWith(
    caches.match(event.request).then(response => {
      if (response) {
        console.log('✅ 캐시 히트:', event.request.url);
      } else {
        console.log('❌ 캐시 미스:', event.request.url);
      }
      return response || fetch(event.request);
    })
  );
});
⚠️ 주의할 점
• Service Worker는 HTTPS에서만 작동해 (localhost는 예외)
• 캐시가 남아있으면 변경사항이 반영 안 될 수 있어
• "Update on reload" 옵션을 켜두면 개발이 편해
• 프라이빗 브라우징 모드에서는 제한적으로 작동할 수 있어
⚡ 성능 최적화 팁
PWA를 만들었다고 끝이 아니야! 성능 최적화도 중요하지. 사용자들이 빠르고 쾌적하게 사용할 수 있도록 해보자! 🚀
모든 걸 다 캐시하면 용량도 문제고 관리도 힘들어. 꼭 필요한 것만 캐시하자!
// 캐시할 파일 타입 필터링
self.addEventListener('fetch', event => {
  const url = new URL(event.request.url);

  // 이미지, CSS, JS만 캐시
  const shouldCache = /\.(png|jpg|jpeg|svg|gif|css|js)$/.test(url.pathname);

  if (shouldCache) {
    event.respondWith(
      caches.match(event.request)
        .then(response => response || fetch(event.request))
    );
  }
});앱 쉘(App Shell)은 설치 시 프리캐싱하고, 나머지는 사용하면서 캐시하는 게 효율적이야!
// 앱 쉘만 프리캐싱
const APP_SHELL = [
  '/',
  '/index.html',
  '/styles/critical.css',
  '/scripts/app.js'
];

self.addEventListener('install', event => {
  event.waitUntil(
    caches.open('app-shell-v1').then(cache => {
      return cache.addAll(APP_SHELL);
    })
  );
});

// 나머지는 런타임에 캐싱
self.addEventListener('fetch', event => {
  event.respondWith(
    caches.match(event.request).then(response => {
      if (response) return response;

      return fetch(event.request).then(response => {
        // 성공적인 응답만 캐시
        if (response.status === 200) {
          const responseClone = response.clone();
          caches.open('runtime-cache-v1').then(cache => {
            cache.put(event.request, responseClone);
          });
        }
        return response;
      });
    })
  );
});이미지가 용량의 대부분을 차지하니까 최적화가 정말 중요해!
🖼️ 이미지 최적화 전략
• WebP 포맷 사용 (fallback으로 JPEG/PNG)
• 적절한 크기로 리사이징
• Lazy Loading 적용
• 썸네일은 별도로 캐시
• 압축 품질 조절 (80-85% 권장)
네트워크 응답이 너무 느리면 캐시를 사용하는 게 나을 수 있어!
function fetchWithTimeout(request, timeout = 3000) {
  return Promise.race([
    fetch(request),
    new Promise((_, reject) =>
      setTimeout(() => reject(new Error('timeout')), timeout)
    )
  ]);
}

self.addEventListener('fetch', event => {
  event.respondWith(
    fetchWithTimeout(event.request, 3000)
      .catch(() => caches.match(event.request))
  );
});
🎓 실무에서 자주 마주치는 문제들
실제로 PWA를 개발하다 보면 여러 가지 문제를 만나게 돼. 미리 알아두면 삽질을 줄일 수 있지! 😅
이건 정말 자주 겪는 문제야. Service Worker 파일이 바뀌어도 브라우저가 인식을 못 하는 경우가 있어.
✅ 해결 방법
1. Service Worker 파일에 캐시 헤더 설정
- Cache-Control: max-age=0
2. 버전 번호를 파일 내용에 포함
3. 개발 중에는 "Update on reload" 옵션 활성화
4. skipWaiting()과 clients.claim() 적절히 사용
외부 리소스를 캐시하려고 할 때 CORS 문제가 발생할 수 있어.
// CORS 모드로 fetch
self.addEventListener('fetch', event => {
  if (event.request.url.includes('external-api.com')) {
    event.respondWith(
      fetch(event.request, {
        mode: 'cors',
        credentials: 'omit'
      }).then(response => {
        // opaque 응답은 캐시하지 않음
        if (response.type === 'opaque') {
          return response;
        }

        const responseClone = response.clone();
        caches.open(CACHE_NAME).then(cache => {
          cache.put(event.request, responseClone);
        });
        return response;
      })
    );
  }
});IndexedDB API가 좀 복잡하긴 해. 그래서 라이브러리를 사용하는 것도 좋은 방법이야!
📚 추천 라이브러리
• Dexie.js: IndexedDB를 쉽게 사용할 수 있게 해주는 라이브러리
• localForage: localStorage 같은 API로 IndexedDB 사용
• idb: Promise 기반의 가벼운 래퍼
// Dexie.js 예제
import Dexie from 'dexie';

const db = new Dexie('TodoDatabase');
db.version(1).stores({
  todos: '++id, text, completed, createdAt'
});

// 사용하기 쉬워!
await db.todos.add({ text: '할 일', completed: false });
const allTodos = await db.todos.toArray();
await db.todos.where('completed').equals(false).delete();아... iOS Safari는 PWA 지원이 좀 제한적이야. 😢
⚠️ iOS Safari 제약사항
• 홈 화면에 추가해야만 Service Worker가 제대로 작동
• 푸시 알림 미지원 (iOS 16.4부터 일부 지원)
• Background Sync 미지원
• 캐시 용량 제한이 더 엄격함
• 설치 프롬프트가 자동으로 안 뜸
그래도 기본적인 오프라인 기능은 작동하니까, iOS 사용자를 위한 별도 안내를 제공하는 게 좋아!
🌟 고급 기능들
기본을 넘어서 더 멋진 기능들도 구현할 수 있어! 하나씩 알아보자. ✨
사용자에게 알림을 보낼 수 있어! 앱을 안 켜놔도 말이야. 🔔
// 푸시 알림 권한 요청
async function requestNotificationPermission() {
  const permission = await Notification.requestPermission();

  if (permission === 'granted') {
    console.log('✅ 알림 권한 획득!');
    await subscribeToPush();
  }
}

// 푸시 구독
async function subscribeToPush() {
  const registration = await navigator.serviceWorker.ready;

  const subscription = await registration.pushManager.subscribe({
    userVisibleOnly: true,
    applicationServerKey: urlBase64ToUint8Array(PUBLIC_VAPID_KEY)
  });

  // 서버에 구독 정보 전송
  await fetch('/api/push-subscribe', {
    method: 'POST',
    headers: { 'Content-Type': 'application/json' },
    body: JSON.stringify(subscription)
  });
}

// Service Worker에서 푸시 수신
self.addEventListener('push', event => {
  const data = event.data.json();

  const options = {
    body: data.body,
    icon: '/images/icon-192x192.png',
    badge: '/images/badge-72x72.png',
    vibrate: [200, 100, 200],
    data: {
      url: data.url
    },
    actions: [
      { action: 'open', title: '열기' },
      { action: 'close', title: '닫기' }
    ]
  };

  event.waitUntil(
    self.registration.showNotification(data.title, options)
  );
});

// 알림 클릭 처리
self.addEventListener('notificationclick', event => {
  event.notification.close();

  if (event.action === 'open') {
    event.waitUntil(
      clients.openWindow(event.notification.data.url)
    );
  }
});사용자에게 앱 설치를 유도할 수 있어!
let deferredPrompt;

window.addEventListener('beforeinstallprompt', (e) => {
  // 기본 프롬프트 막기
  e.preventDefault();
  deferredPrompt = e;

  // 커스텀 설치 버튼 보여주기
  showInstallButton();
});

function showInstallButton() {
  const installButton = document.getElementById('install-button');
  installButton.style.display = 'block';

  installButton.addEventListener('click', async () => {
    if (deferredPrompt) {
      deferredPrompt.prompt();

      const { outcome } = await deferredPrompt.userChoice;
      console.log(`사용자 선택: ${outcome}`);

      deferredPrompt = null;
      installButton.style.display = 'none';
    }
  });
}

// 설치 완료 이벤트
window.addEventListener('appinstalled', () => {
  console.log('🎉 PWA 설치 완료!');
  deferredPrompt = null;
});앱이 닫혀있어도 주기적으로 데이터를 동기화할 수 있어! (Chrome 80+)
// 주기적 동기화 등록
async function registerPeriodicSync() {
  const registration = await navigator.serviceWorker.ready;

  try {
    await registration.periodicSync.register('sync-content', {
      minInterval: 24 * 60 * 60 * 1000 // 24시간
    });
    console.log('✅ 주기적 동기화 등록 완료!');
  } catch (error) {
    console.error('❌ 주기적 동기화 등록 실패:', error);
  }
}

// Service Worker에서 처리
self.addEventListener('periodicsync', event => {
  if (event.tag === 'sync-content') {
    event.waitUntil(syncContent());
  }
});

async function syncContent() {
  try {
    const response = await fetch('/api/latest-content');
    const data = await response.json();

    // 캐시 업데이트
    const cache = await caches.open('content-cache');
    await cache.put('/api/latest-content', new Response(JSON.stringify(data)));

    console.log('✅ 콘텐츠 동기화 완료!');
  } catch (error) {
    console.error('❌ 동기화 실패:', error);
  }
}
🎯 실전 팁과 베스트 프랙티스
마지막으로 실전에서 유용한 팁들을 정리해볼게! 이것만 알아도 훨씬 수월하게 개발할 수 있을 거야. 💪
💡 베스트 프랙티스 체크리스트
✅ HTTPS 사용 (필수!)
✅ 앱 쉘 아키텍처 적용
✅ 적절한 캐싱 전략 선택
✅ 오프라인 페이지 제공
✅ 로딩 상태 표시
✅ 에러 처리 철저히
✅ 버전 관리 체계 확립
✅ 성능 모니터링
✅ 크로스 브라우저 테스트
✅ 접근성 고려
1. 로딩 스켈레톤 사용 데이터를 불러오는 동안 스켈레톤 UI를 보여주면 체감 속도가 빨라져!
2. 낙관적 UI 업데이트
서버 응답을 기다리지 말고 먼저 UI를 업데이트해. 실패하면 롤백하면 돼!
3. 오프라인 표시기
사용자가 오프라인 상태인지 명확하게 알려줘야 해.
4. 동기화 상태 표시
백그라운드에서 동기화 중이면 표시해주는 게 좋아.
⚠️ 보안 체크리스트
• 민감한 데이터는 캐시하지 말 것
• 인증 토큰은 안전하게 저장
• HTTPS 필수 사용
• Content Security Policy 설정
• XSS 공격 방어
• 사용자 입력 검증
Lighthouse를 사용하면 PWA 품질을 쉽게 측정할 수 있어!
// Chrome DevTools에서
// 1. F12 눌러서 개발자 도구 열기
// 2. Lighthouse 탭 선택
// 3. Progressive Web App 체크
// 4. Generate report 클릭

// 또는 CLI로
npm install -g lighthouse
lighthouse https://your-pwa-url.com --view
Lighthouse는 PWA 요구사항을 체크하고 점수를 매겨줘. 90점 이상이면 훌륭한 PWA라고 볼 수 있지! 🏆
🚀 배포와 운영
개발이 끝났다면 이제 배포할 차례야! 몇 가지 주의할 점들을 알아보자. 🌐
✅ 필수 확인 사항
1. HTTPS 설정
- Let's Encrypt로 무료 SSL 인증서 발급
- Cloudflare 같은 CDN 활용
2. manifest.json 검증
- 모든 아이콘 크기 준비
- start_url 정확히 설정
- theme_color, background_color 설정
3. Service Worker 경로
- 루트 경로에 배치 권장
- scope 설정 확인
4. 캐시 버전 관리
- 배포할 때마다 버전 업데이트
- 오래된 캐시 정리 로직 확인
// GitHub Actions 예제 (.github/workflows/deploy.yml)
name: Deploy PWA

on:
  push:
    branches: [ main ]

jobs:
  deploy:
    runs-on: ubuntu-latest

    steps:
    - uses: actions/checkout@v2

    - name: Setup Node.js
      uses: actions/setup-node@v2
      with:
        node-version: '16'

    - name: Install dependencies
      run: npm ci

    - name: Run tests
      run: npm test

    - name: Build
      run: npm run build

    - name: Run Lighthouse CI
      run: |
        npm install -g @lhci/cli
        lhci autorun

    - name: Deploy to production
      run: npm run deploy
      env:
DEPLOY_TOKEN: ${{ secrets.DEPLOY_TOKEN }}배포 후에도 계속 모니터링하는 게 중요해!
// Google Analytics로 PWA 이벤트 추적
// 설치 이벤트
window.addEventListener('appinstalled', () => {
  gtag('event', 'pwa_installed', {
    event_category: 'PWA',
    event_label: 'App Installed'
  });
});

// 오프라인 사용
window.addEventListener('offline', () => {
  gtag('event', 'went_offline', {
    event_category: 'PWA',
    event_label: 'User Offline'
  });
});

// Service Worker 업데이트
navigator.serviceWorker.addEventListener('controllerchange', () => {
  gtag('event', 'sw_updated', {
    event_category: 'PWA',
    event_label: 'Service Worker Updated'
  });
});
🎓 학습 리소스와 도구들
PWA 개발을 더 깊이 공부하고 싶다면 이런 리소스들을 활용해봐! 📚
📖 공식 문서
• MDN Web Docs: Service Worker API 상세 문서
• web.dev: Google의 PWA 가이드
• PWA Builder: Microsoft의 PWA 도구
🛠️ 유용한 도구들
• Workbox: Google의 Service Worker 라이브러리
• PWA Asset Generator: 아이콘 자동 생성
• Lighthouse: PWA 품질 측정
• Chrome DevTools: 디버깅 필수 도구
Workbox를 사용하면 Service Worker 코드를 훨씬 간단하게 작성할 수 있어!
// Workbox 사용
import { precacheAndRoute } from 'workbox-precaching';
import { registerRoute } from 'workbox-routing';
import { CacheFirst, NetworkFirst, StaleWhileRevalidate } from 'workbox-strategies';
import { ExpirationPlugin } from 'workbox-expiration';

// 빌드 시 생성된 파일들 프리캐싱
precacheAndRoute(self.__WB_MANIFEST);

// 이미지는 Cache First
registerRoute(
  ({ request }) => request.destination === 'image',
  new CacheFirst({
    cacheName: 'images',
    plugins: [
      new ExpirationPlugin({
        maxEntries: 60,
        maxAgeSeconds: 30 * 24 * 60 * 60, // 30일
      }),
    ],
  })
);

// API는 Network First
registerRoute(
  ({ url }) => url.pathname.startsWith('/api/'),
  new NetworkFirst({
    cacheName: 'api-cache',
    plugins: [
      new ExpirationPlugin({
        maxEntries: 50,
        maxAgeSeconds: 5 * 60, // 5분
      }),
    ],
  })
);

// CSS/JS는 Stale While Revalidate
registerRoute(
  ({ request }) =>
    request.destination === 'style' ||
    request.destination === 'script',
  new StaleWhileRevalidate({
    cacheName: 'static-resources',
  })
);
Workbox를 쓰면 복잡한 캐싱 로직을 간단하게 구현할 수 있어! 정말 편리하지? 😊
🌈 마무리하며
와! 여기까지 읽었다면 정말 대단해! 🎉 Service Worker와 PWA에 대해 꽤 많은 걸 배웠을 거야. 처음엔 복잡해 보이지만, 하나씩 차근차근 구현하다 보면 금방 익숙해질 거야.
PWA는 단순히 기술이 아니라 사용자 경험을 혁신적으로 개선하는 방법이야. 네트워크가 불안정한 환경에서도, 오프라인 상태에서도 사용자들이 서비스를 이용할 수 있다는 건 정말 큰 가치가 있지! 🌟
재능넷 같은 플랫폼에서도 PWA 기술을 활용하면 사용자들이 언제 어디서나 재능을 공유하고 거래할 수 있게 만들 수 있어. 지하철에서도, 비행기에서도, 산 속에서도 말이야! 📱
💡 마지막 조언
• 작게 시작해서 점진적으로 개선해나가
• 사용자 피드백을 적극 반영해
• 성능 모니터링을 게을리하지 마
• 최신 브라우저 API 동향을 계속 체크해
• 커뮤니티에 참여하고 경험을 공유해
자, 이제 직접 PWA를 만들어볼 차례야! 처음엔 작은 프로젝트로 시작해서 점점 기능을 추가해나가면 돼. 실패를 두려워하지 말고, 계속 시도하다 보면 어느새 멋진 PWA를 만들고 있는 자신을 발견하게 될 거야! 💪
Service Worker는 웹의 미래야. 지금 배운 지식으로 더 나은 웹 경험을 만들어보자! 화이팅! 🚀✨
관련 키워드

댓글 작성
이 글에 대한 여러분의 생각을 들려주세요
로그인이 필요합니다
댓글을 작성하려면 먼저 로그인해주세요.
댓글 0
지식인의 숲 - 지적 재산권 보호 고지
지적 재산권 보호 고지
- 저작권 및 소유권: 본 컨텐츠는 재능넷의 독점 AI 기술로 생성되었으며, 대한민국 저작권법 및 국제 저작권 협약에 의해 보호됩니다.
- AI 생성 컨텐츠의 법적 지위: 본 AI 생성 컨텐츠는 재능넷의 지적 창작물로 인정되며, 관련 법규에 따라 저작권 보호를 받습니다.
- 사용 제한: 재능넷의 명시적 서면 동의 없이 본 컨텐츠를 복제, 수정, 배포, 또는 상업적으로 활용하는 행위는 엄격히 금지됩니다.
- 데이터 수집 금지: 본 컨텐츠에 대한 무단 스크래핑, 크롤링, 및 자동화된 데이터 수집은 법적 제재의 대상이 됩니다.
- AI 학습 제한: 재능넷의 AI 생성 컨텐츠를 타 AI 모델 학습에 무단 사용하는 행위는 금지되며, 이는 지적 재산권 침해로 간주됩니다.





아직 댓글이 없습니다.