
Ver3.0 iOS 푸시 알림과 User Notifications Framework APNs 연동
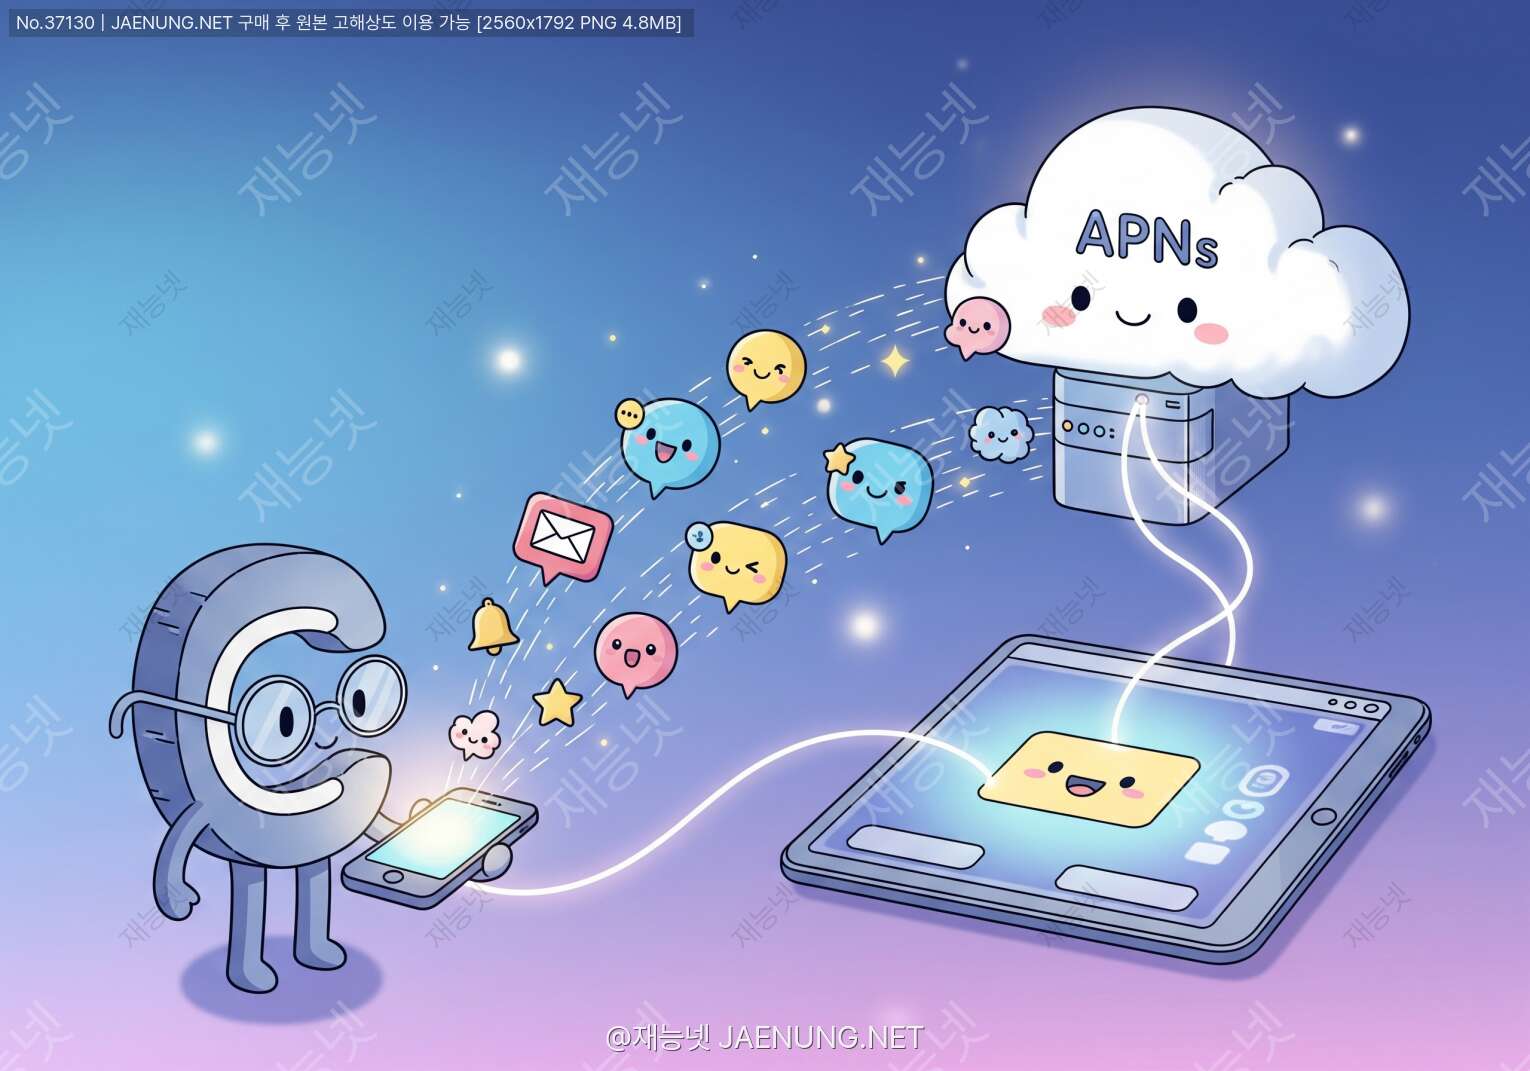
iOS 푸시 알림과 User Notifications Framework APNs 연동
🎯 푸시 알림, 왜 이렇게 중요할까?
야, 솔직히 말해서 요즘 앱 하나 깔면 푸시 알림 허용하라고 물어보잖아? 📲 그거 그냥 귀찮아서 막 허용하거나 거부하는데, 사실 개발자 입장에서는 이게 엄청 중요한 기능이야. 왜냐고? 사용자가 앱을 안 켜고 있어도 소통할 수 있는 거의 유일한 방법이거든!
생각해봐. 배달 앱에서 "음식이 도착했습니다!" 알림 안 오면? 문 앞에 음식 놔두고 가는데 모르고 있다가 식은 음식 먹게 되는 거지. 🍕 메신저 앱에서 친구가 보낸 메시지 알림 안 오면? 친구는 답장 안 온다고 삐지고... 이런 식으로 푸시 알림은 현대 앱의 핵심 기능 중 하나야.
• 사용자 재참여: 잠자는 사용자를 다시 앱으로 불러들임 🔄
• 개인화된 경험: 사용자별 맞춤 메시지 전송 가능 🎁
• 비즈니스 성과: 마케팅, 프로모션, 중요 공지 전달 📈
특히 iOS 개발을 하다 보면, 애플의 APNs(Apple Push Notification service)라는 시스템을 반드시 거쳐야 해. 이게 좀 까다롭긴 한데, 한번 제대로 이해하고 나면 "아, 이래서 이렇게 만들었구나!" 하고 무릎을 탁 치게 될 거야. 💡
🏗️ APNs 아키텍처: 전체 그림 이해하기
자, 이제 본격적으로 들어가보자. APNs가 뭔지부터 알아야 하는데, 간단히 말하면 애플이 운영하는 푸시 알림 중계 서버야. 너의 서버에서 직접 사용자 아이폰으로 알림을 보낼 수 없어. 반드시 애플 서버를 거쳐야 하는 거지.
왜 이렇게 만들었을까? 🤔 여러 이유가 있는데:
2. 배터리 효율: 각 앱마다 서버 연결 유지하면 배터리 금방 닳잖아? 애플 서버 하나만 연결하면 됨
3. 통합 관리: 모든 알림을 애플이 중앙에서 관리하니까 시스템 레벨에서 최적화 가능
4. 신뢰성: 애플의 글로벌 인프라를 활용하니까 안정적이고 빠름 🚀
📡 푸시 알림 전송 플로우
전체 과정을 단계별로 보면 이렇게 돼:
Step 2: APNs가 고유한 Device Token 발급 (이게 핵심!)
Step 3: 앱이 이 Device Token을 너의 서버로 전송
Step 4: 서버가 이 토큰을 DB에 저장
Step 5: 알림 보낼 때가 되면, 서버가 APNs로 요청 (토큰 포함)
Step 6: APNs가 해당 디바이스를 찾아서 알림 전달
Step 7: 사용자 디바이스에 알림 표시! 🎉
🔐 인증 방식: Certificate vs Token
APNs에 접근하려면 "나 진짜 이 앱 개발자 맞아!"라고 증명해야 해. 두 가지 방식이 있어:
| 구분 | Certificate 방식 | Token 방식 (권장) |
|---|---|---|
| 유효기간 | 1년 (매년 갱신 필요) | 무제한 |
| 설정 복잡도 | 복잡함 (CSR 생성, 인증서 다운로드 등) | 상대적으로 간단 |
| 앱별 관리 | 앱마다 별도 인증서 필요 | 하나의 키로 모든 앱 관리 가능 |
| 보안 | 인증서 파일 관리 필요 | JWT 토큰 방식으로 더 안전 |
| 애플 권장 | 레거시 | ✅ 최신 권장 방식 |
요즘은 Token 기반 인증을 쓰는 게 대세야. 한번 설정해두면 계속 쓸 수 있고, 여러 앱을 관리할 때도 훨씬 편하거든. 🎯
🛠️ User Notifications Framework 완벽 정복
자, 이제 코드 레벨로 들어가보자! iOS 10부터 애플이 User Notifications Framework를 도입했어. 이전에는 UILocalNotification 같은 걸 썼는데, 이제는 완전히 새로운 프레임워크로 통합됐지.
📦 Framework 구조 이해하기
User Notifications Framework는 크게 세 가지 핵심 컴포넌트로 구성돼:
2. UNNotificationRequest 📝
실제 알림 요청 객체. 알림 내용(content)과 트리거(trigger)를 담고 있어.
3. UNUserNotificationCenterDelegate 👂
알림 관련 이벤트를 받는 델리게이트. 알림이 도착했을 때, 사용자가 알림을 탭했을 때 등의 이벤트 처리.
🚀 기본 설정: 권한 요청부터 시작
가장 먼저 해야 할 일은 사용자에게 알림 권한을 요청하는 거야. 이거 없으면 아무것도 할 수 없어!
import UserNotifications

class AppDelegate: UIResponder, UIApplicationDelegate {

    func application(_ application: UIApplication,
                     didFinishLaunchingWithOptions launchOptions: [UIApplication.LaunchOptionsKey: Any]?) -> Bool {

        // 1. Notification Center 가져오기
        let center = UNUserNotificationCenter.current()

        // 2. 델리게이트 설정
        center.delegate = self

        // 3. 권한 요청 (alert, badge, sound)
        center.requestAuthorization(options: [.alert, .badge, .sound]) { granted, error in
            if granted {
                print("알림 권한 허용됨! 🎉")
            } else {
                print("알림 권한 거부됨 😢")
            }

            if let error = error {
                print("에러 발생: \(error.localizedDescription)")
            }
        }

        // 4. 원격 알림 등록
        application.registerForRemoteNotifications()

        return true
    }
}• .badge: 앱 아이콘에 빨간 숫자 뱃지 표시
• .sound: 알림 소리 재생
• .carPlay: CarPlay에서 알림 표시 (필요시)
• .criticalAlert: 방해금지 모드에서도 알림 (특별 권한 필요)
📱 Device Token 받기
권한을 받았으면 이제 Device Token을 받아야 해. 이게 진짜 중요한 부분이야!
extension AppDelegate {

    // Device Token 받기 성공
    func application(_ application: UIApplication,
                     didRegisterForRemoteNotificationsWithDeviceToken deviceToken: Data) {

        // Data를 String으로 변환
        let tokenParts = deviceToken.map { data in String(format: "%02.2hhx", data) }
        let token = tokenParts.joined()

        print("Device Token: \(token)")

        // 이 토큰을 서버로 전송해야 함!
        sendTokenToServer(token)
    }

    // Device Token 받기 실패
    func application(_ application: UIApplication,
                     didFailToRegisterForRemoteNotificationsWithError error: Error) {
        print("Device Token 받기 실패: \(error.localizedDescription)")

        // 시뮬레이터에서는 항상 실패함 (실제 기기에서만 작동)
    }

    func sendTokenToServer(_ token: String) {
        // 여기서 너의 서버 API를 호출해서 토큰 저장
        // 예: POST /api/device-tokens
        let url = URL(string: "https://yourserver.com/api/device-tokens")!
        var request = URLRequest(url: url)
        request.httpMethod = "POST"
        request.setValue("application/json", forHTTPHeaderField: "Content-Type")

        let body: [String: Any] = [
            "device_token": token,
            "platform": "ios",
            "user_id": getCurrentUserId() // 현재 로그인한 사용자 ID
        ]

        request.httpBody = try? JSONSerialization.data(withJSONObject: body)

        URLSession.shared.dataTask(with: request) { data, response, error in
            if let error = error {
                print("토큰 전송 실패: \(error)")
                return
            }
            print("토큰 서버 전송 완료! ✅")
        }.resume()
    }

    func getCurrentUserId() -> String {
        // 실제로는 UserDefaults나 Keychain에서 가져와야 함
        return "user123"
    }
}👂 알림 수신 처리하기
이제 알림이 도착했을 때 어떻게 처리할지 정의해야 해. UNUserNotificationCenterDelegate를 구현하면 돼:
extension AppDelegate: UNUserNotificationCenterDelegate {

    // 앱이 포그라운드에 있을 때 알림 도착
    func userNotificationCenter(_ center: UNUserNotificationCenter,
                                willPresent notification: UNNotification,
                                withCompletionHandler completionHandler: @escaping (UNNotificationPresentationOptions) -> Void) {

        let userInfo = notification.request.content.userInfo
        print("포그라운드 알림 수신: \(userInfo)")

        // 앱이 실행 중일 때도 알림을 표시할지 결정
        // iOS 14 이상
        if #available(iOS 14.0, *) {
            completionHandler([.banner, .sound, .badge])
        } else {
            completionHandler([.alert, .sound, .badge])
        }
    }

    // 사용자가 알림을 탭했을 때
    func userNotificationCenter(_ center: UNUserNotificationCenter,
                                didReceive response: UNNotificationResponse,
                                withCompletionHandler completionHandler: @escaping () -> Void) {

        let userInfo = response.notification.request.content.userInfo
        print("알림 탭됨: \(userInfo)")

        // 알림 데이터에 따라 적절한 화면으로 이동
        if let screenName = userInfo["screen"] as? String {
            navigateToScreen(screenName)
        }

        // 액션 버튼 처리
        switch response.actionIdentifier {
        case "ACCEPT_ACTION":
            print("수락 버튼 탭됨")
            handleAcceptAction(userInfo)
        case "DECLINE_ACTION":
            print("거절 버튼 탭됨")
            handleDeclineAction(userInfo)
        case UNNotificationDefaultActionIdentifier:
            print("알림 자체를 탭함")
        case UNNotificationDismissActionIdentifier:
            print("알림을 스와이프로 닫음")
        default:
            break
        }

        completionHandler()
    }

    func navigateToScreen(_ screenName: String) {
        // 화면 이동 로직
        DispatchQueue.main.async {
            // 예: 채팅 화면으로 이동
            if screenName == "chat" {
                // NavigationController를 통해 화면 이동
            }
        }
    }

    func handleAcceptAction(_ userInfo: [AnyHashable: Any]) {
        // 수락 액션 처리
    }

    func handleDeclineAction(_ userInfo: [AnyHashable: Any]) {
        // 거절 액션 처리
    }
}
여기서 중요한 건 포그라운드와 백그라운드 상태를 구분하는 거야. 앱이 실행 중일 때(포그라운드)는 willPresent가 호출되고, 사용자가 알림을 탭했을 때는 didReceive가 호출돼. 🎯
🎨 알림 커스터마이징: 더 풍부한 경험 만들기
기본 알림도 좋지만, 좀 더 멋진 알림을 만들고 싶지 않아? ✨ User Notifications Framework는 다양한 커스터마이징 옵션을 제공해.
🖼️ Rich Notifications: 이미지, 비디오, 오디오
iOS 10부터는 알림에 이미지, 비디오, 오디오를 첨부할 수 있어. 이걸 Rich Notifications라고 해.
// 서버에서 보내는 푸시 페이로드 예시 (JSON)
{
    "aps": {
        "alert": {
            "title": "새로운 사진이 도착했어요!",
            "body": "친구가 사진을 공유했습니다"
        },
        "sound": "default",
        "mutable-content": 1  // 중요! 이게 있어야 Notification Service Extension 작동
    },
    "attachment-url": "https://example.com/images/photo.jpg",
    "category": "PHOTO_CATEGORY"
}
하지만 이미지를 표시하려면 Notification Service Extension을 만들어야 해. 왜냐하면 알림이 표시되기 전에 이미지를 다운로드해야 하거든.
🔧 Notification Service Extension 만들기
// 1. Xcode에서 File > New > Target > Notification Service Extension 추가

// 2. NotificationService.swift 파일이 생성됨

import UserNotifications

class NotificationService: UNNotificationServiceExtension {

    var contentHandler: ((UNNotificationContent) -> Void)?
    var bestAttemptContent: UNMutableNotificationContent?

    override func didReceive(_ request: UNNotificationRequest,
                             withContentHandler contentHandler: @escaping (UNNotificationContent) -> Void) {
        self.contentHandler = contentHandler
        bestAttemptContent = (request.content.mutableCopy() as? UNMutableNotificationContent)

        guard let bestAttemptContent = bestAttemptContent else {
            return
        }

        // 이미지 URL 가져오기
        if let urlString = request.content.userInfo["attachment-url"] as? String,
           let url = URL(string: urlString) {

            // 이미지 다운로드
            downloadImage(from: url) { localURL in
                if let localURL = localURL {
                    // 첨부파일 추가
                    if let attachment = try? UNNotificationAttachment(identifier: "image",
                                                                       url: localURL,
                                                                       options: nil) {
                        bestAttemptContent.attachments = [attachment]
                    }
                }

                // 알림 표시
                contentHandler(bestAttemptContent)
            }
        } else {
            contentHandler(bestAttemptContent)
        }
    }

    override func serviceExtensionTimeWillExpire() {
        // 시간 초과 시 (30초 제한)
        if let contentHandler = contentHandler,
           let bestAttemptContent = bestAttemptContent {
            contentHandler(bestAttemptContent)
        }
    }

    func downloadImage(from url: URL, completion: @escaping (URL?) -> Void) {
        let task = URLSession.shared.downloadTask(with: url) { localURL, response, error in
            guard let localURL = localURL, error == nil else {
                completion(nil)
                return
            }

            // 임시 파일로 복사 (Extension은 30초 후 종료되므로)
            let tempDirectory = FileManager.default.temporaryDirectory
            let tempFile = tempDirectory.appendingPathComponent(url.lastPathComponent)

            try? FileManager.default.removeItem(at: tempFile)
            try? FileManager.default.copyItem(at: localURL, to: tempFile)

            completion(tempFile)
        }
        task.resume()
    }
}serviceExtensionTimeWillExpire()가 호출되고, 원본 알림이 표시돼.
🎬 Actionable Notifications: 버튼 추가하기
알림에 버튼을 추가해서 사용자가 앱을 열지 않고도 액션을 취할 수 있게 만들 수 있어. 예를 들어 "수락/거절", "좋아요/나중에" 같은 버튼들 말이야. 👍
// AppDelegate에서 카테고리와 액션 등록

func registerNotificationCategories() {
    // 액션 정의
    let acceptAction = UNNotificationAction(
        identifier: "ACCEPT_ACTION",
        title: "수락",
        options: [.foreground]  // 앱을 포그라운드로 가져옴
    )

    let declineAction = UNNotificationAction(
        identifier: "DECLINE_ACTION",
        title: "거절",
        options: [.destructive]  // 빨간색으로 표시
    )

    let replyAction = UNTextInputNotificationAction(
        identifier: "REPLY_ACTION",
        title: "답장",
        options: [],
        textInputButtonTitle: "전송",
        textInputPlaceholder: "메시지를 입력하세요..."
    )

    // 카테고리 생성
    let inviteCategory = UNNotificationCategory(
        identifier: "INVITE_CATEGORY",
        actions: [acceptAction, declineAction],
        intentIdentifiers: [],
        options: []
    )

    let messageCategory = UNNotificationCategory(
        identifier: "MESSAGE_CATEGORY",
        actions: [replyAction],
        intentIdentifiers: [],
        options: []
    )

    // 등록
    let center = UNUserNotificationCenter.current()
    center.setNotificationCategories([inviteCategory, messageCategory])
}

// didFinishLaunchingWithOptions에서 호출
func application(_ application: UIApplication,
                 didFinishLaunchingWithOptions launchOptions: [UIApplication.LaunchOptionsKey: Any]?) -> Bool {
    // ... 기존 코드 ...
    registerNotificationCategories()
    return true
}
서버에서 푸시를 보낼 때는 category 필드를 포함시켜야 해:
{
    "aps": {
        "alert": {
            "title": "친구 요청",
            "body": "철수님이 친구 요청을 보냈습니다"
        },
        "category": "INVITE_CATEGORY",  // 여기!
        "sound": "default"
    },
    "user_id": "user456"
}
📝 텍스트 입력 액션 처리
사용자가 알림에서 직접 텍스트를 입력할 수 있는 기능도 있어. 메신저 앱에서 많이 보이는 기능이지?
extension AppDelegate: UNUserNotificationCenterDelegate {

    func userNotificationCenter(_ center: UNUserNotificationCenter,
                                didReceive response: UNNotificationResponse,
                                withCompletionHandler completionHandler: @escaping () -> Void) {

        // 텍스트 입력 액션 처리
        if let textResponse = response as? UNTextInputNotificationResponse {
            let userText = textResponse.userText
            print("사용자가 입력한 텍스트: \(userText)")

            // 서버로 메시지 전송
            sendMessageToServer(userText, userInfo: response.notification.request.content.userInfo)
        }

        completionHandler()
    }

    func sendMessageToServer(_ message: String, userInfo: [AnyHashable: Any]) {
        // API 호출해서 메시지 전송
        guard let recipientId = userInfo["user_id"] as? String else { return }

        let url = URL(string: "https://yourserver.com/api/messages")!
        var request = URLRequest(url: url)
        request.httpMethod = "POST"
        request.setValue("application/json", forHTTPHeaderField: "Content-Type")

        let body: [String: Any] = [
            "recipient_id": recipientId,
            "message": message,
            "sent_from_notification": true
        ]

        request.httpBody = try? JSONSerialization.data(withJSONObject: body)

        URLSession.shared.dataTask(with: request) { data, response, error in
            if error == nil {
                print("메시지 전송 완료! 📤")
            }
        }.resume()
    }
}
이렇게 하면 사용자가 앱을 열지 않고도 알림에서 바로 답장을 보낼 수 있어. 사용자 경험이 엄청 좋아지지! 🚀
🔐 APNs 인증 설정: 실전 가이드
자, 이제 가장 중요한 부분이야. 서버에서 APNs로 푸시를 보내려면 인증이 필요해. 앞에서 말했듯이 Token 기반 인증을 사용하는 게 좋아.
🎫 APNs Auth Key 생성하기
Apple Developer 계정에서 Auth Key를 만들어야 해. 단계별로 보자:
Step 2: Certificates, Identifiers & Profiles 메뉴로 이동
Step 3: Keys 섹션에서 + 버튼 클릭
Step 4: Key Name 입력하고 "Apple Push Notifications service (APNs)" 체크
Step 5: Continue → Register → Download
Step 6: .p8 파일 다운로드 (이 파일은 한 번만 다운로드 가능하니 잘 보관!)
Step 7: Key ID와 Team ID 메모해두기
🖥️ 서버에서 APNs로 푸시 보내기
이제 서버 코드를 봐보자. 여기서는 Node.js 예제를 보여줄게. (다른 언어도 비슷한 라이브러리들이 있어)
// Node.js + apn 라이브러리 사용 예제

const apn = require('apn');

// APNs Provider 설정
const options = {
    token: {
        key: './AuthKey_XXXXXXXXXX.p8',  // .p8 파일 경로
        keyId: 'XXXXXXXXXX',              // Key ID
        teamId: 'YYYYYYYYYY'              // Team ID
    },
    production: false  // 개발: false, 프로덕션: true
};

const apnProvider = new apn.Provider(options);

// 푸시 알림 보내기 함수
async function sendPushNotification(deviceToken, title, body, data = {}) {
    const notification = new apn.Notification();

    // 알림 내용 설정
    notification.alert = {
        title: title,
        body: body
    };

    notification.sound = 'default';
    notification.badge = 1;
    notification.topic = 'com.yourcompany.yourapp';  // Bundle ID

    // 커스텀 데이터 추가
    notification.payload = data;

    // Rich Notification을 위한 설정
    if (data.imageUrl) {
        notification.mutableContent = 1;
        notification.payload['attachment-url'] = data.imageUrl;
    }

    // 카테고리 설정 (액션 버튼)
    if (data.category) {
        notification.category = data.category;
    }

    try {
        const result = await apnProvider.send(notification, deviceToken);
        console.log('푸시 전송 결과:', result);

        if (result.failed.length > 0) {
            console.error('전송 실패:', result.failed);
            // 실패한 토큰은 DB에서 삭제하거나 비활성화 처리
        }

        return result;
    } catch (error) {
        console.error('푸시 전송 에러:', error);
        throw error;
    }
}

// 사용 예시
const deviceToken = '사용자의_디바이스_토큰';

sendPushNotification(
    deviceToken,
    '새 메시지 도착!',
    '친구가 메시지를 보냈습니다',
    {
        screen: 'chat',
        chatId: '12345',
        category: 'MESSAGE_CATEGORY'
    }
);
🐍 Python으로 푸시 보내기
Python을 쓴다면 이렇게 할 수 있어:
# Python + PyAPNs2 라이브러리

from apns2.client import APNsClient
from apns2.payload import Payload
from apns2.credentials import TokenCredentials

# 인증 정보 설정
token_credentials = TokenCredentials(
    auth_key_path='./AuthKey_XXXXXXXXXX.p8',
    auth_key_id='XXXXXXXXXX',
    team_id='YYYYYYYYYY'
)

# APNs 클라이언트 생성
client = APNsClient(
    credentials=token_credentials,
    use_sandbox=True  # 개발: True, 프로덕션: False
)

# 푸시 알림 보내기
def send_push(device_token, title, body, custom_data=None):
    payload = Payload(
        alert={
            'title': title,
            'body': body
        },
        sound='default',
        badge=1,
        custom=custom_data or {}
    )

    topic = 'com.yourcompany.yourapp'  # Bundle ID

    try:
        client.send_notification(device_token, payload, topic)
        print(f'푸시 전송 성공: {device_token}')
    except Exception as e:
        print(f'푸시 전송 실패: {e}')

# 사용 예시
send_push(
    '사용자의_디바이스_토큰',
    '새 메시지',
    '안녕하세요!',
    {
        'screen': 'chat',
        'chat_id': '12345'
    }
)
어때? 생각보다 간단하지? 😊 라이브러리가 대부분의 복잡한 처리를 해주니까 우리는 내용만 잘 구성하면 돼.
🎯 실전 시나리오: 완전한 푸시 시스템 구축
이제 실제로 어떻게 활용하는지 몇 가지 시나리오를 봐보자. 💼
📨 시나리오 1: 채팅 앱 메시지 알림
가장 흔한 케이스지. 누군가 메시지를 보내면 실시간으로 알림을 받아야 해.
// iOS 앱 - 메시지 수신 처리

extension AppDelegate: UNUserNotificationCenterDelegate {

    func userNotificationCenter(_ center: UNUserNotificationCenter,
                                didReceive response: UNNotificationResponse,
                                withCompletionHandler completionHandler: @escaping () -> Void) {

        let userInfo = response.notification.request.content.userInfo

        // 채팅방으로 이동
        if let chatId = userInfo["chat_id"] as? String {
            DispatchQueue.main.async {
                self.navigateToChatRoom(chatId)
            }
        }

        // 텍스트 입력 액션 (빠른 답장)
        if let textResponse = response as? UNTextInputNotificationResponse {
            let replyText = textResponse.userText

            // 백그라운드에서 메시지 전송
            sendQuickReply(replyText, chatId: userInfo["chat_id"] as? String)
        }

        completionHandler()
    }

    func navigateToChatRoom(_ chatId: String) {
        // 채팅 화면으로 네비게이션
        if let windowScene = UIApplication.shared.connectedScenes.first as? UIWindowScene,
           let window = windowScene.windows.first,
           let rootVC = window.rootViewController {

            // 채팅 뷰컨트롤러 생성 및 표시
            let chatVC = ChatViewController(chatId: chatId)

            if let navController = rootVC as? UINavigationController {
                navController.pushViewController(chatVC, animated: true)
            }
        }
    }

    func sendQuickReply(_ message: String, chatId: String?) {
        guard let chatId = chatId else { return }

        // API 호출
        let url = URL(string: "https://api.yourapp.com/messages")!
        var request = URLRequest(url: url)
        request.httpMethod = "POST"
        request.setValue("application/json", forHTTPHeaderField: "Content-Type")

        let body: [String: Any] = [
            "chat_id": chatId,
            "message": message,
            "timestamp": Date().timeIntervalSince1970
        ]

        request.httpBody = try? JSONSerialization.data(withJSONObject: body)

        URLSession.shared.dataTask(with: request).resume()
    }
}
🛒 시나리오 2: 배달 앱 주문 상태 알림
배달 앱에서는 주문 상태가 바뀔 때마다 알림을 보내야 해. "주문 접수됨 → 조리 중 → 배달 시작 → 배달 완료" 이런 식으로.
// 서버 코드 - 주문 상태 변경 시 푸시 전송
async function updateOrderStatus(orderId, newStatus, userId) {
// DB에서 주문 상태 업데이트
await db.orders.update(orderId, { status: newStatus });
// 사용자의 디바이스 토큰 가져오기
const user = await db.users.findById(userId);
const deviceTokens = user.deviceTokens || [];
// 상태별 메시지 정의
const statusMessages = {
'accepted': {
title: '주문이 접수되었습니다! 🎉',
body: '맛있는 음식을 준비하고 있어요'
},
'cooking': {
title: '조리가 시작되었습니다 👨🍳',
body: '곧 맛있는 음식이 완성됩니다'
},
'delivering': {
title: '배달이 시작되었습니다! 🛵',
body: '라이더님이 음식을 가지고 출발했어요'
},
'delivered': {
title: '배달이 완료되었습니다! 🎊',
body: '맛있게 드세요!'
}
};
const message = statusMessages[newStatus];
// 모든 디바이스에 푸시 전송
for (const token of deviceTokens) {
await sendPushNotification(
token,
message.title,
message.body,
{
order_id: orderId,
status: newStatus,
screen: 'order_detail',
sound: 'notification.wav'
}
);
}
}🎮 시나리오 3: 게임 앱 이벤트 알림
게임 앱에서는 이벤트, 보상, 친구 초대 등 다양한 알림이 필요해. 이미지가 포함된 Rich Notification을 활용하면 좋아.
// 서버 - 이벤트 알림 전송

async function sendEventNotification(userIds, eventData) {
    const notification = {
        title: eventData.title,
        body: eventData.description,
        imageUrl: eventData.bannerImage,  // 이벤트 배너 이미지
        data: {
            event_id: eventData.id,
            screen: 'event_detail',
            category: 'EVENT_CATEGORY',
            'attachment-url': eventData.bannerImage,
            'mutable-content': 1
        }
    };

    // 대량 전송
    for (const userId of userIds) {
        const user = await db.users.findById(userId);

        // 사용자 설정 확인 (알림 수신 동의 여부)
        if (!user.notificationSettings.events) {
            continue;  // 이벤트 알림 거부한 사용자는 스킵
        }

        for (const token of user.deviceTokens) {
            await sendPushNotification(
                token,
                notification.title,
                notification.body,
                notification.data
            );
        }
    }
}
이런 식으로 다양한 시나리오에 맞춰서 푸시 알림을 활용할 수 있어. 중요한 건 사용자 경험을 최우선으로 생각하는 거야. 너무 많은 알림은 오히려 역효과를 낼 수 있으니까! ⚖️
🐛 트러블슈팅: 자주 만나는 문제들
푸시 알림 개발하다 보면 여러 가지 문제를 만나게 돼. 내가 겪었던 대표적인 문제들과 해결 방법을 공유할게. 🔧
❌ 문제 1: Device Token을 받지 못함
didRegisterForRemoteNotificationsWithDeviceToken이 호출되지 않고, didFailToRegisterForRemoteNotificationsWithError만 호출됨.원인과 해결:
• 시뮬레이터 사용: 시뮬레이터는 푸시를 지원하지 않음 → 실제 기기 사용
• Capabilities 미설정: Xcode에서 Push Notifications capability 추가 안 함 → Target > Signing & Capabilities에서 추가
• 프로비저닝 프로파일 문제: 개발자 계정 설정 오류 → Apple Developer에서 확인
• 네트워크 문제: 방화벽이나 VPN이 APNs 연결 차단 → 네트워크 설정 확인
❌ 문제 2: 푸시가 전송되지 않음
원인과 해결:
• 환경 불일치: 개발 환경 토큰으로 프로덕션 서버에 전송 → 환경 맞춰서 전송
• Bundle ID 오류: 서버에서 잘못된 Bundle ID 사용 → topic 확인
• 만료된 토큰: 사용자가 앱 삭제 후 재설치 → 토큰 갱신 로직 구현
• 인증 정보 오류: .p8 파일이나 Key ID가 잘못됨 → Apple Developer에서 재확인
• APNs 서버 주소 오류: 개발/프로덕션 서버 주소 혼동 → 올바른 주소 사용
// APNs 서버 주소
// 개발: api.sandbox.push.apple.com:443
// 프로덕션: api.push.apple.com:443

// 라이브러리 사용 시 자동으로 처리되지만, 직접 구현할 때는 주의!
❌ 문제 3: 포그라운드에서 알림이 표시되지 않음
해결:
willPresent 델리게이트 메서드에서 presentation options를 반환해야 함.
func userNotificationCenter(_ center: UNUserNotificationCenter,
                            willPresent notification: UNNotification,
                            withCompletionHandler completionHandler: @escaping (UNNotificationPresentationOptions) -> Void) {

    // iOS 14 이상
    if #available(iOS 14.0, *) {
        completionHandler([.banner, .sound, .badge])  // 이걸 꼭 호출해야 함!
    } else {
        completionHandler([.alert, .sound, .badge])
    }
}
❌ 문제 4: Rich Notification 이미지가 표시되지 않음
원인과 해결:
• mutable-content 누락: 페이로드에
"mutable-content": 1 추가• Notification Service Extension 미구현: Extension 타겟 추가 및 구현
• 이미지 다운로드 실패: URL이 잘못되었거나 30초 내에 다운로드 실패 → 작은 이미지 사용
• 지원하지 않는 포맷: JPEG, PNG, GIF만 지원 → 포맷 확인
• 파일 크기 초과: 10MB 제한 → 이미지 최적화
❌ 문제 5: 배지 숫자가 업데이트되지 않음
해결:
• 푸시 페이로드에
"badge" 필드 포함• 앱에서 읽은 알림은 배지 숫자 감소 처리
• 앱 실행 시 배지 초기화
// 앱 실행 시 배지 초기화
func applicationDidBecomeActive(_ application: UIApplication) {
    UIApplication.shared.applicationIconBadgeNumber = 0

    // 또는 서버와 동기화
    let unreadCount = getUnreadNotificationCount()
    UIApplication.shared.applicationIconBadgeNumber = unreadCount
}

// 서버에서 푸시 보낼 때
{
    "aps": {
        "alert": "새 메시지",
        "badge": 5,  // 현재 읽지 않은 알림 총 개수
        "sound": "default"
    }
}• APNs 응답 코드 확인 (400, 410 등)
• Device Token이 올바른지 검증
• 테스트용 푸시 전송 도구 사용 (Pusher, Knuff 등)
• 개발 환경과 프로덕션 환경 분리해서 테스트
⚡ 성능 최적화와 베스트 프랙티스
푸시 알림 시스템을 제대로 만들려면 성능과 사용자 경험을 모두 고려해야 해. 몇 가지 중요한 팁들을 공유할게. 🎯
📊 1. 토큰 관리 전략
• 사용자별 다중 디바이스 지원: 한 사용자가 여러 기기 사용 가능
• 만료된 토큰 정리: APNs에서 410 응답 받으면 DB에서 삭제
• 플랫폼 구분: iOS, Android 토큰 분리 저장
• 환경 구분: 개발/프로덕션 토큰 별도 관리
// 서버 DB 스키마 예시 (MongoDB)

{
    user_id: "user123",
    device_tokens: [
        {
            token: "abc123...",
            platform: "ios",
            environment: "production",
            created_at: ISODate("2024-01-15"),
            last_used: ISODate("2024-01-20"),
            device_info: {
                model: "iPhone 14 Pro",
                os_version: "17.2"
            }
        },
        {
            token: "def456...",
            platform: "ios",
            environment: "production",
            created_at: ISODate("2024-01-10"),
            last_used: ISODate("2024-01-20"),
            device_info: {
                model: "iPad Pro",
                os_version: "17.1"
            }
        }
    ],
    notification_settings: {
        enabled: true,
        messages: true,
        events: false,
        marketing: false
    }
}
🎨 2. 사용자 경험 최적화
• 중요도에 따라 알림 우선순위 설정
• 사용자가 알림 설정을 세밀하게 조절할 수 있게 제공
• Quiet Hours (방해금지 시간) 기능 구현
• 비슷한 알림은 그룹화해서 전송
// 알림 빈도 제한 로직 예시

class NotificationThrottler {
    private let maxNotificationsPerHour = 5;
    private let maxNotificationsPerDay = 20;

    async function canSendNotification(userId: string): Promise<boolean> {
        const now = Date.now();
        const oneHourAgo = now - (60 * 60 * 1000);
        const oneDayAgo = now - (24 * 60 * 60 * 1000);

        // 최근 1시간 내 알림 개수 확인
        const hourlyCount = await db.notifications.count({
            user_id: userId,
            sent_at: { $gte: oneHourAgo }
        });

        if (hourlyCount >= this.maxNotificationsPerHour) {
            console.log(`사용자 ${userId}: 시간당 알림 제한 초과`);
            return false;
        }

        // 최근 24시간 내 알림 개수 확인
        const dailyCount = await db.notifications.count({
            user_id: userId,
            sent_at: { $gte: oneDayAgo }
        });

        if (dailyCount >= this.maxNotificationsPerDay) {
            console.log(`사용자 ${userId}: 일일 알림 제한 초과`);
            return false;
        }

        return true;
    }
}
🔒 3. 보안 고려사항
- ✅ .p8 인증 키 파일을 안전하게 보관 (환경 변수나 비밀 관리 시스템 사용)
- ✅ Device Token을 암호화해서 저장
- ✅ 푸시 페이로드에 민감한 정보 포함하지 않기 (비밀번호, 카드번호 등)
- ✅ HTTPS를 통해서만 토큰 전송
- ✅ 서버 API에 인증/인가 구현
- ✅ Rate Limiting으로 악용 방지
- ✅ 로그에 민감한 정보 기록하지 않기
📈 4. 모니터링과 분석
푸시 알림 시스템의 성능을 추적하는 것도 중요해. 다음 지표들을 모니터링하자:
| 지표 | 설명 | 목표 |
|---|---|---|
| 전송 성공률 | APNs로 성공적으로 전송된 비율 | 95% 이상 |
| 도달률 | 실제로 디바이스에 도착한 비율 | 90% 이상 |
| 오픈율 | 사용자가 알림을 탭한 비율 | 10-30% |
| 전송 지연 시간 | 서버에서 보낸 후 도착까지 시간 | 5초 이내 |
| 옵트아웃율 | 알림을 끈 사용자 비율 | 낮을수록 좋음 |
// 알림 분석 데이터 수집 예시

async function trackNotificationMetrics(notificationId, userId, event) {
    await db.notification_analytics.insert({
        notification_id: notificationId,
        user_id: userId,
        event: event,  // 'sent', 'delivered', 'opened', 'dismissed'
        timestamp: new Date(),
        device_info: {
            platform: 'ios',
            os_version: '17.2'
        }
    });

    // 실시간 대시보드 업데이트
    await updateDashboard(event);
}

// 사용 예시
await trackNotificationMetrics('notif_123', 'user456', 'sent');
await trackNotificationMetrics('notif_123', 'user456', 'delivered');
await trackNotificationMetrics('notif_123', 'user456', 'opened');
🚀 5. 대량 전송 최적화
수천, 수만 명에게 동시에 푸시를 보내야 할 때는 효율적인 전송 전략이 필요해.
• 병렬 처리: 여러 워커를 사용해서 동시 전송
• 우선순위 큐: 중요한 알림 먼저 전송
• 재시도 로직: 실패한 알림 자동 재전송
• Connection Pooling: APNs 연결 재사용
// Node.js - 대량 전송 예시

const async = require('async');

async function sendBulkNotifications(notifications) {
    // 100개씩 배치로 나누기
    const batches = [];
    for (let i = 0; i < notifications.length; i += 100) {
        batches.push(notifications.slice(i, i + 100));
    }

    console.log(`총 ${batches.length}개 배치로 전송 시작`);

    // 병렬로 5개 배치씩 처리
    await async.eachLimit(batches, 5, async (batch) => {
        await Promise.all(batch.map(async (notif) => {
            try {
                await sendPushNotification(
                    notif.deviceToken,
                    notif.title,
                    notif.body,
                    notif.data
                );

                await trackNotificationMetrics(notif.id, notif.userId, 'sent');
            } catch (error) {
                console.error(`전송 실패: ${notif.id}`, error);

                // 재시도 큐에 추가
                await addToRetryQueue(notif);
            }
        }));
    });

    console.log('대량 전송 완료!');
}
🎓 실무에서 배운 교훈들
마지막으로, 내가 실제로 푸시 알림 시스템을 운영하면서 배운 것들을 공유할게. 이런 건 문서에는 안 나와있지만 정말 중요한 내용들이야. 💎
// Silent Notification 페이로드
{
    "aps": {
        "content-available": 1  // 이게 핵심!
    },
    "data": {
        "action": "sync_messages",
        "chat_id": "12345"
    }
}

// iOS 앱에서 처리
func application(_ application: UIApplication,
                 didReceiveRemoteNotification userInfo: [AnyHashable : Any],
                 fetchCompletionHandler completionHandler: @escaping (UIBackgroundFetchResult) -> Void) {

    if let action = userInfo["action"] as? String {
        switch action {
        case "sync_messages":
            syncMessages { success in
                completionHandler(success ? .newData : .failed)
            }
        default:
            completionHandler(.noData)
        }
    }
}// 로컬 알림 스케줄링 예시
func scheduleLocalNotification(title: String, body: String, after seconds: TimeInterval) {
let content = UNMutableNotificationContent()
content.title = title
content.body = body
content.sound = .default
let trigger = UNTimeIntervalNotificationTrigger(timeInterval: seconds, repeats: false)
let request = UNNotificationRequest(identifier: UUID().uuidString,
content: content,
trigger: trigger)
UNUserNotificationCenter.current().add(request) { error in
if let error = error {
print("로컬 알림 스케줄링 실패: \(error)")
}
}
}
// 사용 예시: 30분 후 알림
scheduleLocalNotification(
title: "휴식 시간이에요!",
body: "30분 동안 열심히 하셨네요. 잠시 쉬어가세요 😊",
after: 30 * 60
)🎬 마무리하며
와, 여기까지 읽었다면 정말 대단해! 👏 iOS 푸시 알림과 User Notifications Framework, APNs 연동에 대해 꽤 깊이 있게 다뤄봤어. 처음엔 복잡해 보이지만, 하나씩 차근차근 따라하다 보면 어느새 푸시 알림 전문가가 되어 있을 거야.
핵심을 정리하자면:
애플의 푸시 알림 서비스를 반드시 거쳐야 하며, Token 기반 인증이 최신 권장 방식
2. Device Token 관리가 생명
토큰을 안전하게 저장하고, 항상 최신 상태로 유지하며, 만료된 토큰은 정리
3. User Notifications Framework 활용
Rich Notifications, Actionable Notifications 등으로 풍부한 사용자 경험 제공
4. 사용자 경험 최우선
알림 빈도 조절, 개인화, 적절한 타이밍이 성공의 열쇠
5. 지속적인 모니터링과 개선
데이터를 추적하고 분석해서 계속 최적화해나가기
푸시 알림은 단순히 메시지를 보내는 기능이 아니야. 사용자와 소통하고, 앱의 가치를 전달하며, 비즈니스 목표를 달성하는 강력한 도구지. 하지만 잘못 사용하면 사용자를 떠나게 만들 수도 있어. 항상 사용자 입장에서 생각하고, 가치 있는 알림만 보내도록 노력하자. 💪
개발하다가 막히는 부분이 있으면 Apple 공식 문서를 참고하고, 커뮤니티에서 도움을 구하고, 필요하다면 재능넷 같은 플랫폼에서 전문가의 조언을 받는 것도 좋은 방법이야. 혼자 고민하지 말고 적극적으로 도움을 구하자!
자, 이제 너만의 멋진 푸시 알림 시스템을 만들어볼 시간이야! 화이팅! 🚀✨
관련 키워드

댓글 작성
이 글에 대한 여러분의 생각을 들려주세요
로그인이 필요합니다
댓글을 작성하려면 먼저 로그인해주세요.
댓글 0
지식인의 숲 - 지적 재산권 보호 고지
지적 재산권 보호 고지
- 저작권 및 소유권: 본 컨텐츠는 재능넷의 독점 AI 기술로 생성되었으며, 대한민국 저작권법 및 국제 저작권 협약에 의해 보호됩니다.
- AI 생성 컨텐츠의 법적 지위: 본 AI 생성 컨텐츠는 재능넷의 지적 창작물로 인정되며, 관련 법규에 따라 저작권 보호를 받습니다.
- 사용 제한: 재능넷의 명시적 서면 동의 없이 본 컨텐츠를 복제, 수정, 배포, 또는 상업적으로 활용하는 행위는 엄격히 금지됩니다.
- 데이터 수집 금지: 본 컨텐츠에 대한 무단 스크래핑, 크롤링, 및 자동화된 데이터 수집은 법적 제재의 대상이 됩니다.
- AI 학습 제한: 재능넷의 AI 생성 컨텐츠를 타 AI 모델 학습에 무단 사용하는 행위는 금지되며, 이는 지적 재산권 침해로 간주됩니다.
아직 댓글이 없습니다.